GeoODK Collect
GeoODK Collect is an Android device tool for data collection and mapping applications derived from ODK Collect. It provides a way to collect and store georeferenced information along with a suite of tools to visualize, analyze and manipulate ground data for specific needs.
Special GeoODK features include, but are not limited to:
- Offline Mapping
- Ability to collect point, polygon, and GPS tracking data and then associate this spatial information with all the collected form information (visualization of collected data)
- Ability to add your own map imagery
It collects and stores georeferenced data on a mobile device or tablet and sends it to an aggregate server such as Ona. It provides solutions for data collection, online or offline, with mapping functionality for data collection-driven projects.
GeoODK Collect can import pre-designed surveys, collect data, and submit finalized forms to Ona.
Installing GeoODK Collect
To install GeoODK Collect:
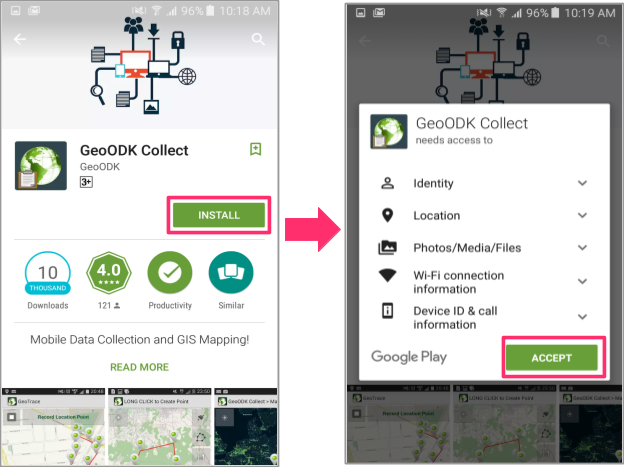
- Visit the Google Play Store on your Android device and search for GeoODK Collect.
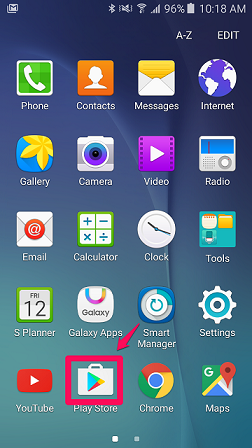
- Select GeoODK Collect, tap Install, and Accept to start the download.
Appearance
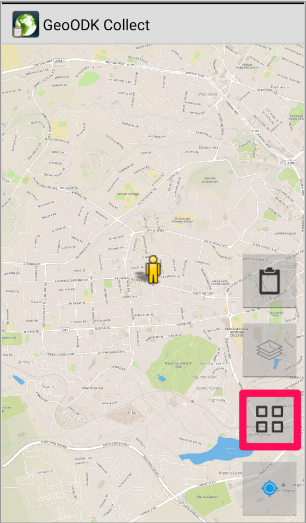
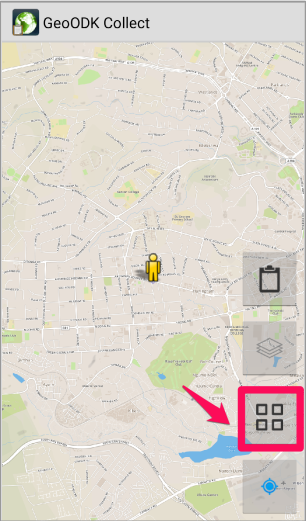
When you first open GeoODK Collect, you will see a map background and the map theme. The theme will have four buttons on the lower right side of the screen.
To switch to the classic theme:
1. Tap the third button in the map view as shown below. This will take you to the Data Collection and Mapping options.
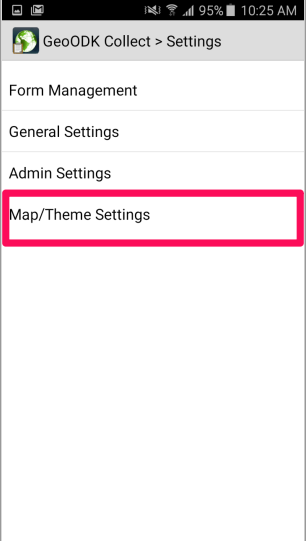
 2. Select Settings.
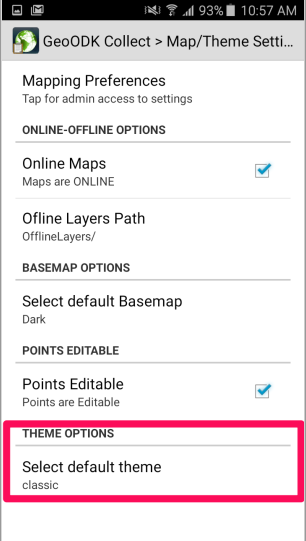
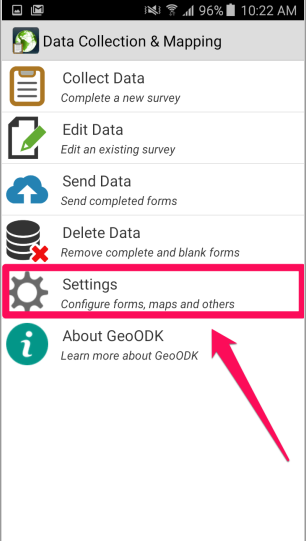 3. Select Map/Theme Settings.
 4. Under Theme Options, select Select default theme, and then Classic.
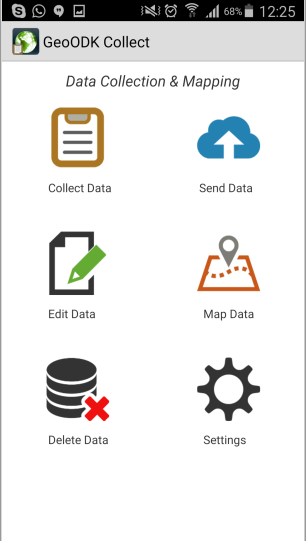
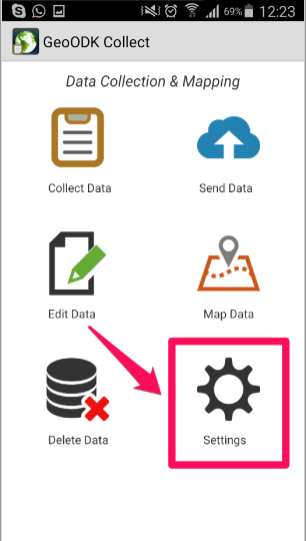
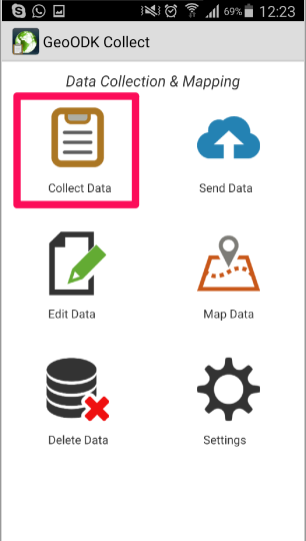
The classic theme will display six icons as shown in the image below.
Settings
Settings in the Map Theme:
1. Tap the third button on the lower right side of your screen.
 2. Select Settings.
Settings in the Classic Theme:
1. Tap Settings.
Configuring GeoODK Collect with your Ona account
After installing GeoODK Collect, the next step is to configure the application to your Ona account.
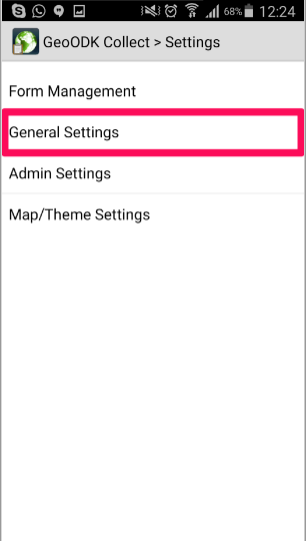
1. Go to Settings and then to General Settings.
 2. Under Server Settings, select Configure platform settings.
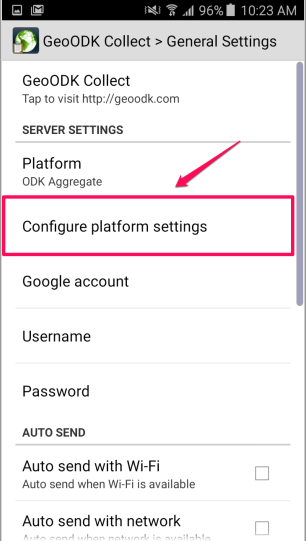
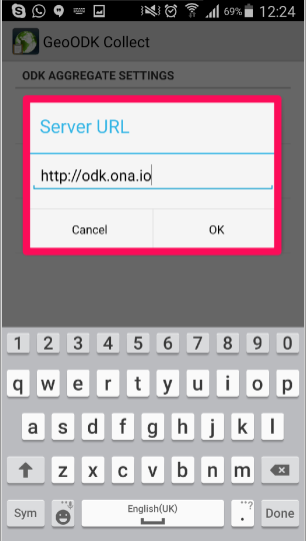
- Type in https://odk.ona.io as the URL, then press OK.
- Similarly, select Username and enter your Ona username, and then select Password and enter your Ona password.
Downloading forms to your phone
Depending on the theme you are using, go to the Settings option:
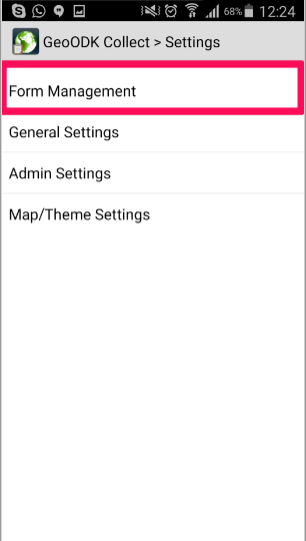
1. Select Form Management. GeoODK Collect will connect to Ona and display all published and active forms uploaded to your Ona account.
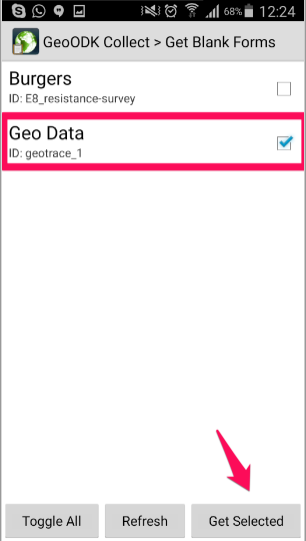
2. Download forms by checking the check box and then tapping Get Selected.
Filling your Blank Form
Return to the main menu, which will look different depending on which theme you selected.
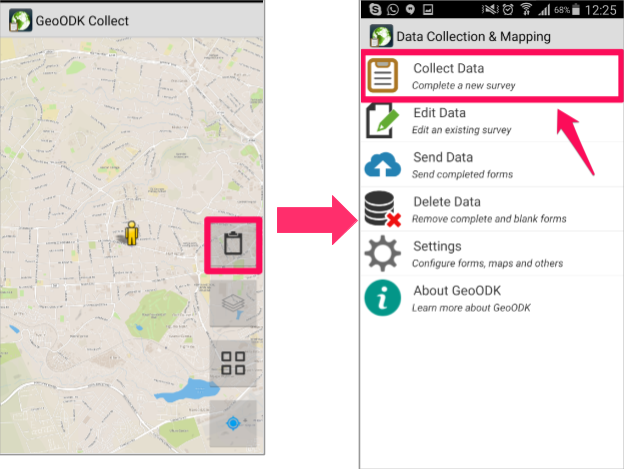
i) When using the Map theme
There are two ways to fill out your blank form when using the map theme.
1. You can either go to the Data Collection and Mapping option (the third button) or tap the first button on the lower right side of your screen and select Collect Data.
 2. Select the form you want to fill out by tapping its name on the screen. The form will open, and you can begin collecting your data.
ii) When using the Classic theme
1. Select Collect Data
 2. Select the form you want to fill out by tapping its name on the screen. The form will open, and you can begin collecting your data.
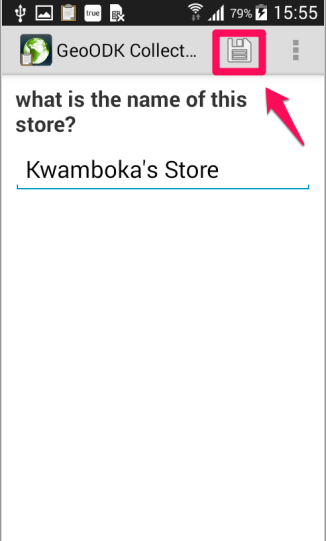
Saving your Record
When collecting data, you can save the data you have collected using the save button on the upper right side of the screen.
Upon exiting, at any point of collecting data, you can save your changes by selecting Save Changes when prompted to either Save Changes or Ignore Changes.
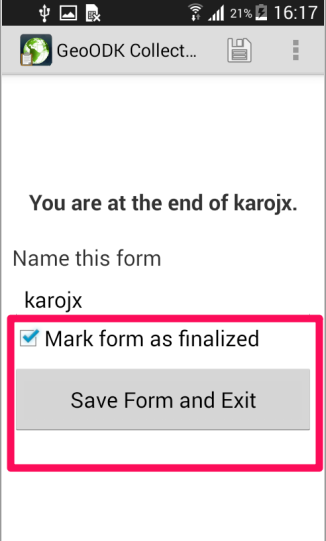
At the end of your form, you can Mark form as finalized to send the form to Ona, or you can Save the Form and Exit to edit later.
Editing Saved Forms
i) When using the Map theme
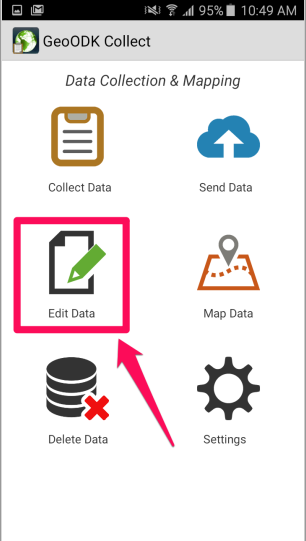
1. Go to Data Collection and Mapping options, and select Edit Data.

ii) When using the Classic theme
1. Select Edit data.
 2. Select the saved form whose data you want to edit by tapping on its name. This will open the form, you can begin your editing.
Once you are finished editing your form, Save your Record and Exit.
Sending Finalized Form
i) When using the Map theme
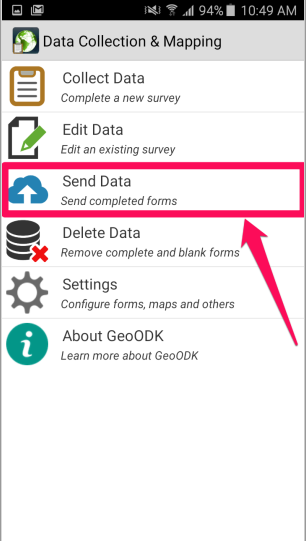
1. Go to Data Collection and Mapping option, and select the Send Data option.
ii) When using the Classic theme
1. Select the Send Data icon on the upper right side of your screen.
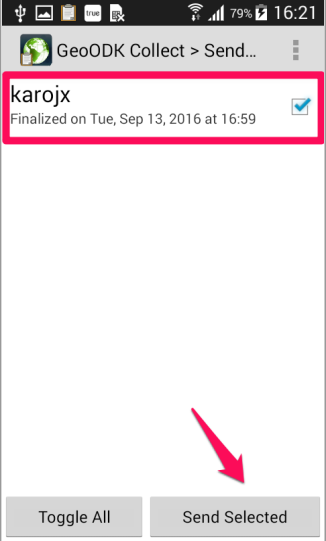
 For both cases, choose the finalized form you want to send and press Send Selected
Deleting Forms
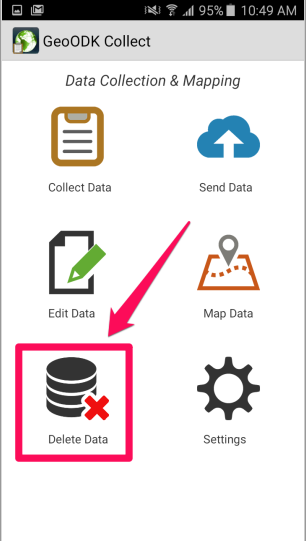
i) When using the Map theme
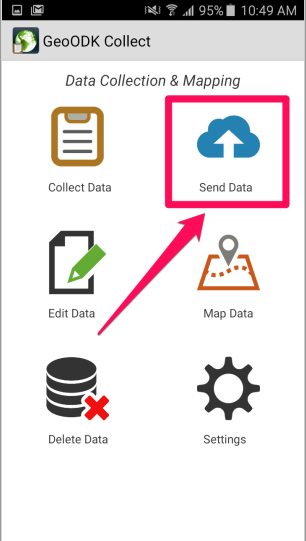
1. Go to Data Collection and Mapping option, and select the Delete Data option.
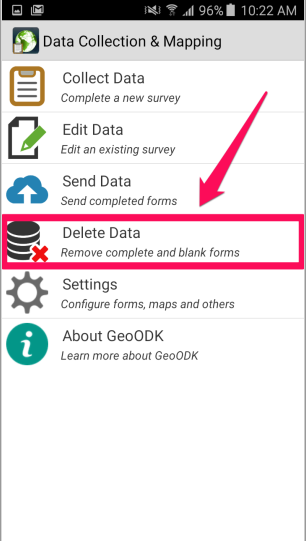
ii) When using the Classic theme
1. Select the Delete Data icon.
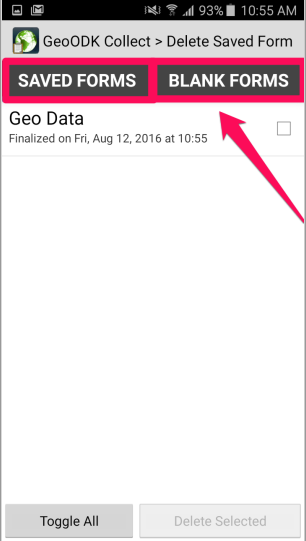
 2. At the top of the screen two tabs will appear: Saved Forms and Blank Forms. The Save Forms tab is a list of all the forms that were submitted to the server and all the forms that are currently saved as a draft in GeoODK Collect. The Blank Forms tab is a list of all the blank forms currently downloaded on your mobile device. Select the specific form you want to delete, and select Delete Selected.
Note:
- Deleting a form only deletes it from the phone, but does not delete the form submission if it was already submitted to the server.
- Be careful when deleting saved form drafts as this can not be undone. You can distinguish between saved forms and sent forms by referencing the Saved on vs. Sent on underneath the form name.
- Once you delete a form, you will lose it forever!
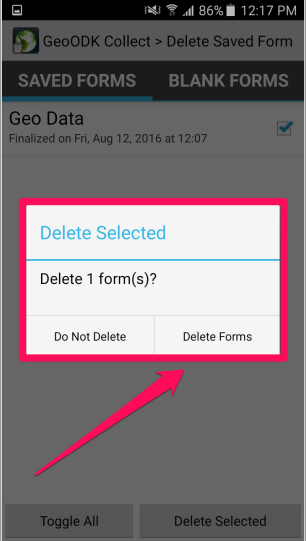
3. A confirmatory message will pop up on your screen. Confirm your deletion by selecting Delete Forms. Your form will then be successfully deleted.
Tips on using GeoODK Collect
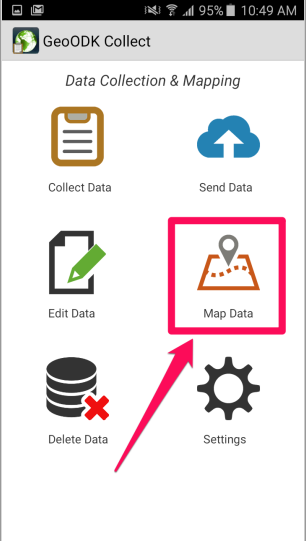
1. Viewing Maps on Classic Theme
If you want to go to map view while in the Classic theme, select Map Data. This will bring you to a map of your area.
2. Collecting GPS data
a . Geopoint
When recording your GPS coordinates, make sure your GPS is on in your phone settings!
Press the record location button:
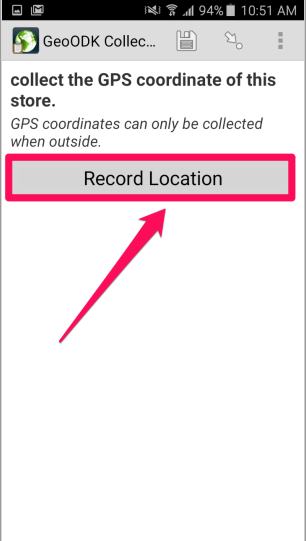
When the map is displayed, wait until your preferred accuracy is reached (usually 6m), then tap the save button on the upper right side of your screen.
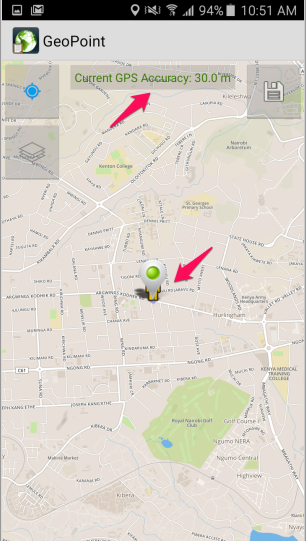
You can view or change your location by pressing the View or Change Location.

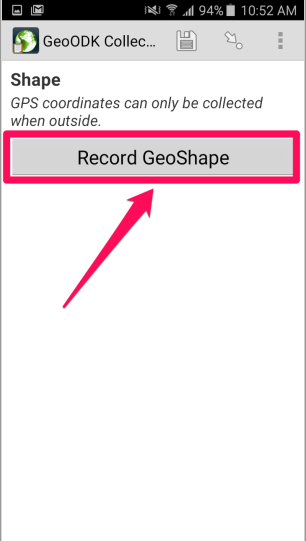
b. Geoshape
This is used to create shapes to represent a specific location. Press the Record GeoShape, and the map of your coordinates will be displayed. When drawing, mark the shape’s points on the map on your phone’s screen, and then join these points with a line.
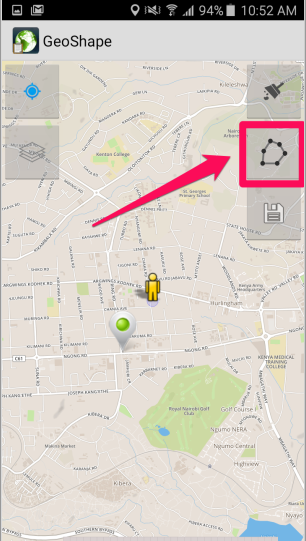
- Long press each point on the map, which will be joined to form your shape.
- Press the second button on the upper right side of your screen to draw a line through your points.
Save your shape by pressing the save button, the second button in the upper right side corner, or clear your shape and redraw by pressing the broom icon, on the upper right side of your screen.
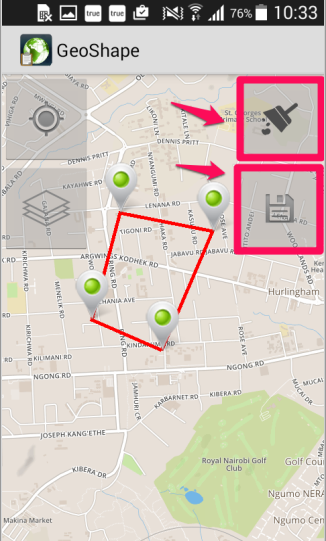
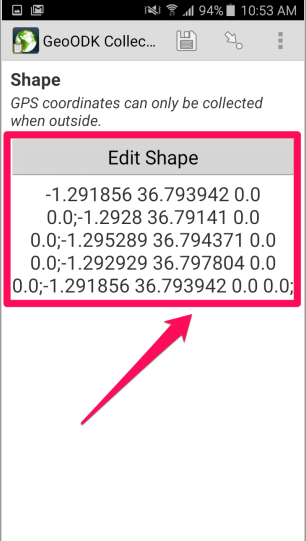
You can edit your shape by pressing Edit Shape after saving.
c. Geotrace
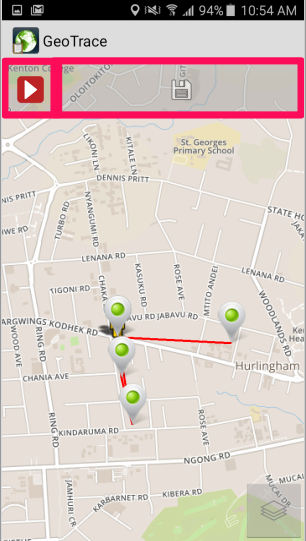
Using this feature, you walk and mark points to create your trace. To begin, press Record GeoTrace. To start tracing, press the play button on the upper left side of your screen.
You will be given the option of automatic mode (where location points will be picked automatically after a set period of time) or manual mode (where you will record the points yourself)
I. Manual Mode:
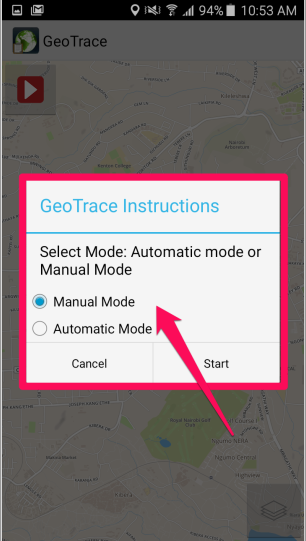
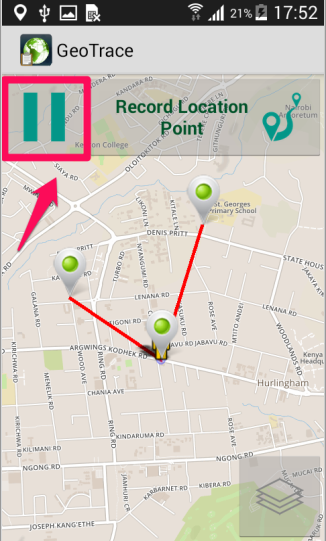
Select Manual Mode, move to your first point, and press the Record Location button to get your first point. Press the Record button whenever you reach somewhere and want the point recorded as part of your trace.
Do this until you are done tracing all your points. When you are done, press the pause button, and then the save button to save your trace.
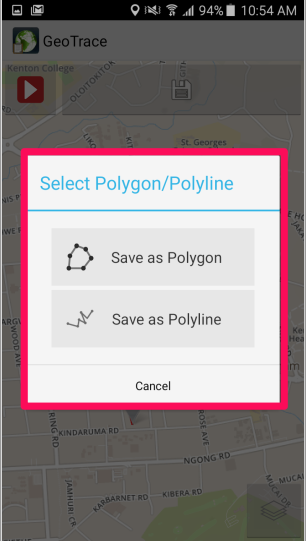
Select Save as Polygon (which is a shape with no opening) or Save as Polyline (which is a line that does not join all points to create a shape).
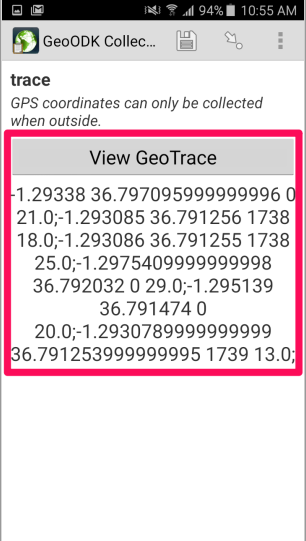
You can view the geotrace by pressing View Geotrace.
II. Automatic mode:
If you choose the automatic mode, you can set your time interval for recording a point automatically below this option, then press Start.
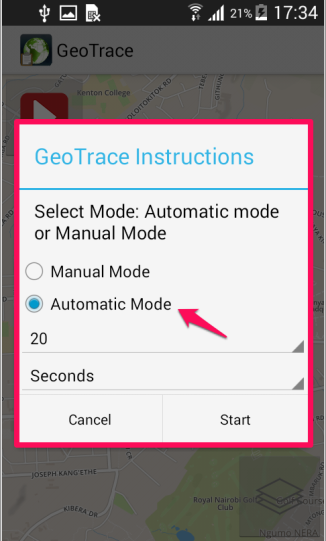
This will record your location points automatically as you move in the field after the set period of time you entered until you press the pause button and save the points. In the case above, after every 20s, the coordinates of the user will be recorded. You will be given the option of saving as Save as Polygon or Save as Polyline. You can view the geotrace by pressing the view geotrace button.
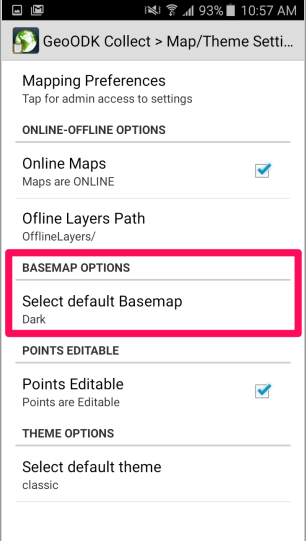
3. Map/ Theme Settings
In settings, under the maps and theme settings, there are a variety of default basemaps to choose from. Select the map that best suits your needs.
For more information, please visit the GeoODK site: http://geoodk.com/