Get started on a project
A project is the most basic element of Ona. It contains all of the forms and data related to the project as well as information to aid new collaborators understand the project better; such as Project description, Category, and Location.
Projects are where you set permissions for sharing and for form submissions.
Project vs. Form
Projects allow you to put related forms together. A form is a set of questions to which a user submits data. Forms are the starting point for collecting and viewing information from users. With Ona, you can author forms using the XLSForm syntax with different features such as skip logic and checks.
Data share settings and form submission settings both occur at the Project level. Every form and all of the data in the project inherits the same settings as the project. Therefore, related forms should go into a single project for easy access and collaboration.
Create a project
Create a New Project that will contain all of the forms and data related to the project. Follow the steps below to create a new project.
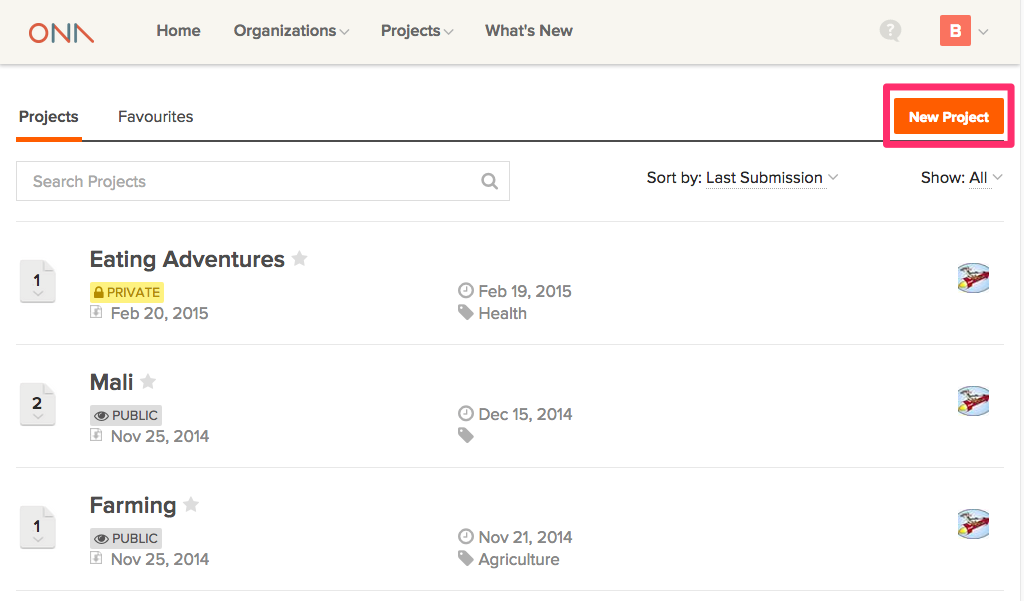
1. From the Home page, click on the New Project button, located on the right side of your projects page.
2. The Create Project modal will pop up as shown in the image below;
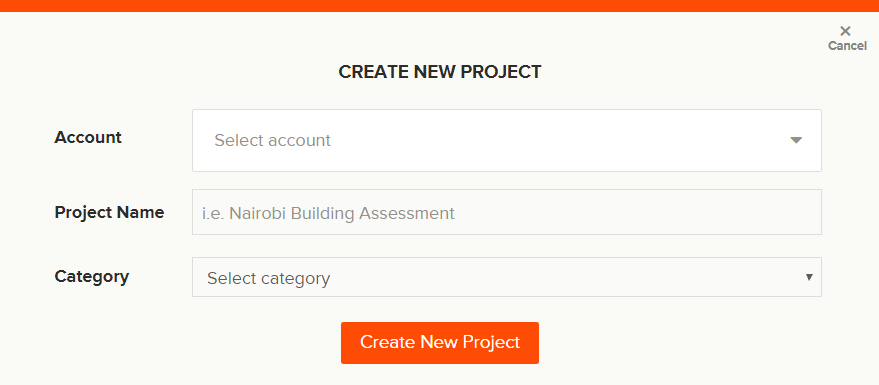
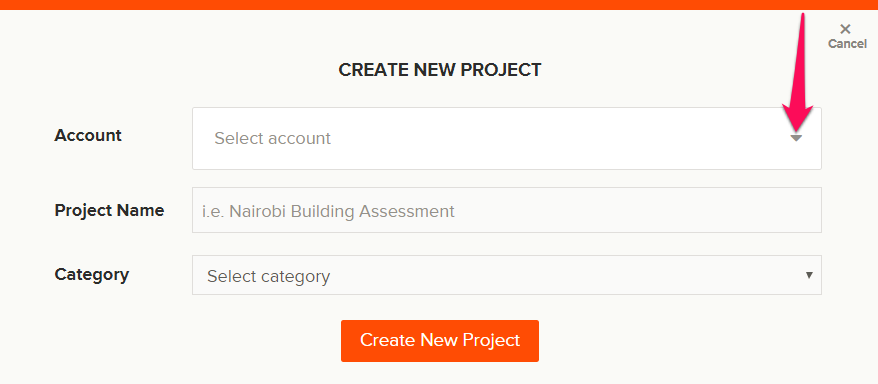
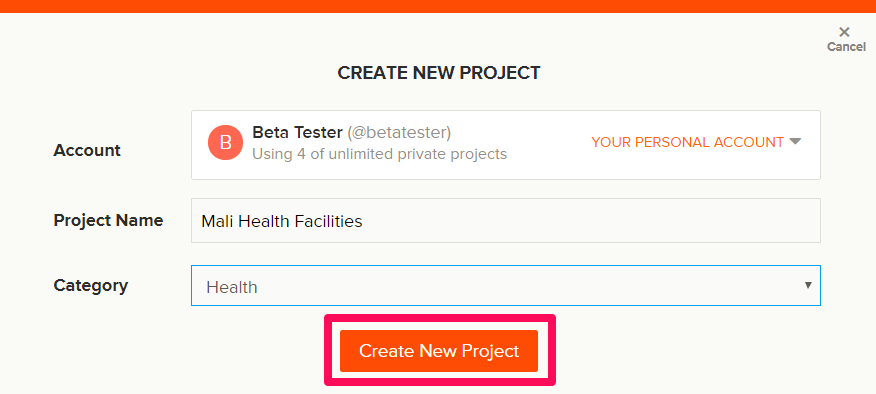
3. Select the account in which the project will be located from the account drop-down menu. It can either be an organization or an individual account.
Note:
- Read more on the differences between organization accounts and personal accounts in this faq.
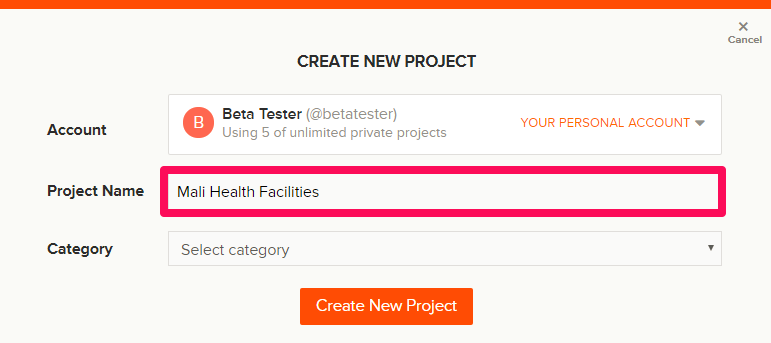
- Also, kindly note, the project with ‘Your Personal Account’ is the account you are active in.
- Enter the name of the project, in the Project Name text box;
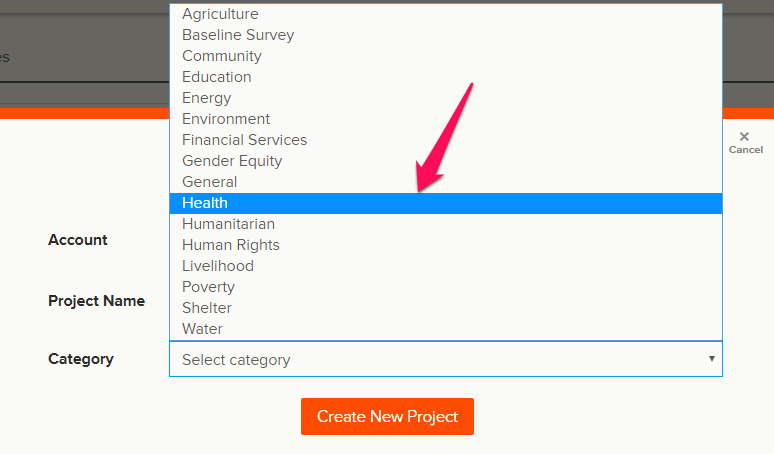
 5. Select a category from the project category dropdown e.g. Health;
6. Click on the Create New Project button;
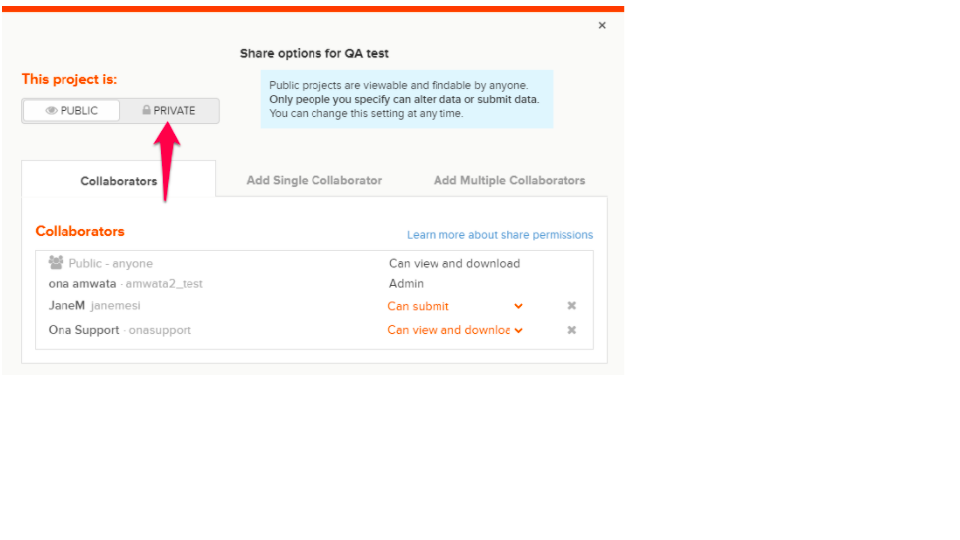
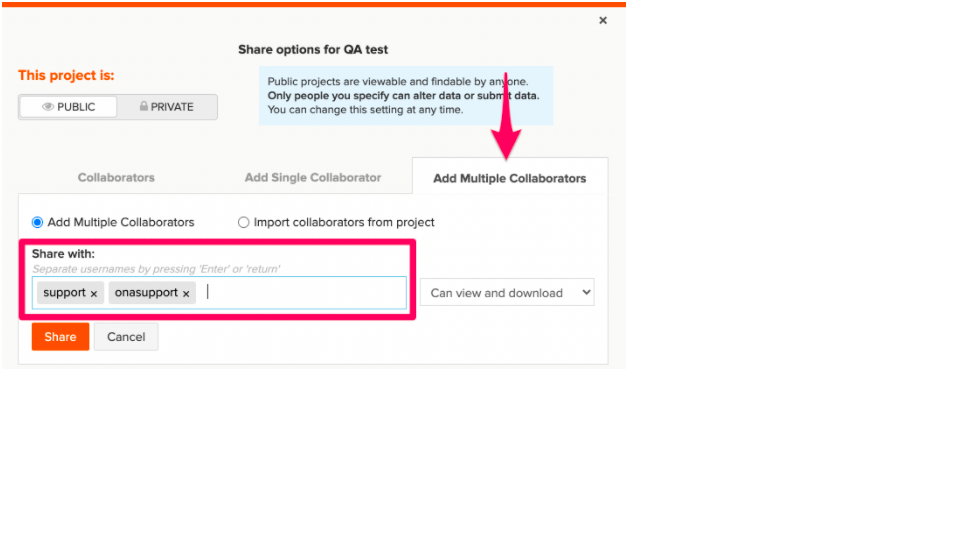
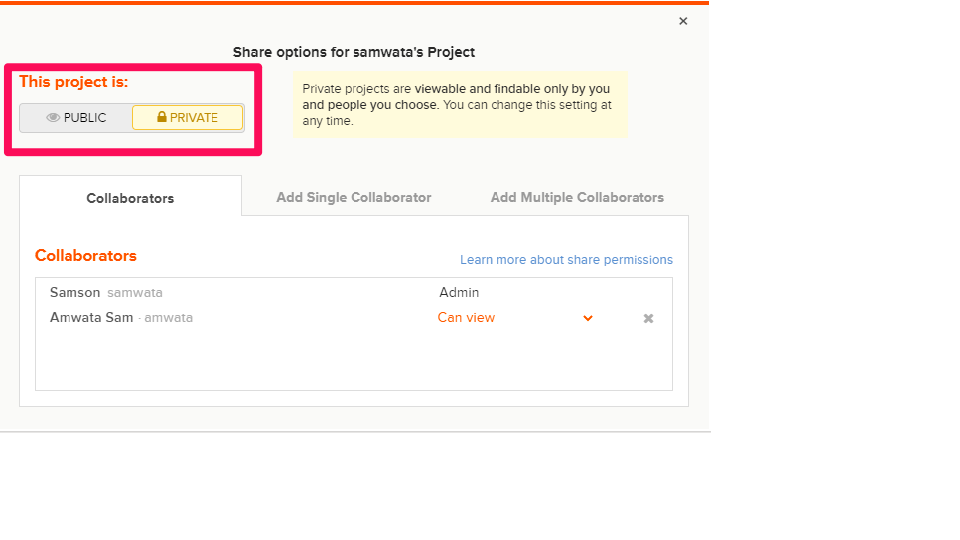
7. Then, choose the project’s Share options;
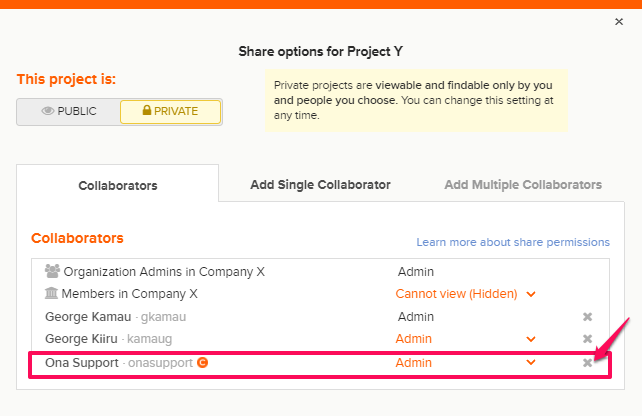
- First, determine whether your project is Private or Public. Click on Public to make the project accessible and findable by anyone who visits the website. Anyone who accesses a Public project will have a Can View permission level for all forms and data within the project.

- Select Private to make the project private. A Private project can only be viewed or contributed by you (the owner) and collaborators who have access.
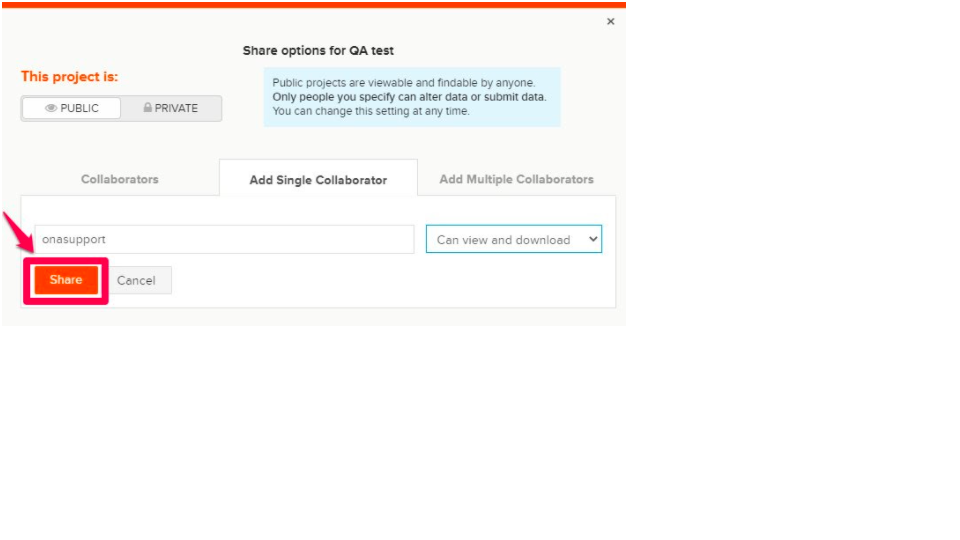
- If you would like to add a single collaborator and share with them the project, click on Add Single Collaborator and enter a collaborator’s username or name.
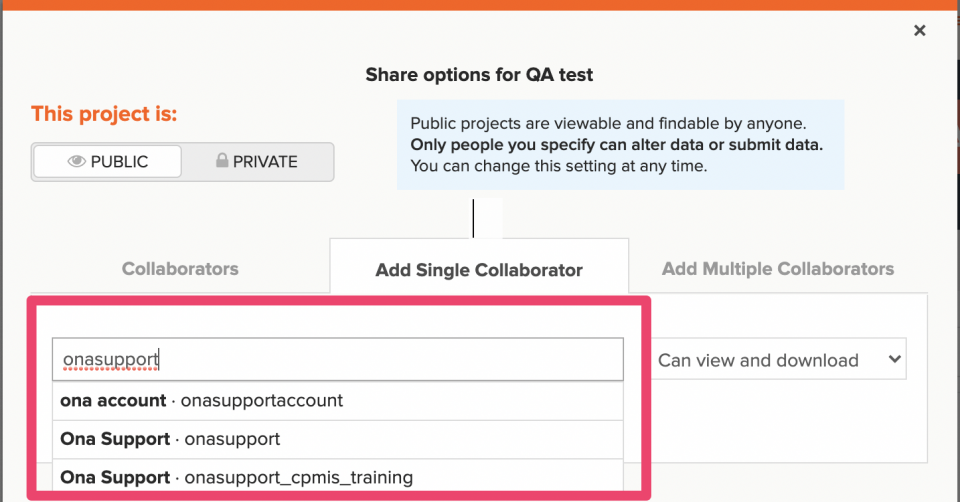
- Select the permission level from the permissions drop-down.
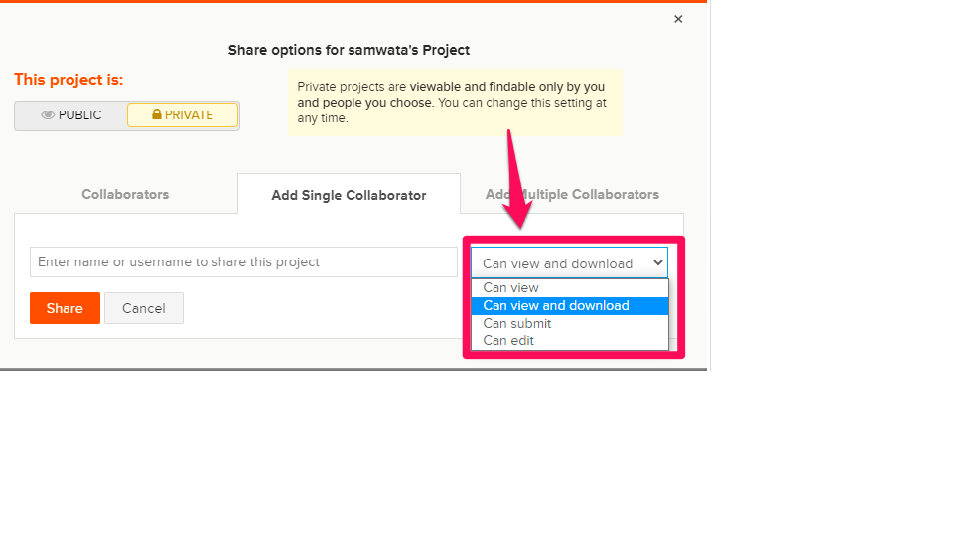
- Then, click on the Share button;
- Finally, click on the Done button when all collaborators have been added to the project. The user’s name, username, and permission level will be displayed on the list of Collaborators under the collaborators tab.

Categories
These are group labels you add to a project to help others identify the project and find the project if it is public. You can add the project category when creating a project on the Create Project modal as explained in the previous section.
You can also change the project category from the Project Settings page:

Managing projects
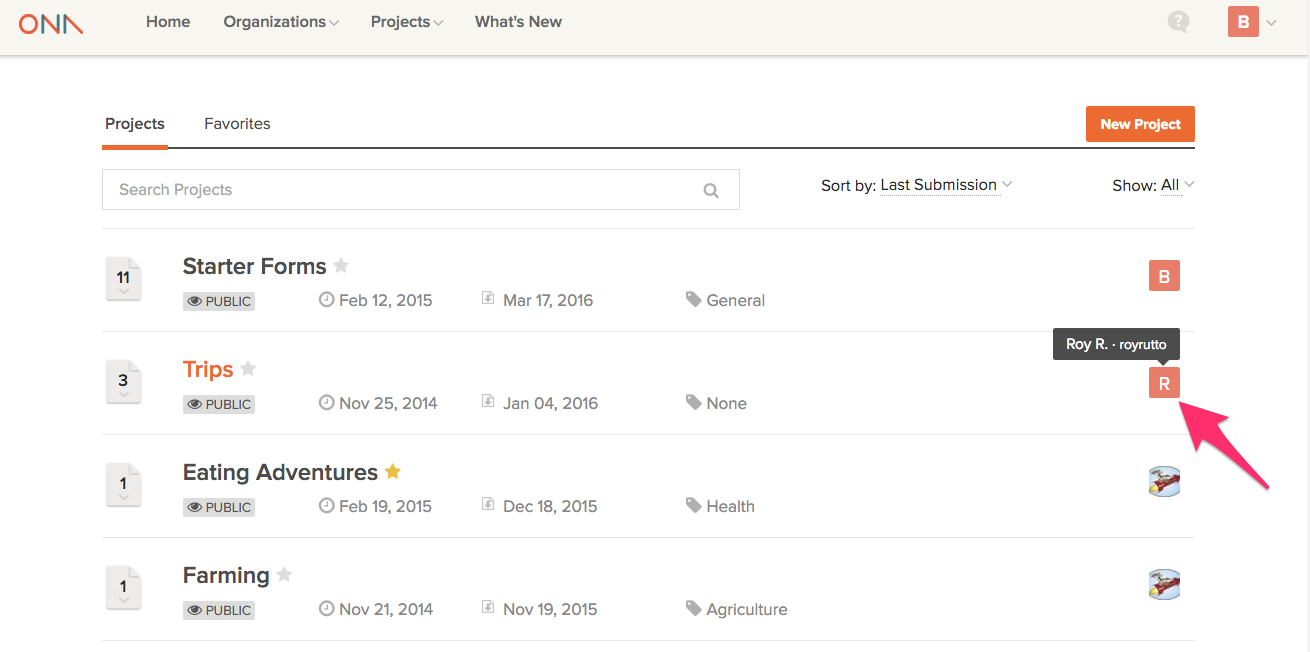
Projects shared with you
When you login into your account, all the projects shared with you are accessible on your Home page. A project that is shared with you will have the Owner’s avatar tagged to it instead of your own as illustrated in the screenshot below:
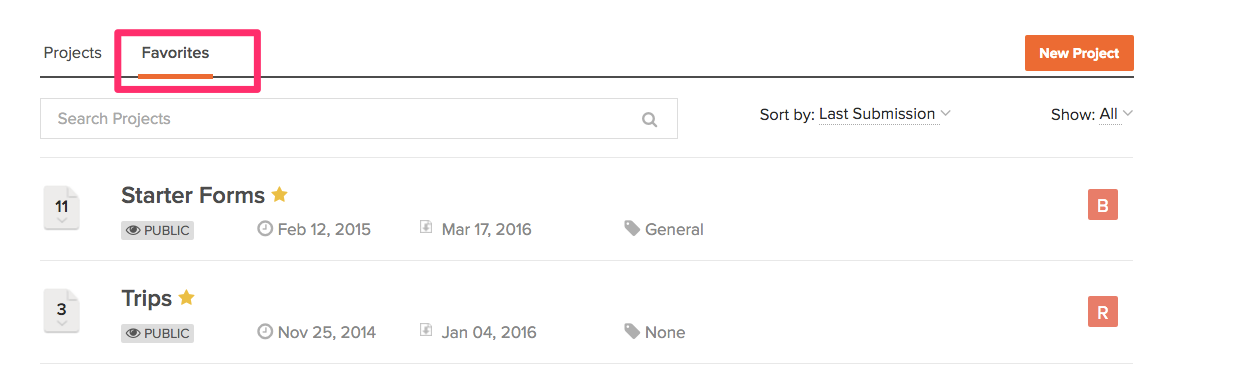
Starring and Favoriting
If there is a current project you are working on or there’s a project you’d like to follow, you can “star” (aka “favorite”) a project and save it to your favorites. If you are just starting out or just want easy access to reference forms, we recommend you favorite the Starter Forms project. To star a project, click on the star icon next to the project name. It will turn yellow to let you know the project has been favorited.
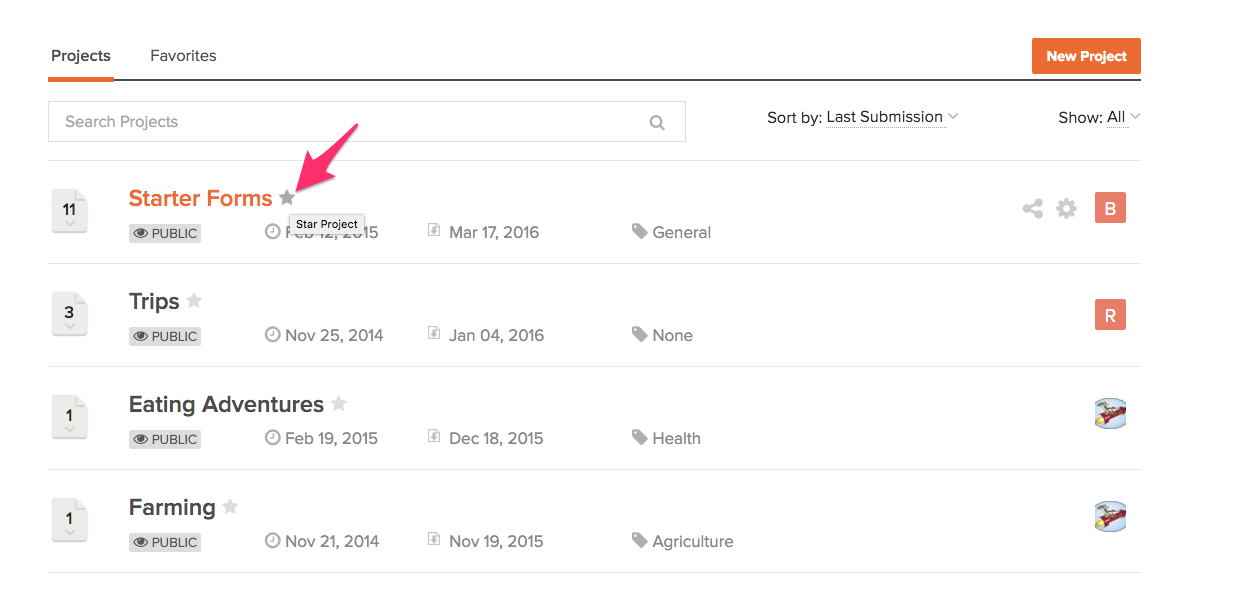
Once you star a project, it will always have a yellow star next to it and show up in the Favorites tab, as shown in the image below. To unfavorite or unstar a project, simply click the star again, and it will become grey.
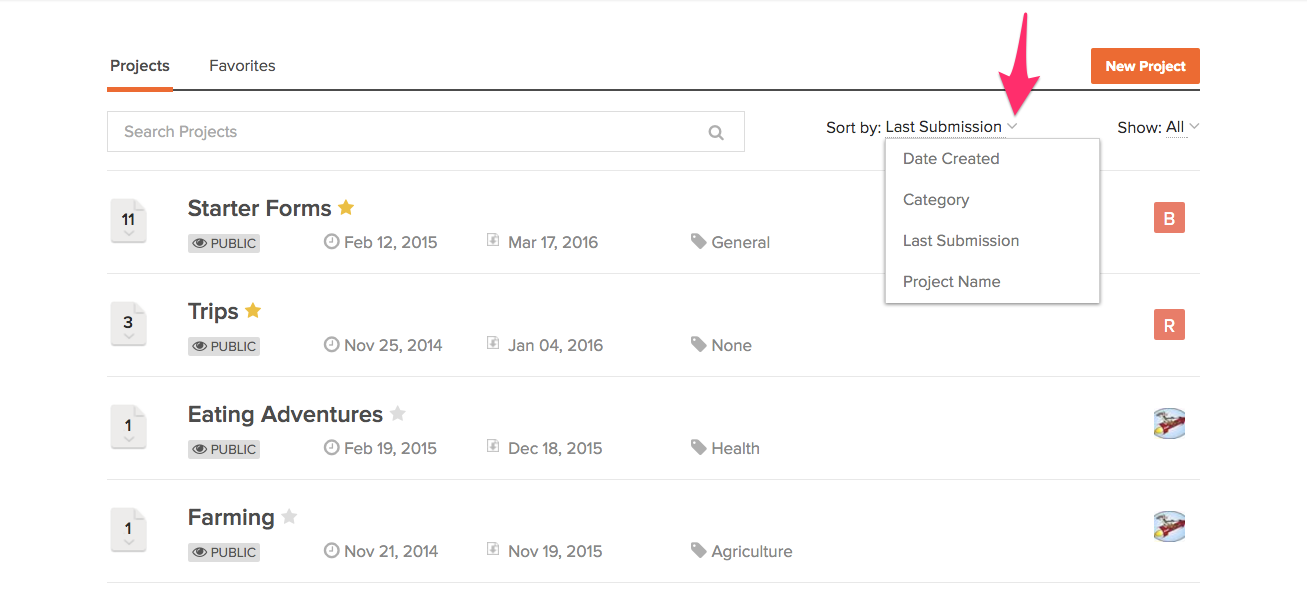
Finding/Sorting
You can sort projects according to your preference on your home page. Projects can be sorted by Date Created, Category, Last Submission, and Project Name:
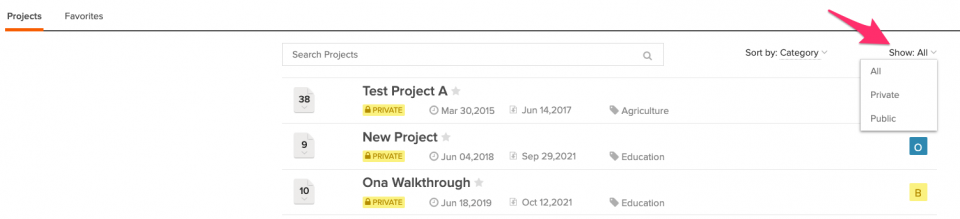
Click on the Show All dropdown to view All, Private or Public projects that have been shared with you;
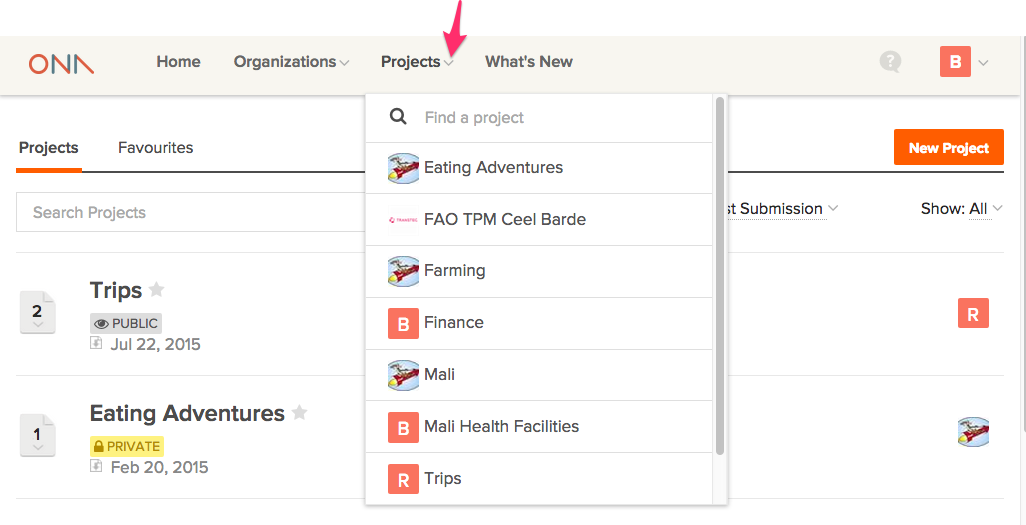
You can also Find a project shared with you from the Projects dropdown in the top bar.
Transferring Projects
This means transferring project ownership from one account to another. When you transfer a project, the project and all of its forms and data will be transferred to the new account and the original account will lose ownership of the project.
Note: Transfer of projects from one personal account to another is not supported. You can only transfer projects from personal projects to organization accounts where you are admin.
A summary of project transfer permissions is in the table below:
| Project transfer condition | Permission level |
|---|---|
| Transferring a project out of an individual account | The user must be the project admin. |
| Transferring a project out of an organization account | The user must be a project admin (this includes the org admin group). |
| Transferring a project to an organization account | The user must have an admin or project manager role in the org. |
To transfer a project:
- From the home page, click on the Project Settings icon.
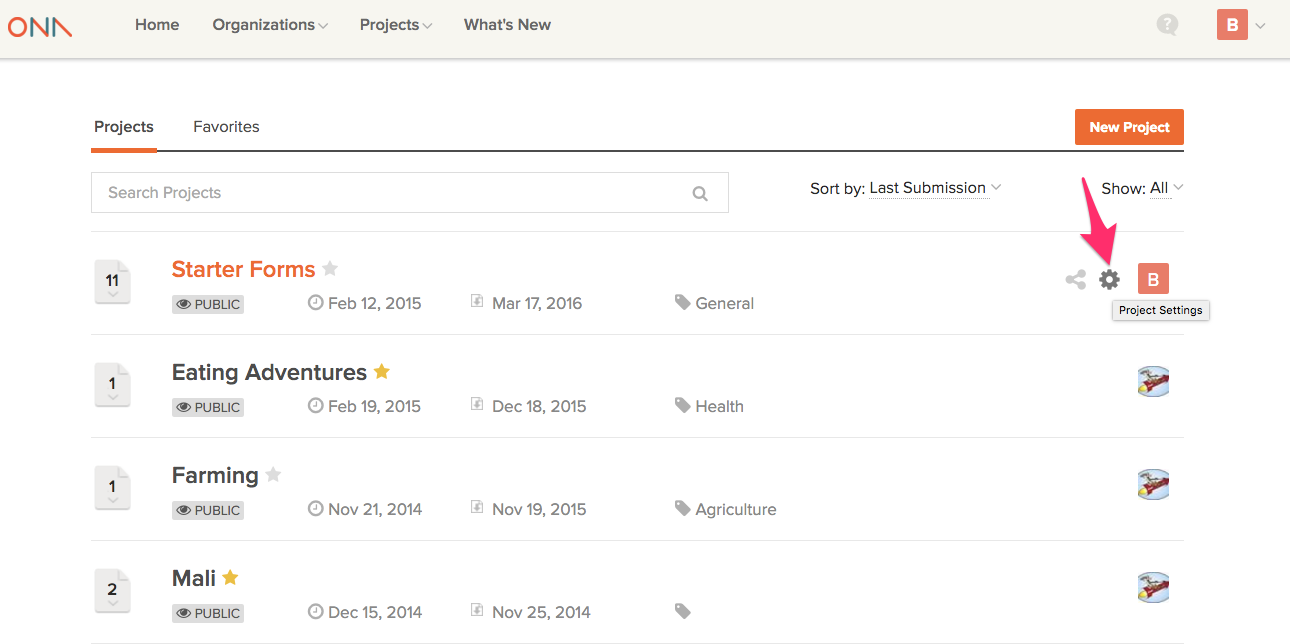
- On the Project Settings page, scroll down to the Transfer Ownership section, and click on the Transfer button.
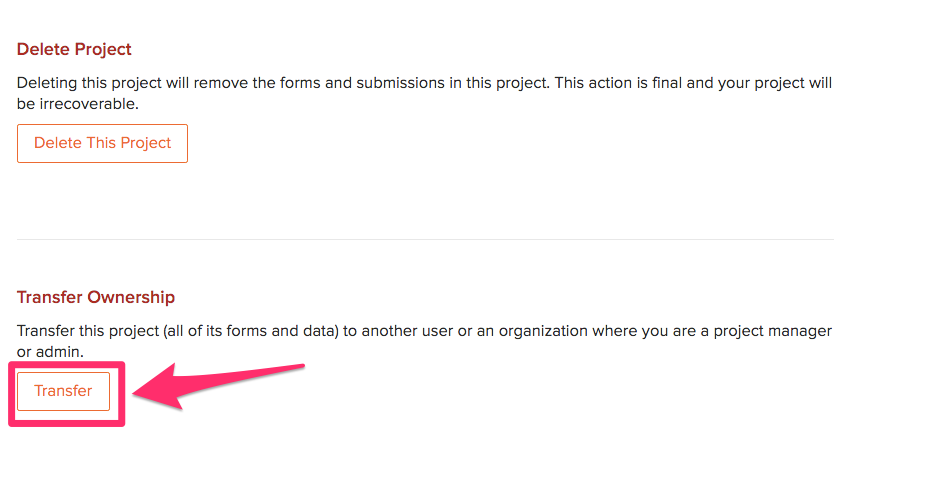
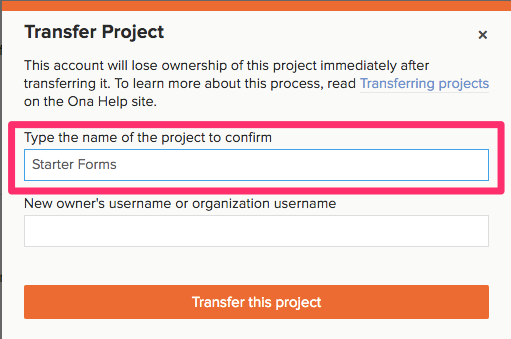
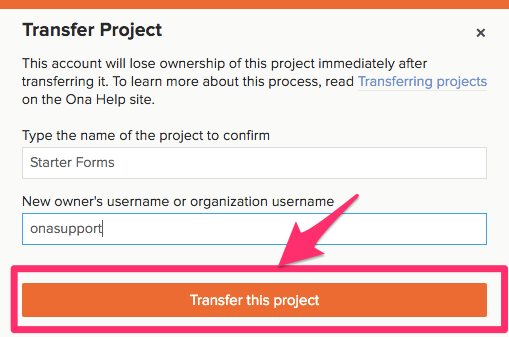
- A Transfer Project modal will pop up:
- Enter the name of the project to confirm the transfer.
- Type the organization username in the text box.
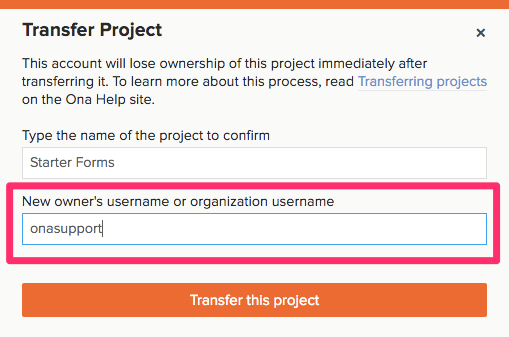
- Finally, click on Transfer this project button to complete the transfer;
- Enter the name of the project to confirm the transfer.
Deleting projects
You can delete a project from your account. Deleting a project completely removes all the forms and submissions associated with the project. This action is final and your project will be irrecoverable.
To delete a project:
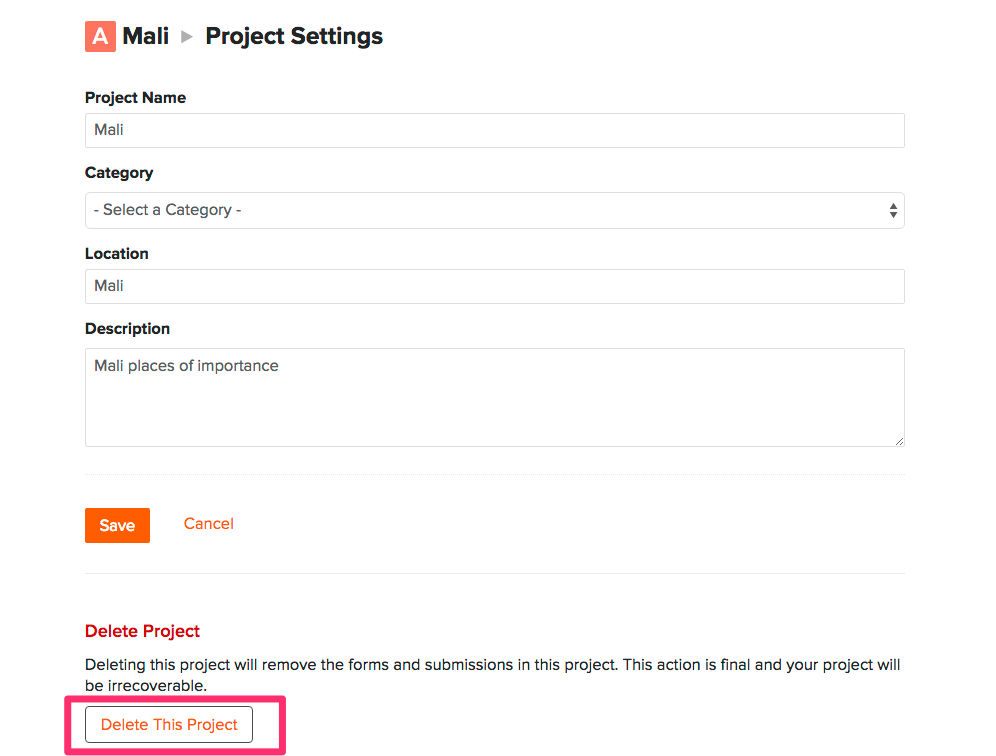
- From the Project Settings page, scroll down to the Delete Project section and click on the Delete This Project button.
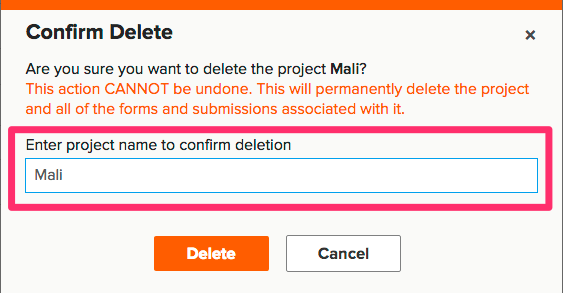
- Confirm Delete modal will pop up, enter the Project name to confirm the deletion.
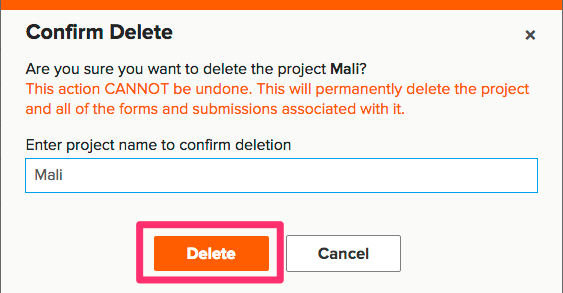
- Then, click on the Delete button to permanently delete the project and all of the forms and submissions associated with it.
Collaborating with others
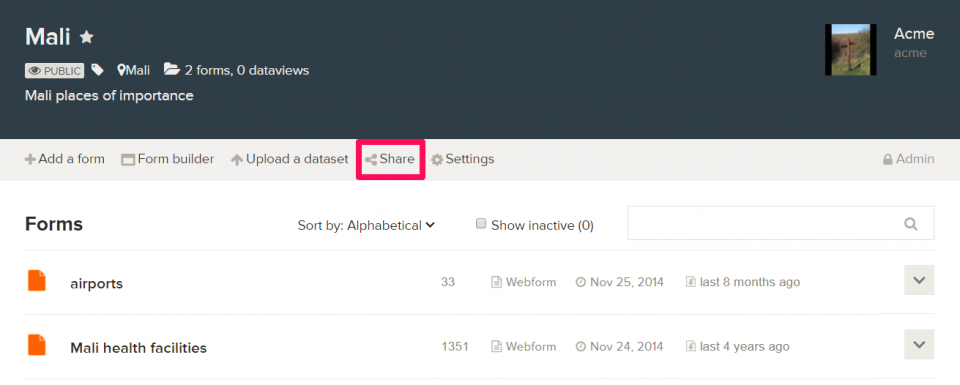
Sharing projects
Data share settings and form submission settings both occur at the project level and are inherited by all forms in the project.
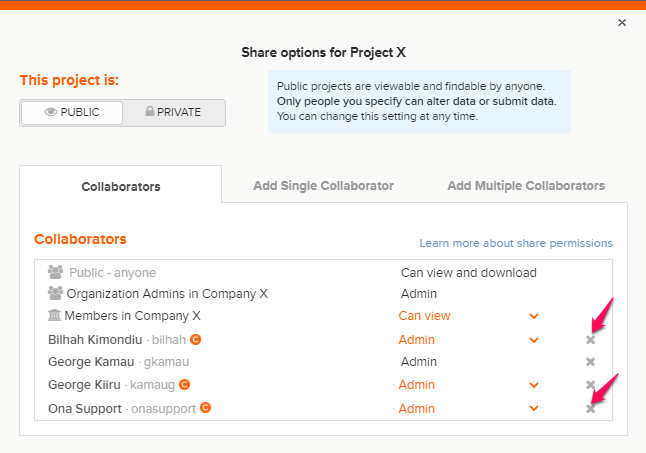
To share your project with collaborators:
- From the Home page, click on the Share Project icon;
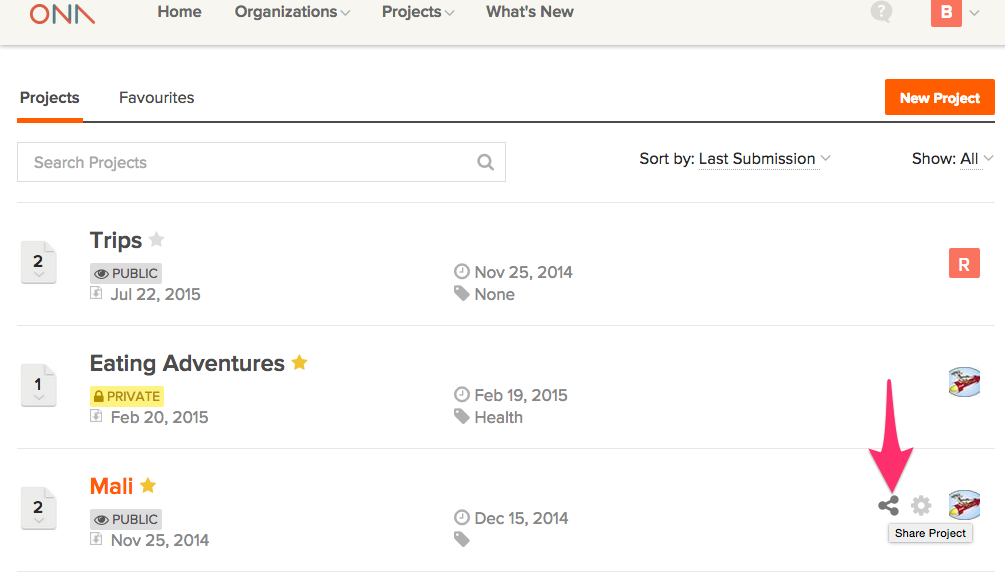 You can also access the Share modal from the project page. If you don’t see the Share button, you don’t have permission to change the share settings.
- If you would like to add a single collaborator, click on Add Single Collaborator and enter a collaborator’s username or a name that you would like to share the project with.
- Alternatively, you can add multiple collaborators by clicking on Add Multiple collaborators tab. Add multiple collaborator usernames, and click enter to add another collaborator username. Make sure you are adding the correct usernames.
- You can also import users from one project to another. To do this, click on Add Multiple collaborators tab and click Import Collaborators from the Project
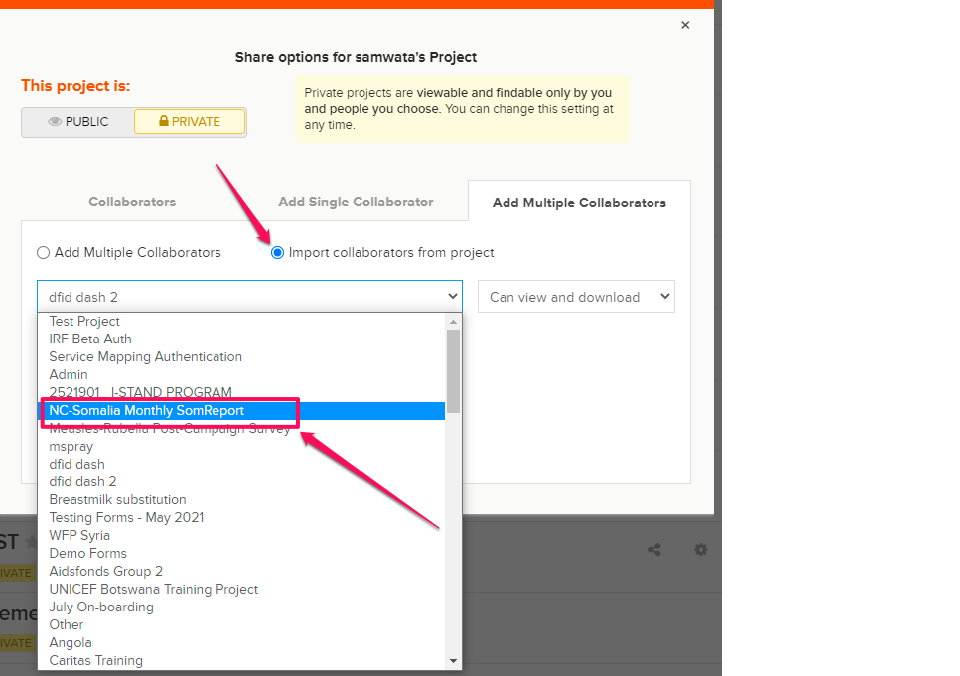 All the users shared with the project you selected will be imported, and then you can click on Share.
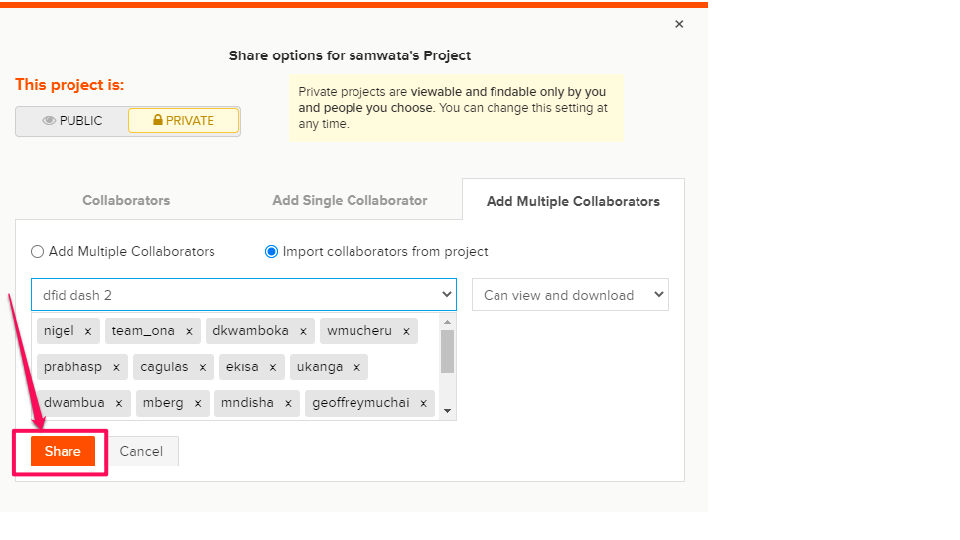
Permission levels
You can grant project access to collaborators who have Ona accounts. When you add a collaborator to your project, the next step is to select their level of access from the permissions drop-down menu as shown below:
If someone is given permission to a project where they have Can View permissions, they also receive view permissions for the forms. If a user receives Can Edit and higher permissions for a project, they will be able to submit data to forms, as long as the form status is active.
The permission levels are defined as follows:
| Can View | Can View and Download | Can Submit | Can Edit | Is admin | |
| Can view data on a map | x | x | x | x | x |
| Can view data as summary charts | x | x | x | x | x |
| Can view data in a table | x | x | x | x | x |
| Can preview forms | x | x | x | ||
| Can download forms | x | x | x | x | |
| Can download data | x | x | x | x | |
| Can submit data | x | x | x | ||
| Can edit data | x | x | |||
| Can delete data | x | x | |||
| Can change the project share settings | x | ||||
| Can add, delete, replace or make forms inactive | x | ||||
| Can edit project metadata | x | ||||
| Can delete the project | x | ||||
| Can transfer project ownership to another user or to an organization | x |
Note:
- Personal accounts have only one admin — the account the project lives on, which for new projects is the creator of the project. To have multiple admins on a single project, create an organization project.
- To accommodate legacy ODK Collect users, the XML representation of private forms is available at a URL that is not password protected. This means that if the account’s require phone authentication is set to OFF, private forms can be accessed on ODK Collect or ODK aggregate API when a user appends your username to the URL.
Leaving projects
You can leave a project when you no longer need access to the project.
To leave a project:
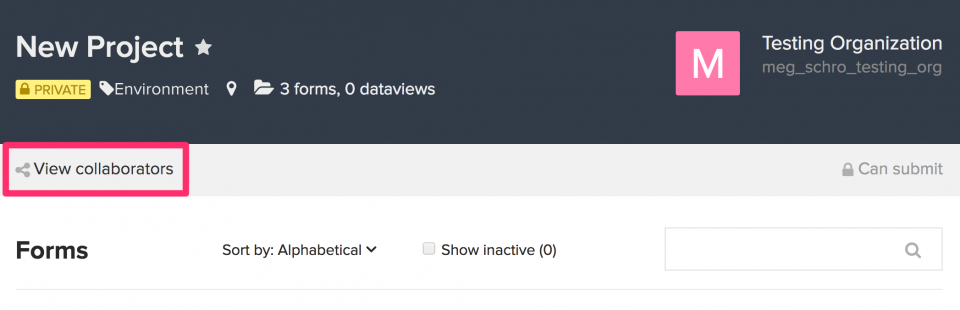
- Go to the project you want to leave.
- Click on View Collaborators to view the Share modal.
- A pop-up Share modal will appear. Find your username and click the X, next to the permission level to remove yourself from the project.
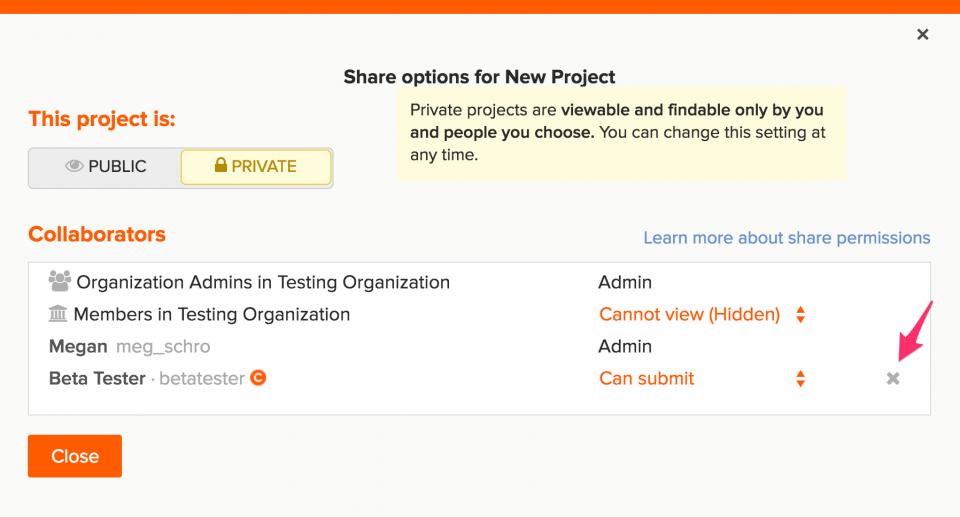
- An additional pop-up window will appear to confirm that you want to leave the project. Click Yes, if you want to leave the project. Click No, if do not want to leave the project.
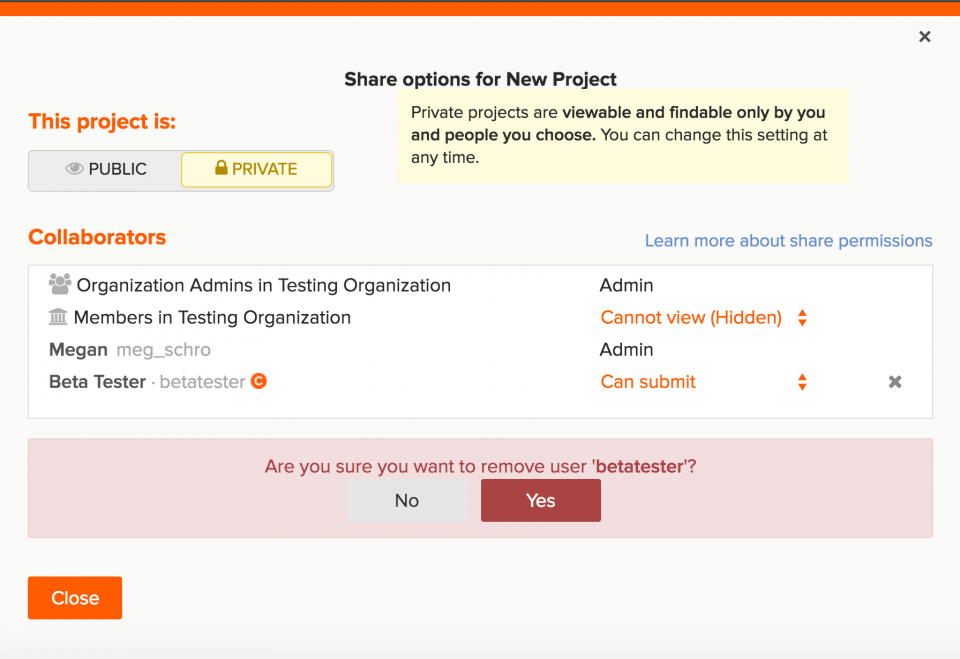
- If you selected Yes, you will be removed from the project, and a message will appear stating it may take some time to reflect this change. If you select No, you will return to the Share module.
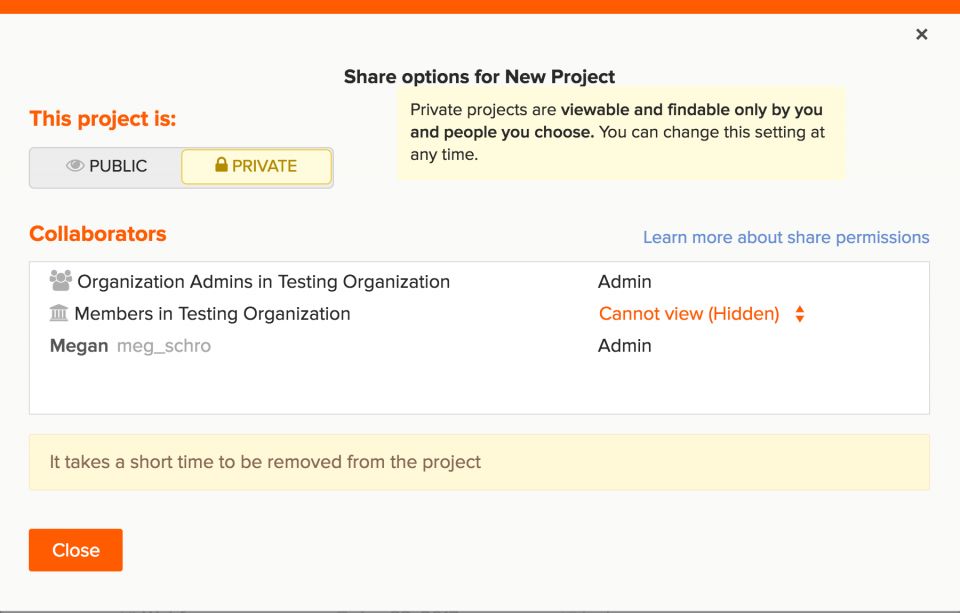
- Once you have finished, click Close to close the Share modal.
Note: Project Admins can not remove themselves from projects in personal accounts. In organization accounts, Org Admins can remove themselves from individual projects, but will still retain access as all Org Admins have access to all projects with Admin permission level.
Deleting Project Collaborators
If a project collaborator is no longer involved in a project, they can be deleted from the project’s share modal. Account and Project Admins have the ability to remove project collaborators from projects they have been added to.
To delete a project collaborator, click on the X icon on the project share modal. Then, select Done to save the changes.
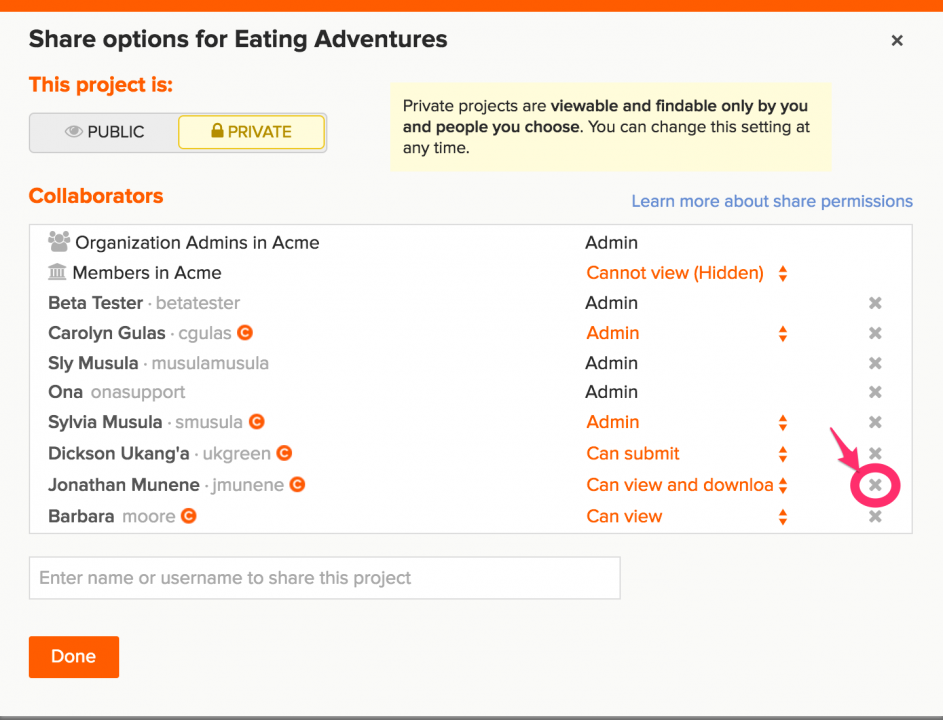
If a collaborator has administrator rights to a project, they cannot remove accounts or project administrators from the project. They can, however, remove fellow admin collaborators from the project by clicking on the X icon.
If a user is a project manager with administrator permissions, they cannot remove account administrators from the project. They can, however, remove project collaborators with administrator permissions. To remove a collaborator with administrator permissions, simply click on the X icon.
Finally, account administrators can remove fellow account administrators, project collaborators with administrator permissions, and project managers, from any project within the account. The account administrators have control over all project access within their accounts.