How do I add role-based permission restrictions to a form?
Role-based permission restrictions levels allow the Admin of the project to set restrictions for the project’s collaborators. Unlike normal project permissions, these restrictions are set for individual forms in the project and do not apply to all forms in the project.
Every project collaborator can have the following permission levels: Admin, Can view, Can view and download, Can submit, and Can edit. With role-based permission restrictions, you can add more restrictions to the Can Submit and Can Edit roles. For example, you may use restrictions to hide sensitive data collected by other users or hide data collected by others if it is irrelevant to a user.
About the permission restriction levels
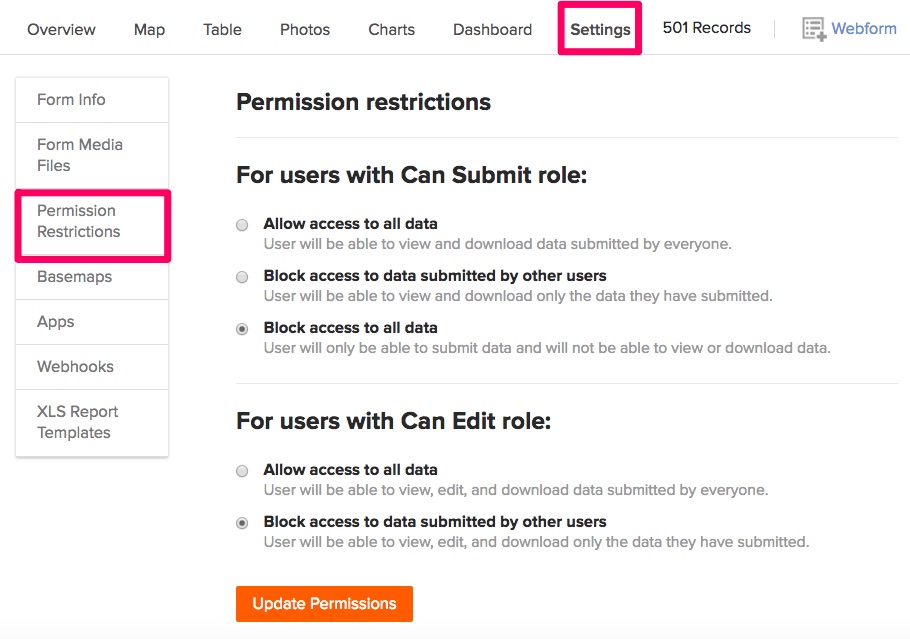
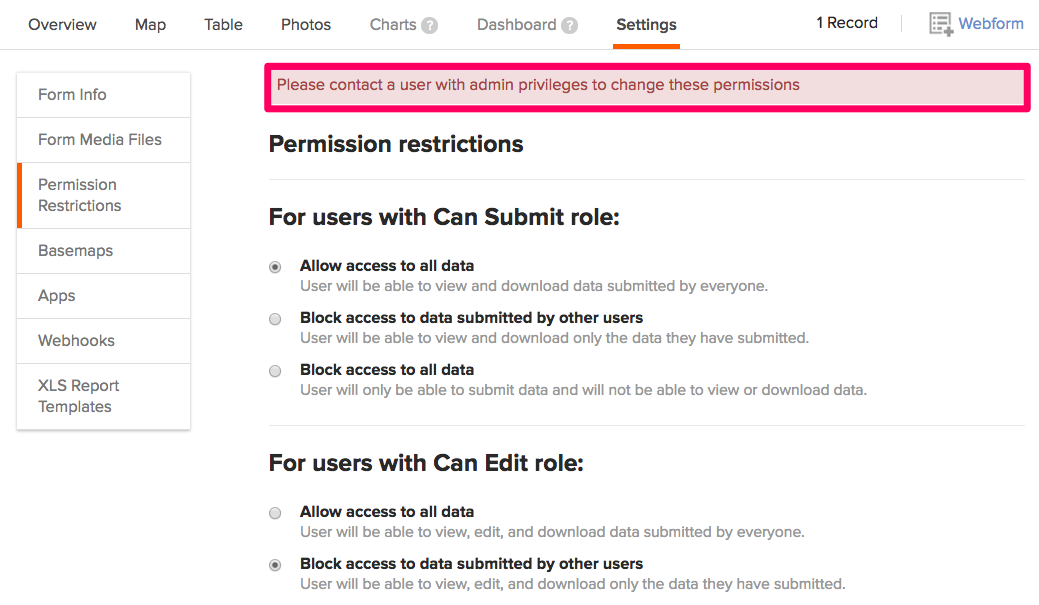
Above: Permission restrictions options available in Ona
- Project collaborators with the Can Submit role can have any of the following access restrictions to a form: a) Allow access to all data – These users can view and download all the data submitted by all collaborators for that particular form. The collaborators will have access to the data, maps, charts, and dashboards. b) Block access to data submitted by other users – These users can view and download the data they have submitted. Data that has been submitted by other collaborators is blocked. The users will only view the records they have submitted in the table view. c) Block access to all data – These users cannot view or download any data, they will only be able to submit data. The table view, chart, and dashboard will be disabled.
- Project collaborators with Can Edit roles can have any of the below access restrictions to a form: a) Allow access to all data – These users can view, edit and download all the data submitted by all collaborators for that particular form. b) Block access to data submitted by other users – The users can view and download only the data they have submitted. Data submitted by other collaborators is blocked.
How to change permission restrictions
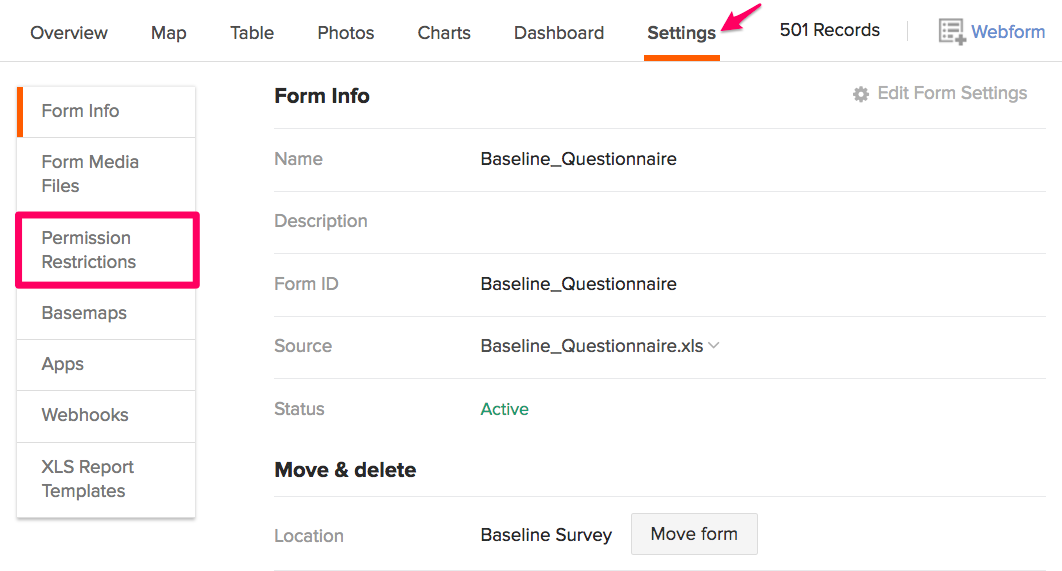
Role-based permission restrictions are set under the form’s Settings page. Select the Permission Restrictions option as shown below.
The default permission restrictions for the collaborators with Can Submit and Can Edit roles on every form allows them access to all data.
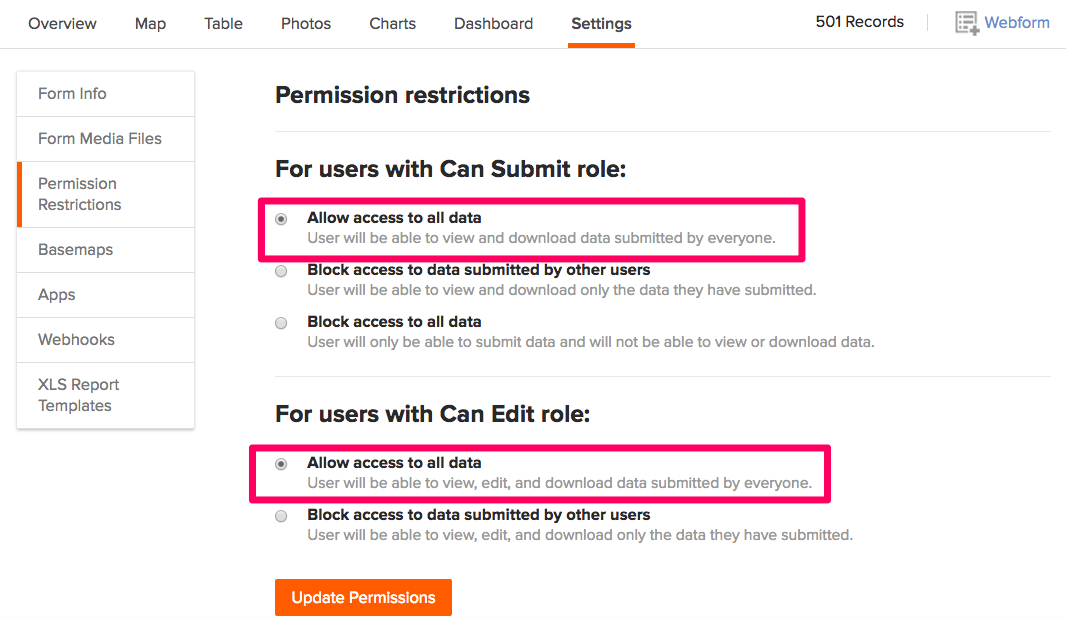
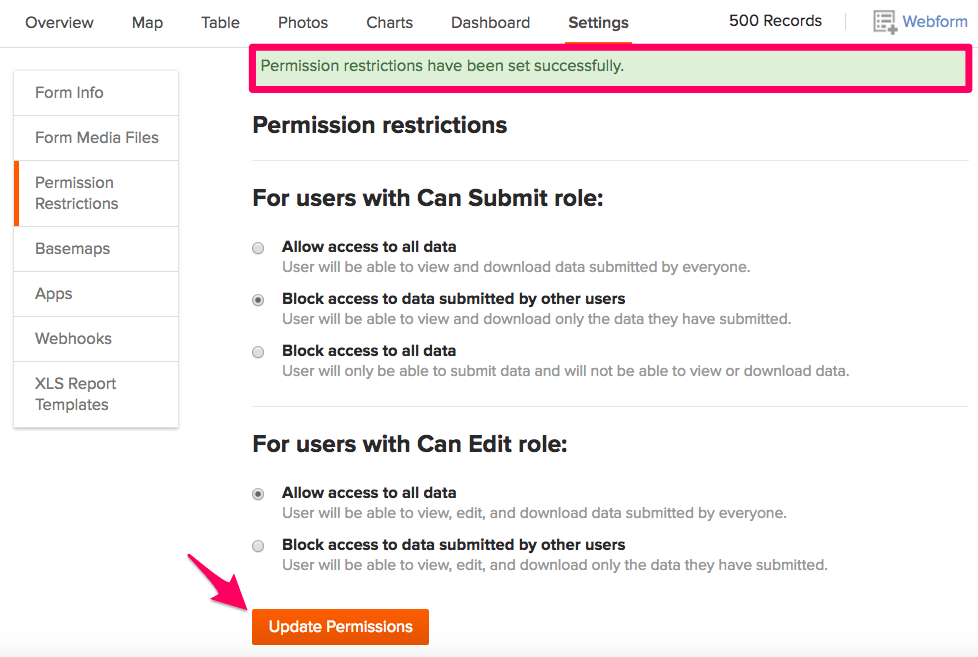
If you want to change the setting, select new permissions for each collaborator role (i.e Can Submit and Can Edit) you would like to modify, then click on the Update Permissions button to save the changes.
How changes are reflected when viewing data
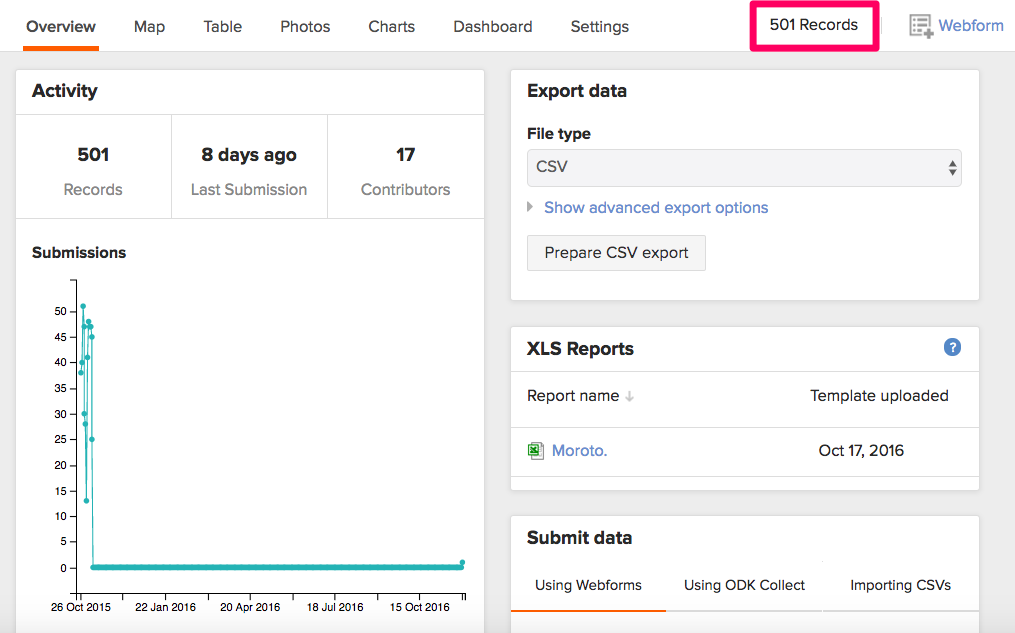
Users with Can Edit and Can Submit permissions with Allow access to all data selected are able to view the map, table, charts, and dashboard tabs. These users can also download data. No data will be hidden as shown in the screenshot below.
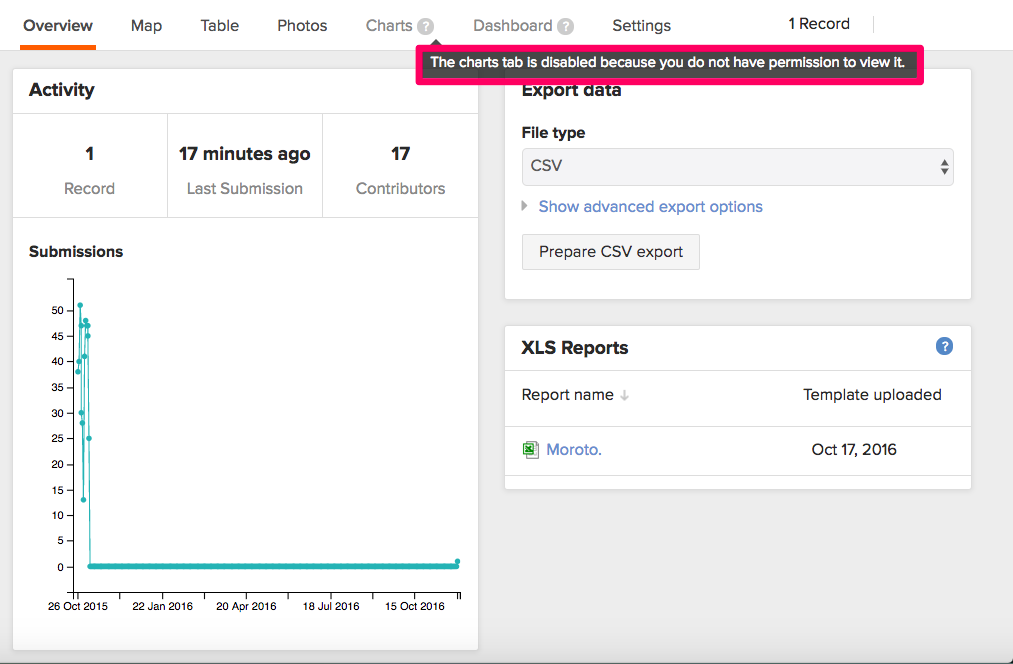
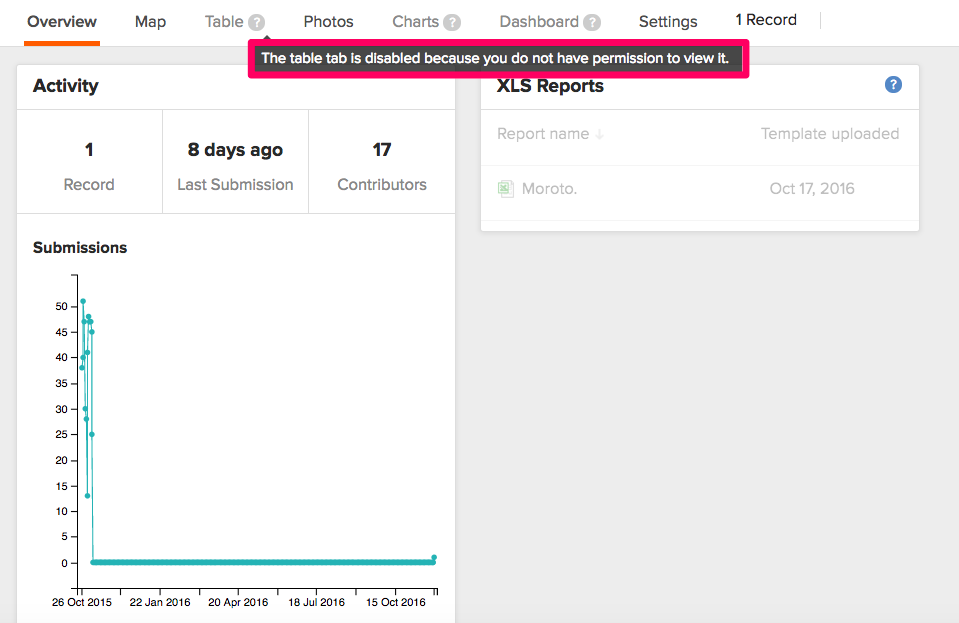
Users with Can Edit and Can Submit permissions with Block access to data submitted by other users selected can only export data and view the data they submitted in the Table tab. The Charts and Dashboard tabs will be disabled, as shown below.
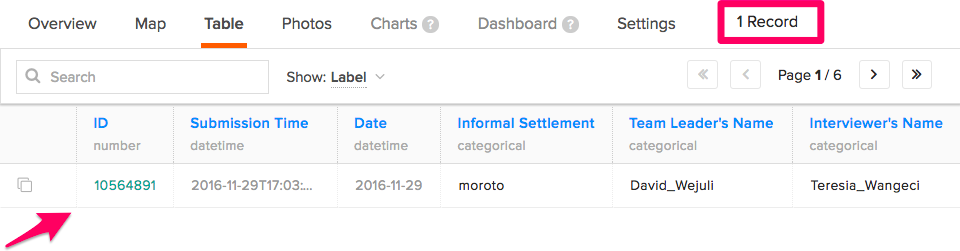
The table below shows users with Can Submit permission but are blocked from accessing data submitted by other users. They can only access data submitted by them.
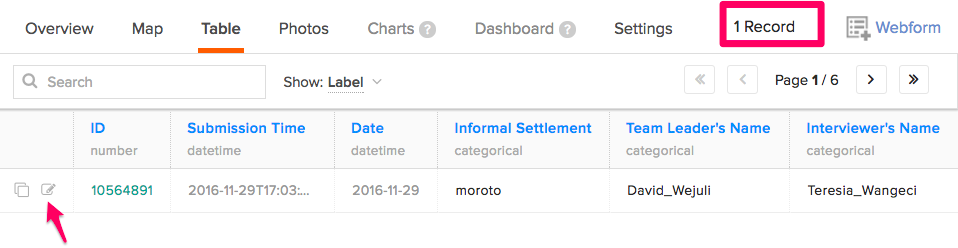
Users with Can Edit permission but have been blocked to access data submitted by other users can only edit data submitted by them as shown below.
Blocking access to all data is not an option for users with the Can Edit permission level, since you have to have access to data in order to edit data. For users with Can submit permission and have been blocked from accessing all data, they will not have access to any data as shown in the screenshot below.
What non-admin users see on the permission restriction options
Only the Admin of a project can set these restrictions in both personal and organization accounts. A user with lesser permission will not be able to change the restriction and will see a notification when they select the Permission Restrictions settings, as shown below.
Note:
- When using Enketo, the account Admin will need to turn on the account’s Require Phone Authentication feature to ensure that users authenticate when submitting data to forms in the account. This will allow the ‘submitted by’ field to be populated with the username. Please note that require phone authentication can only be turned on for the entire account and not just for one form. You can set this by following the steps below:
- Go to https://company.ona.io/
- Log in using your Ona account credentials.
- Select the Settings option under your profile.
- Check the Require Phone Authentication option.
- Select Save Changes.
- If a project or form is public, the permission restrictions will be overridden, and the forms will be accessible by anyone. These permissions only apply to private forms.