Enketo vs. ODK Collect
There are two options that Ona users have for data collection: Enketo Smart Paper and ODK Collect.
Enketo is a web application that works on any modern web browser (although we highly recommend the Chrome browser), while ODK Collect is an Android application that can be installed on any Android smartphone or tablet device.
![]()
Enketo and ODK Collect can work in tandem, meaning that a single form can be deployed at the same time with Enketo and ODK Collect; there is no need to author separate forms for each. This guide walks you through the steps for collecting data in both Enketo and ODK Collect. Whether you use Enketo or ODK Collect (or both) is primarily based on your data collection and user needs.
Collecting data offline
Both Enketo and ODK Collect work offline, meaning that users can launch forms and collect and save their data without an internet or data connection.
Using Enketo
An introduction to Enketo
Enketo is a lightweight web application that is used for data entry in Ona. Enketo forms, also known as webforms, launch in your computer or mobile device’s web browser. Along with ODK Collect, Enketo is a major component of Ona’s ecosystem that, together with XLSForm authoring, provides a complete solution for collecting data and sharing information.
Enketo has the following key features:
- Offline capable – Enketo webforms can be filled with data and saved without an Internet connection. Once a webform is opened online for the first time, a copy of the webform is stored inside the web browser. The user can bookmark the webform, and from then onwards be able to access it with or without an Internet connection. Data that is entered while in offline mode is safely stored in the web browser until the user is able to connect to the Internet and upload the records later on. Users can safely close their web browser or computer without it affecting their saved data. Your data is deleted from the web browser only after the record is successfully submitted to the server.
- Print-friendly forms – Enketo can automatically generate a print-friendly version of each form for traditional data collection with paper and pen, without the need to maintain a separate paper version of the form.
- Low technical requirements – The only requirement to use Enketo is access to a modern web browser. One can deploy Enketo webforms easily and quickly on any laptop, computer or smart mobile device.
Opening an Enketo form
Once you have successfully added a form to your Project on Ona, you can immediately open it in Enketo webforms and start collecting data following the steps below:
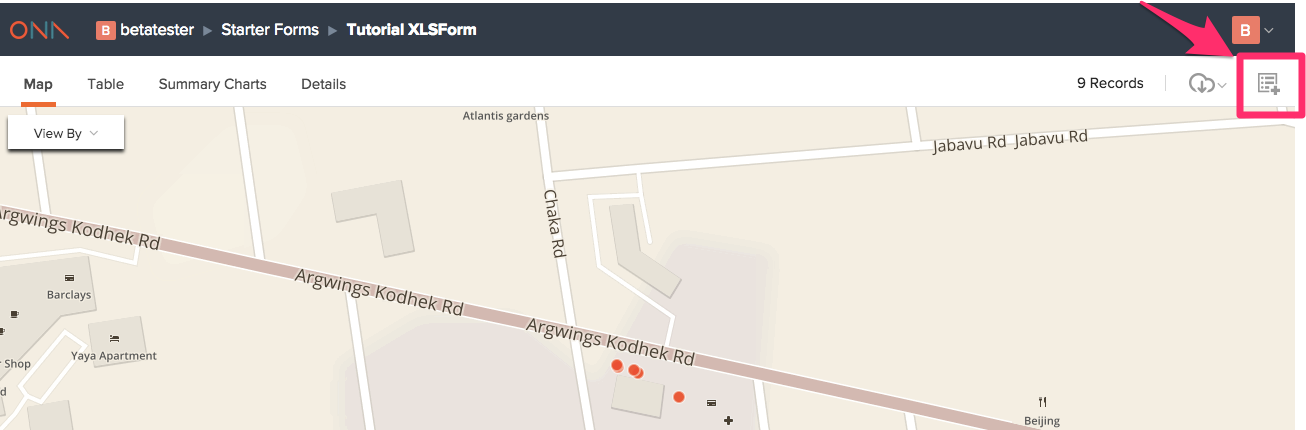
From the list of Forms in your Project, click the Webform icon next to the name of the form you wish to open.

You can also open the webform at any time from the form data page.
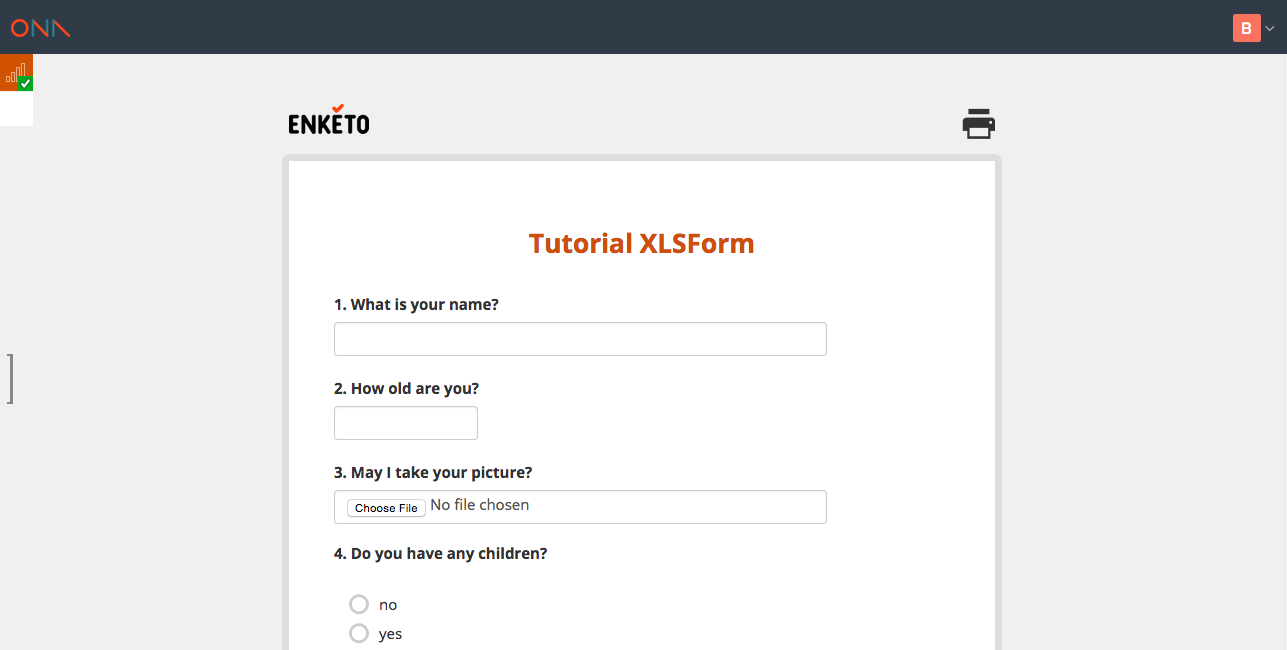
The webform will open in a new browser tab.
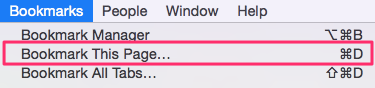
If this is the first time you are opening the form, make sure you bookmark it for easy offline access. In Chrome, you can do this by going to the Bookmarks menu and selecting Bookmark This Page…
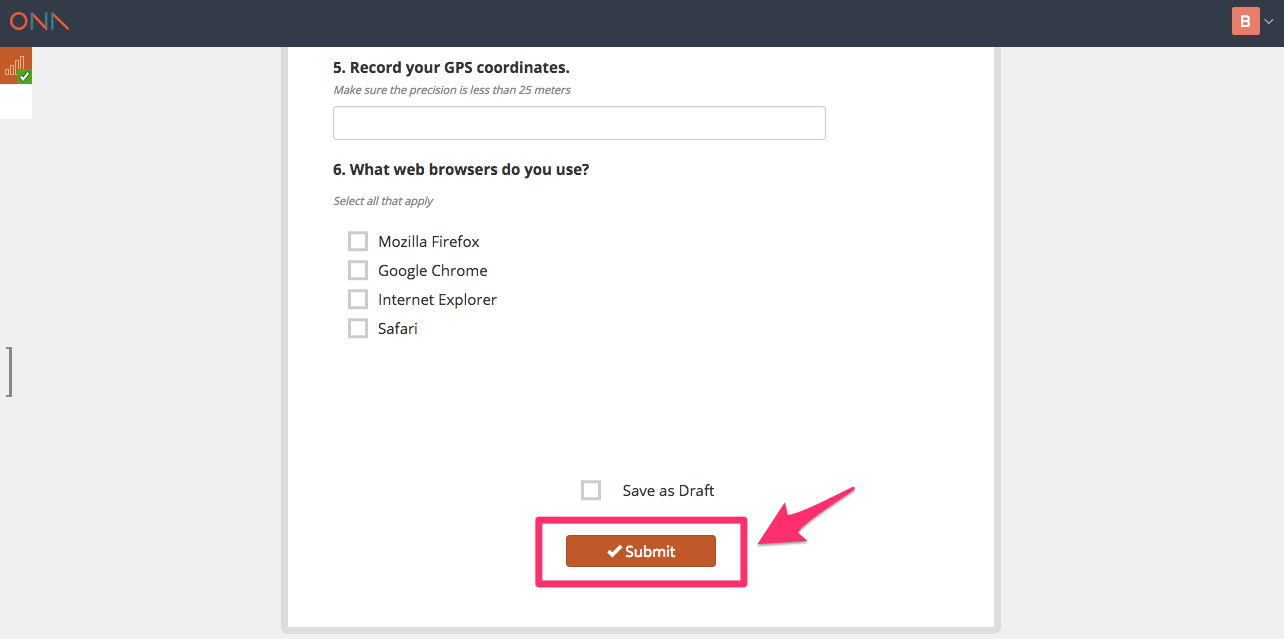
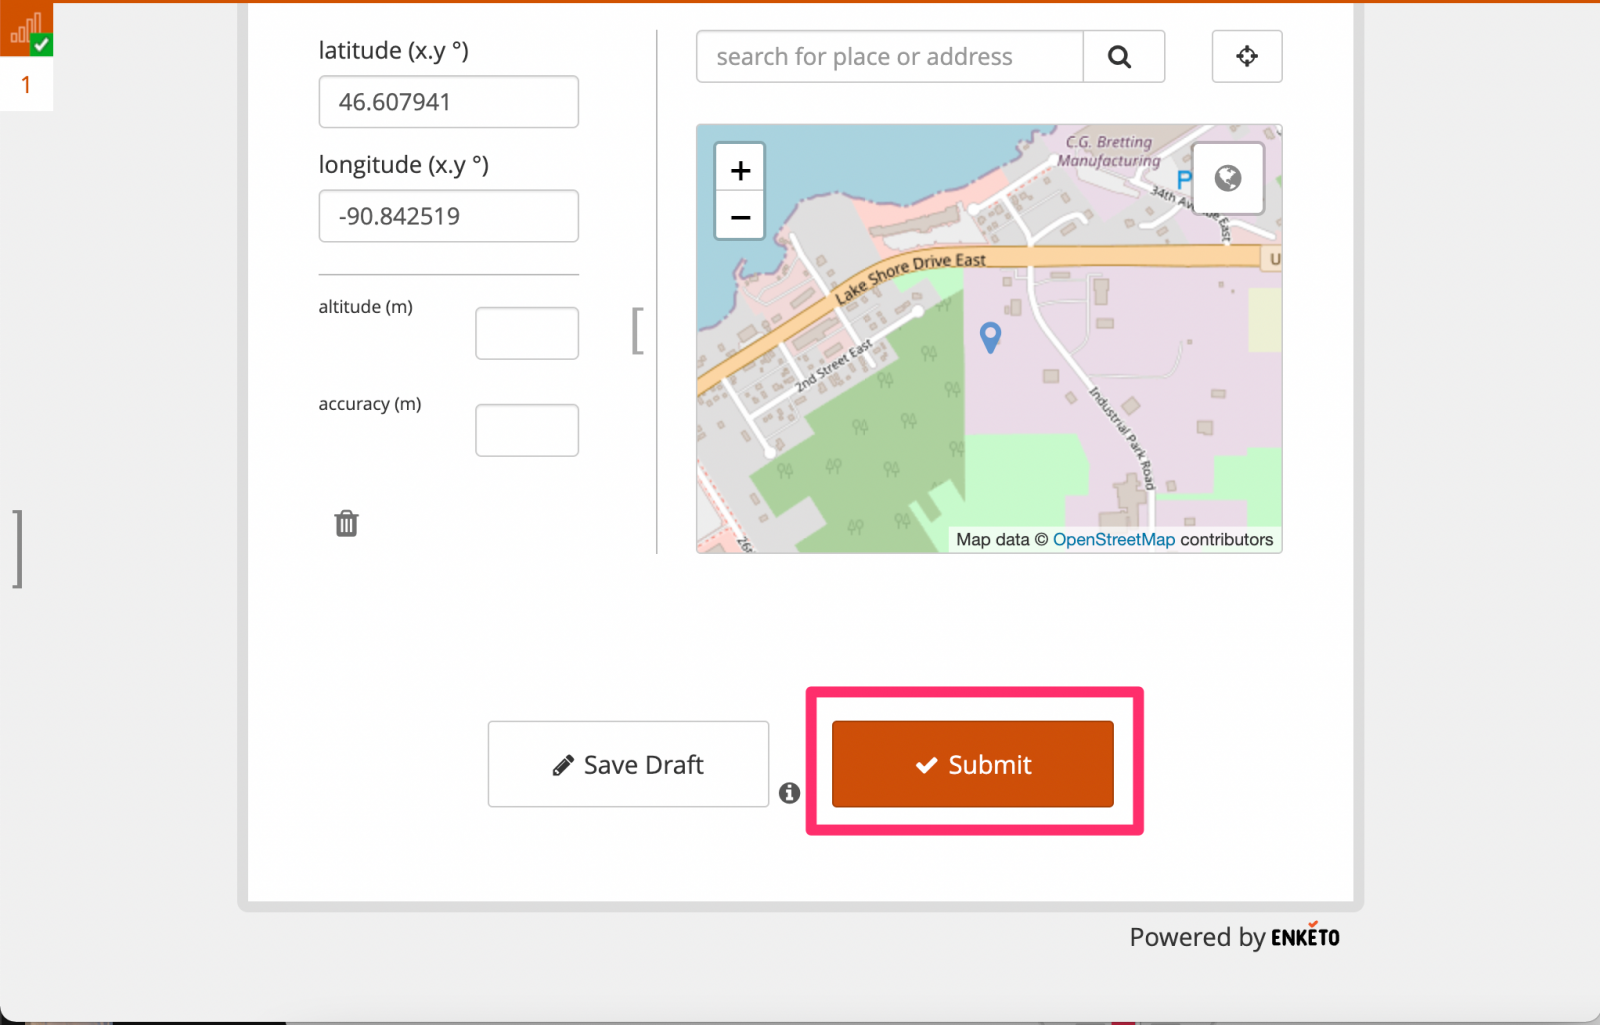
When you’re ready, start entering data into the webform. When you reach the end of the webform, click on the Submit button to save your form and submit it to the server. If you do not have an Internet connection at the time, the form will be saved and queued in the web browser and uploaded automatically when an internet connection is available. If there is more than one record queued for submission in the web browser, the records will be submitted automatically, one by one, when an internet connection is available.
Queued records
These are the records that are stored inside your web browser until there is an internet connection whereafter they are uploaded to the server. They remain there even if you go offline or if you shut down your computer, device or laptop.
Queued records can be seen on the webform’s side bar with a list of records and their upload status.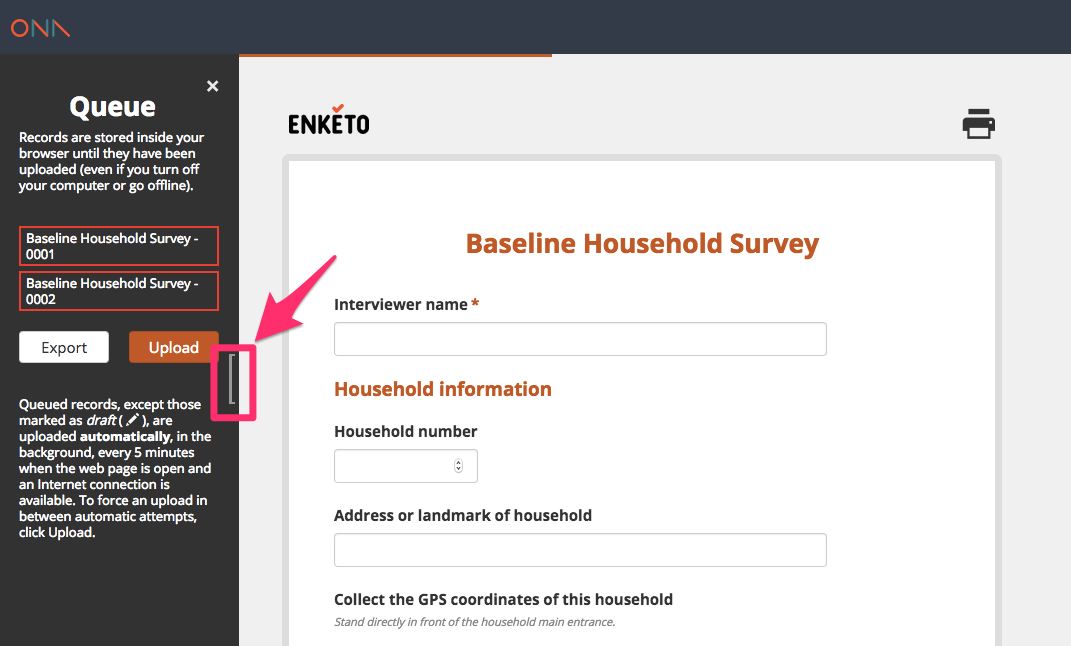
Note:
It is highly recommended, however, that you do submit or export your saved form records as soon as they are finalized. If your browser data/cache is cleared before you are able to submit or export your saved records, you risk losing your data. Be especially cognisant of this if you are not using a personal laptop or computer, as many public desktops have pre-installed software that intermittently clears website and browsing data from the computer, which would erase any saved records you have stored in the web browser.
To reveal the queued records:
- Click on the Records Queued icon;
- A record’s border will turn orange when an upload is going;
- When an upload succeeds, the border turns green, and then the record disappears from the queue;
- The record turns red if an error occurs, an error message is briefly shown underneath. The error message can be revealed and hidden at any time by clicking the record.
Queued records are uploaded automatically in the background, every 5 minutes when the web page is open and an Internet connection is available.
To force an upload in between automatic attempts, click Upload as shown below:
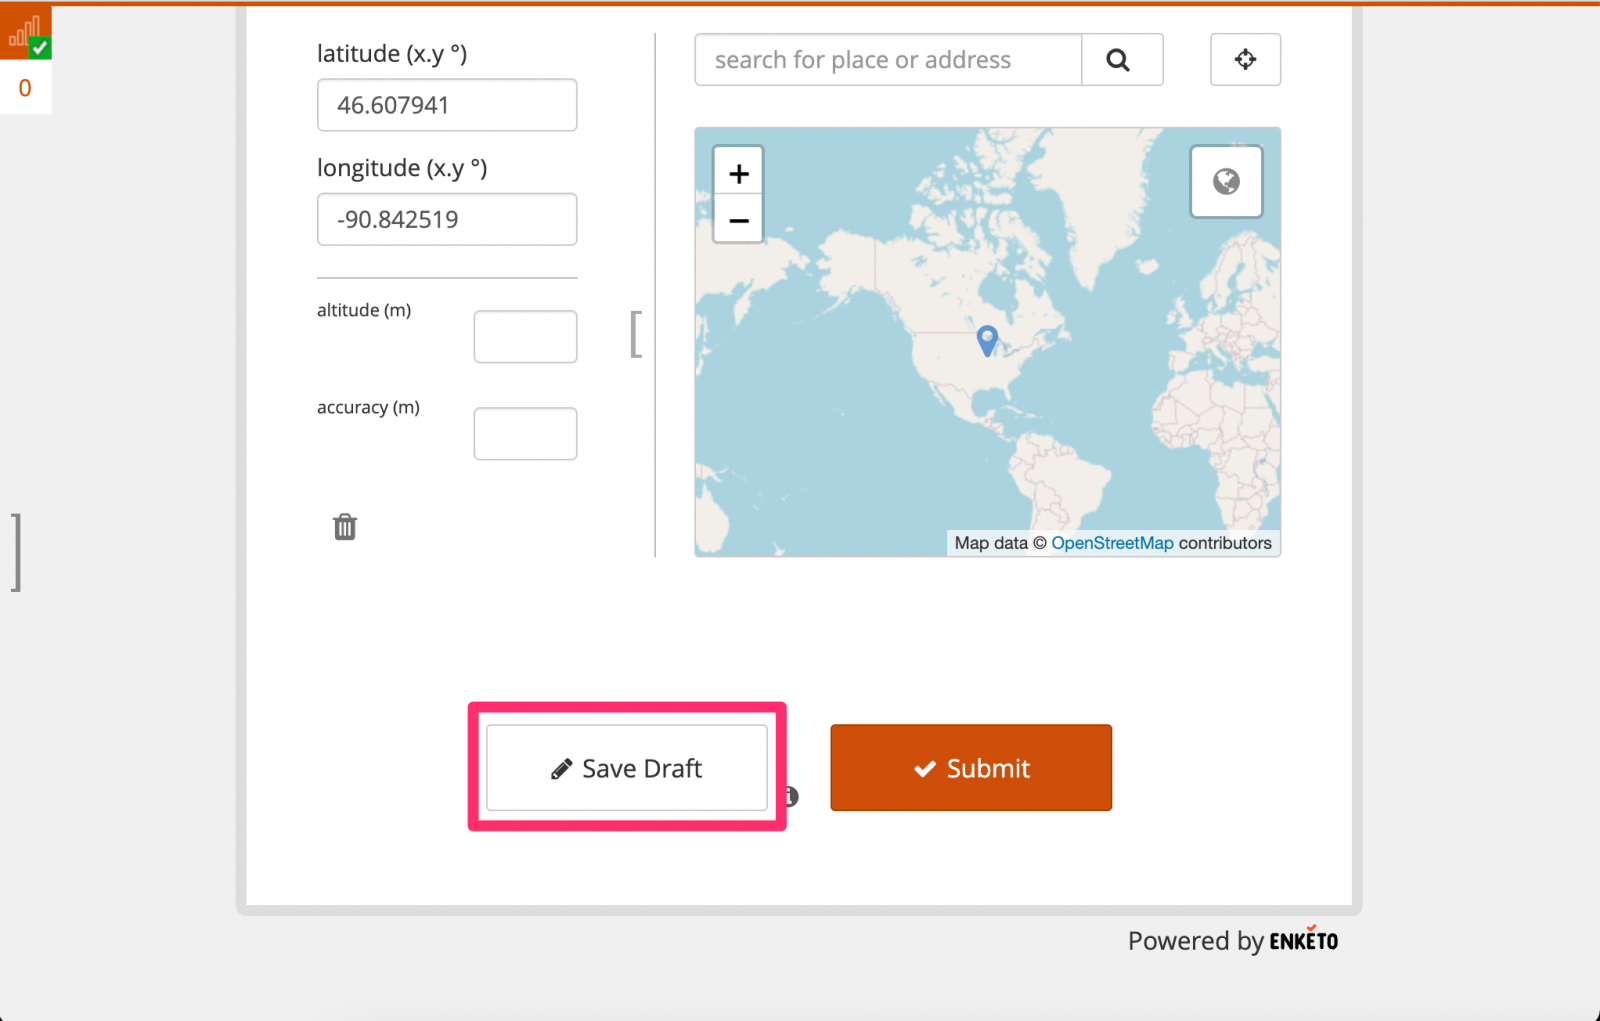
Saving drafts
If you are not ready to submit your form, you can save the form as a draft that you can open and edit later.
- Click on the Save as Draft button next to the Submit button.
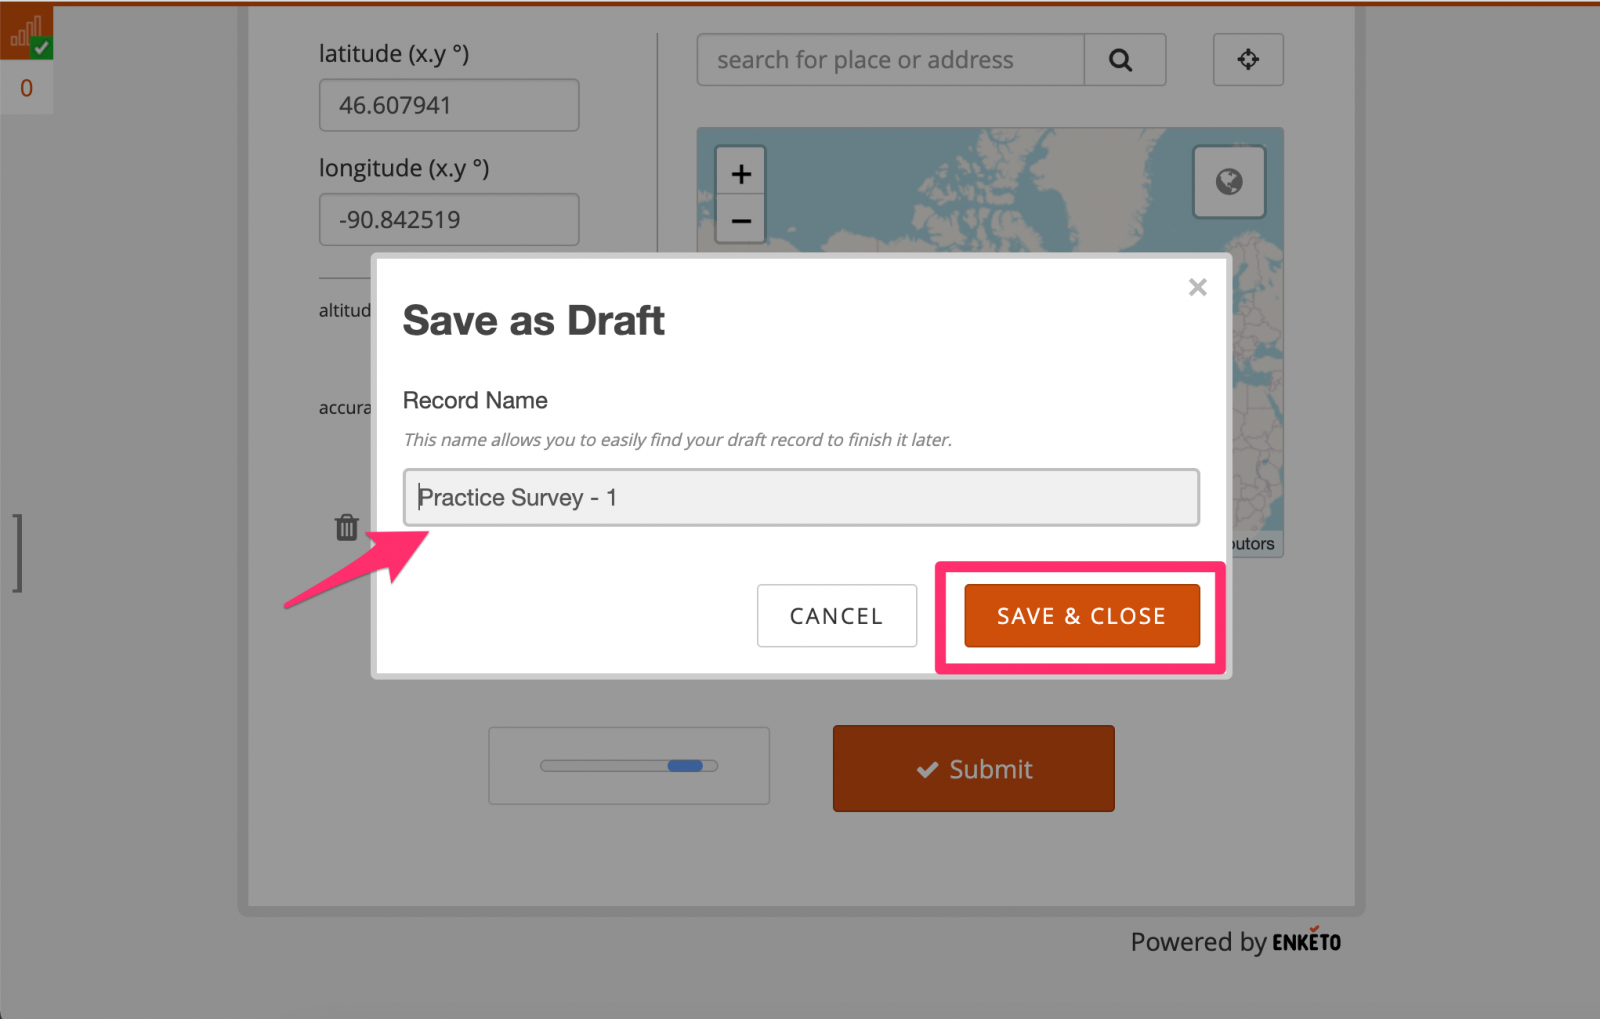
- A dialog box will pop-up prompting you to enter the Record Name to make it easy to find a draft record later in a long list of records. The name exists locally in the browser storage only and will not be transferred back to the server. Type the record name, then click on the Save & Close button.
To load the draft record:
- Click on the Records Queued icon.
- In the sidebar, click on the record that has a small pencil icon. A notification message will pop up to notify you that the draft record has been loaded on your browser.

- Continue filling out the form. Then, finally, click on the Submit button to upload the record to the server.
Note:
When a record is saved without marking it as a ‘draft’, it is considered cleared for uploading as soon as an internet connection is available.
ODK Collect
Open Data Kit is a free and open-source set of tools that help organizations author, field, and manage mobile data collection solutions.
ODK Collect is used to collect the data on a mobile device and send it to an aggregate server such as Ona.
Ona being a mobile data collection tool uses ODK Collect to download already designed surveys and allow submission of the finalized forms back to Ona. For one to be able to use ODK collect, the application must be installed on an Android device.
Installing ODK Collect
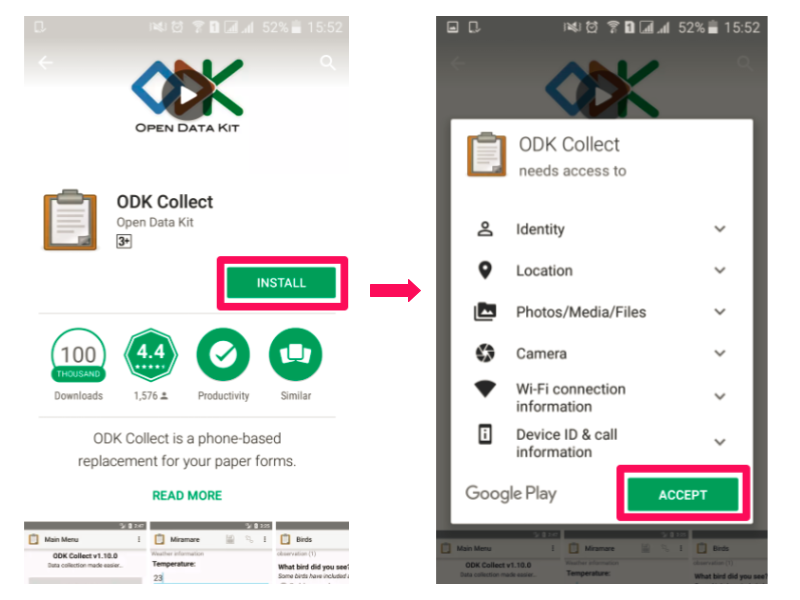
Below are the steps follow when installing the ODK collect App:
- On your Android device, go to Google Play Store and search for the latest version of ODK Collect
- Tap, Install then Accept, to start the download;
Configuring ODK Collect with your Ona account
After installing ODK Collect, the next step is to configure the application to your Ona account. The Url https://odk.ona.io must be given to ODK Collect before you get forms from and submit data to Ona.
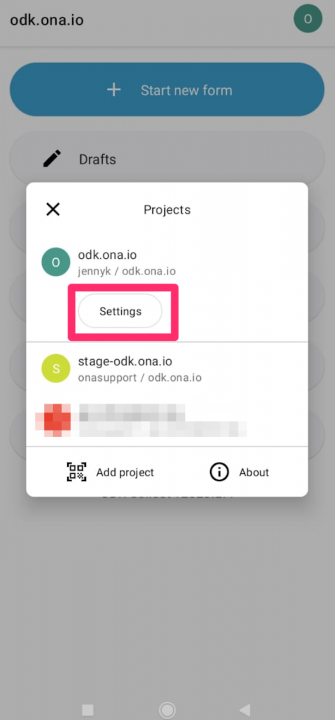
- In ODK Collect’s Main Menu, press the Menu button on your device (note: the menu button location can vary by device),
2. Tap on settings,
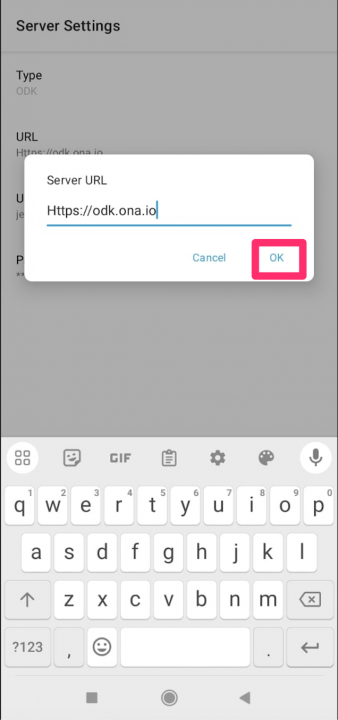
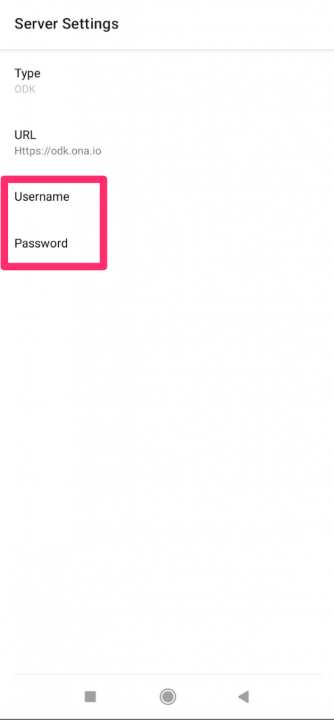
3. On the page that opens, tap on Server,
4. Under Server Settings tap on URL then enter https://odk.ona.io as the URL then press OK;
5. Similarly, select Username and enter your Ona username, then select Password and enter your Ona account password.
The video tutorial below demonstrates how to go about this process:
Configuring ODK Collect using QR Codes
Configuring using QR codes can be used to quickly set up a large number of devices or a single device with the same server setting, reducing time and errors. A user can quickly scan the QR for multiple devices or share a QR code via email, WhatsApp, social media, or SMS. QR code can be used to configure ODK Collect only at the project level. QR codes can be scanned to add a new Project, or they can be scanned to reconfigure the current project.
Project-Level configuration
To configure ODK Collect, follow the steps below:
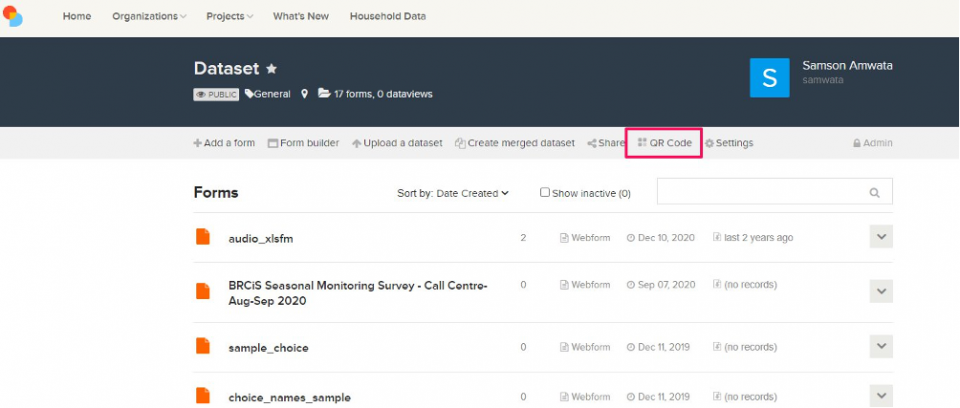
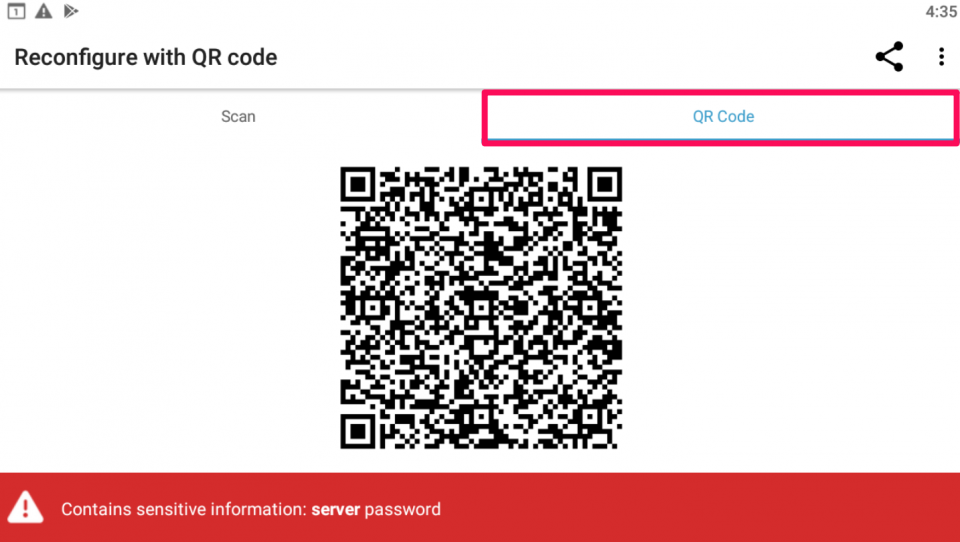
Open the project with the forms you would like to configure ODK Collect with using a QR code. Then, click on the QR code as shown below.
The QR Code configuration page will open that has the QR Code and selections to customize your QR code configuration in ODK collect.
You are required to click on Use my account details to make submissions (verification required) checkbox so that you can enter your account credentials that will be integrated in your QR code.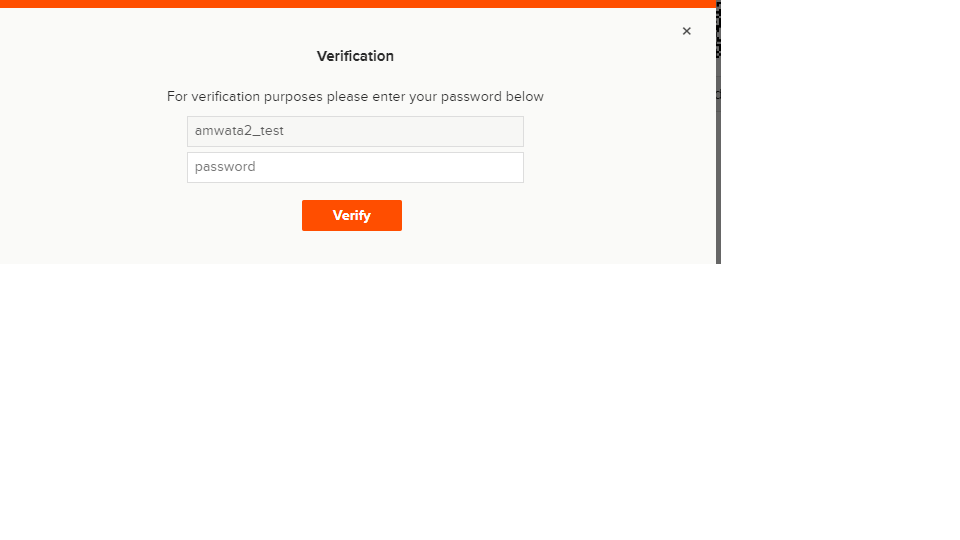
This will enable users to automatically download forms without being required to sign into any account if they use the QR Code. If you don’t check this checkbox and use the QR code as it is, then the users will be prompted to enter account credentials when scanning the QR code in ODK Collect.
You can update the QR code configurations, also called form management configurations in ODK Collect if you want to add more settings to your QR Code.
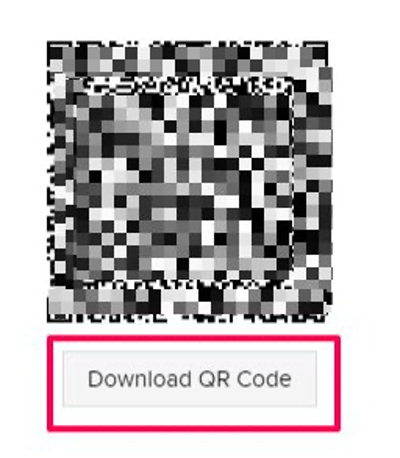
The QR code can be used as it is displayed on the screen in ODK Collect or you can download the QR code to reference later or share by clicking on the Download QR Code.
To scan the QR code with Collect, go to ODK Collect’s Main Menu and press the Menu button on your device. The menu button location can vary by device.
There are two ways to add a QR code configuration, using the Add project button or by navigating to Reconfigure with QR code in Project Management settings.
a. Configure using Add Project
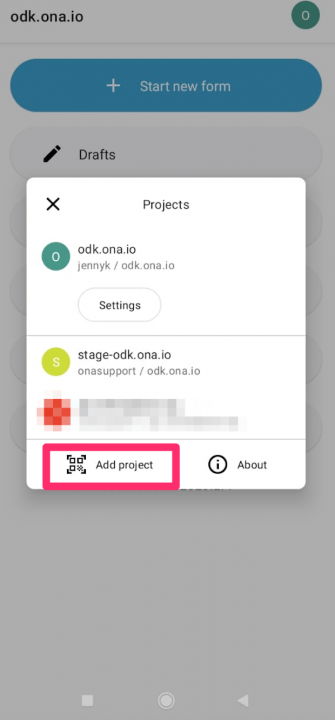
After clicking on the menu button, tap on the Add project button.
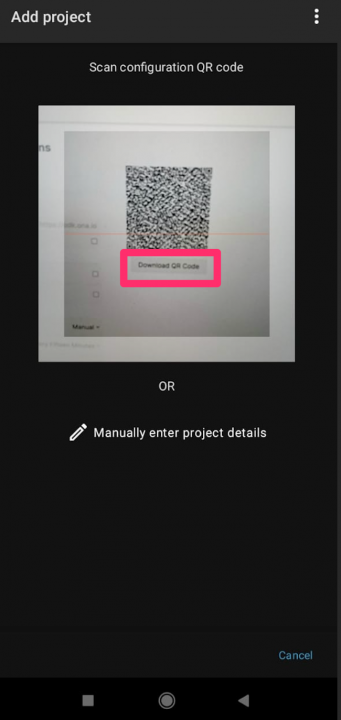
A QR code scan page will open where you will scan your QR code from the Ona Data project page or from a downloaded QR code image.
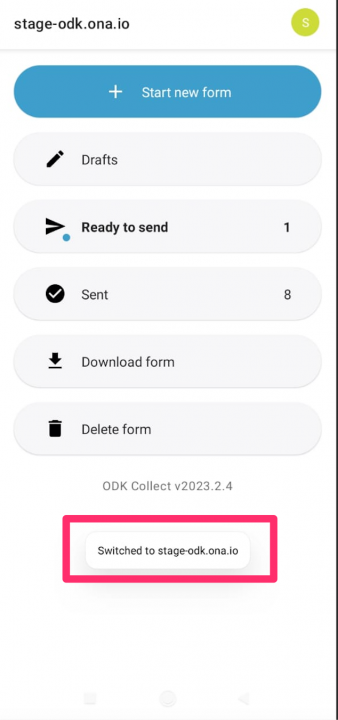
You will get a notification that a project has been added successfully and the ODK settings will switch to the project.
a. Configure using reconfigure with QR Code
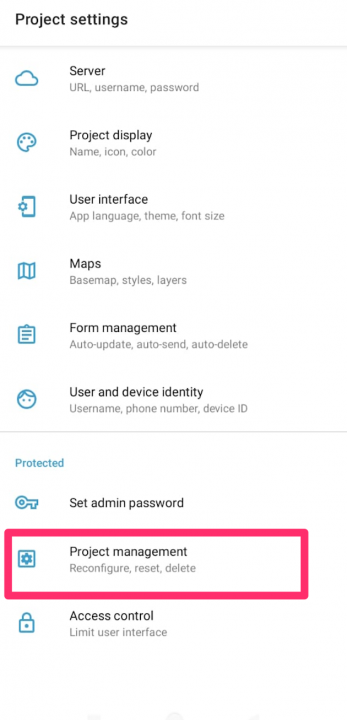
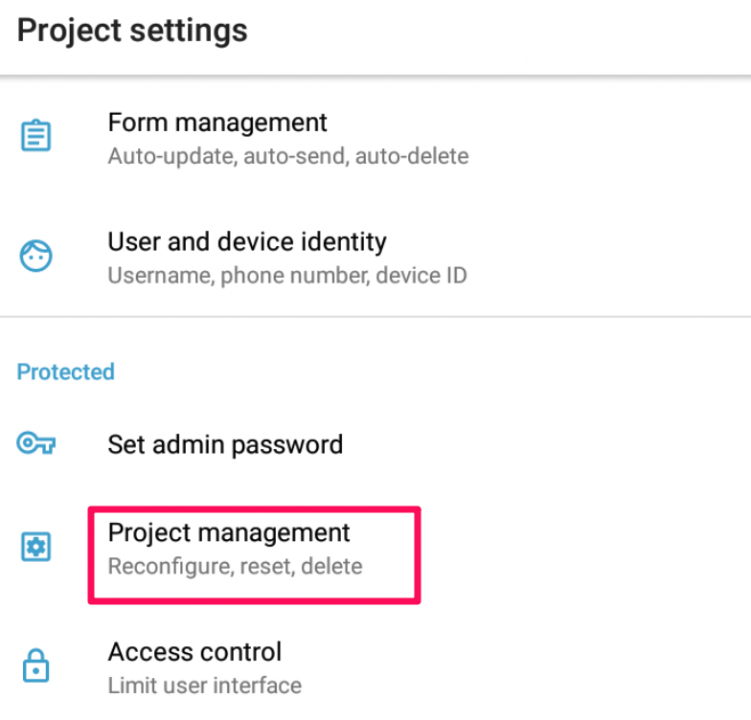
After clicking on the menu button, tap on the Settings button.
Click on Project Management to reconfigure, reset, and delete the existing configuration.
Click on the Reconfigure with QR code to replace existing settings. If there are no settings, it will create a new configuration.
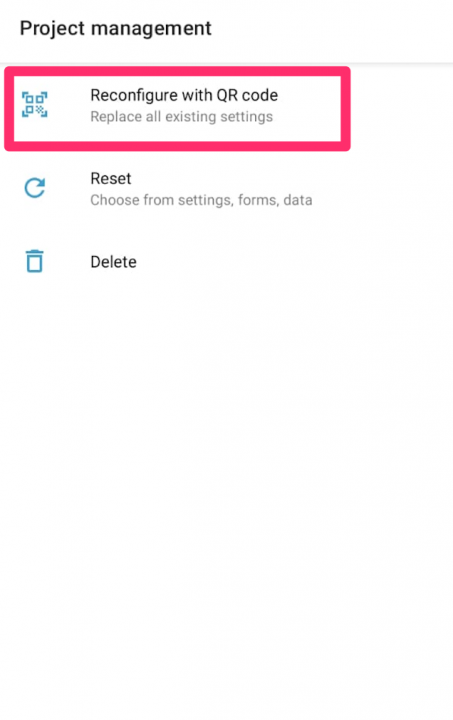
A QR code scan page will open where you will scan your QR code from the project page or from the downloaded QR code image. After a successful scan, the project configuration will be updated, and you will receive a notification as shown earlier.
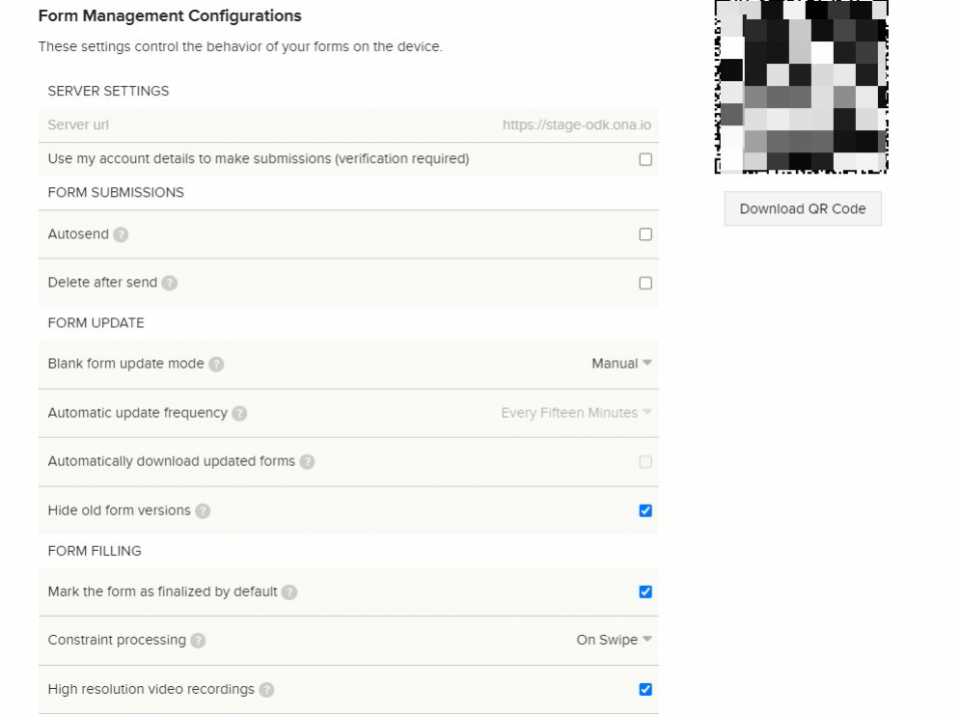
Form management configuration options
Before scanning the QR code, you will notice that there are some form management configurations based on the ODK Collect configuration you can set before sharing the QR code:
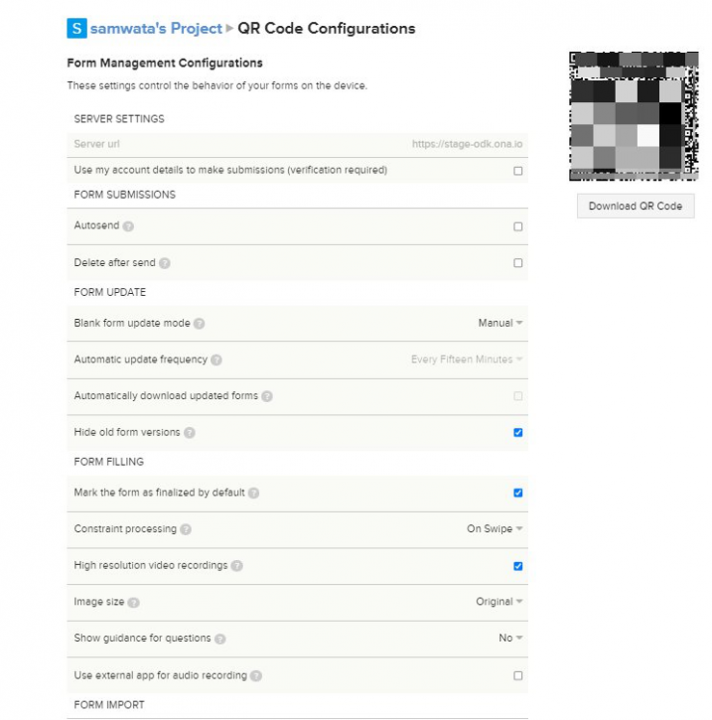
Server url – This is read-only and set based on the Ona Data instance you are using. For Ona Data (ona.io), this will be https://odk.ona.io.
Use my account details to make submissions (verification required) – This should be selected if you would like to automatically set your credentials, which are required to send submissions. You will need to verify your password before you can select this option.
Autosend – If this is checked, ODK Collect will send submissions automatically for all forms that have been marked finalized.
Delete after send- If the selection is checked, it will automatically delete all submissions after they have been successfully submitted to the Ona Data platform.
Blank form update mode– This setting determines how new/updated forms are downloaded, and it has three options: Manually, Previously Downloaded, and Match Exactly.
Automatic update frequency- This setting determines the frequency forms are updated, either 15 minutes, 30 minutes, 1 hour, 6 hours, or 24 hours. It depends on the Blank form update mode setting when it is set to Previously Downloaded or Match Exactly.
Automatically download updated forms – If the selection is checked, ODK Collect will update downloaded forms with new form versions. It depends on the Blank form update mode setting when it is set to Previously Downloaded.
Hide old form versions – This setting is selected by default to hide old form versions when the form has been updated on ODK Collect.
Mark the form as finalized by default- When selection is checked, ODK Collect marks the form as finalized by default when you go through the survey until the end.
Constraint processing – This setting determines whether constraints are evaluated after a swipe, moving to the next screen in ODK Collect, or on finalizing the form i.e. it allows you to set whether constraints are evaluated on swipe or on finalize. By default, it is set to swipe.
High-resolution video recordings- When the setting is checked, videos are recorded on high resolution. It is set to true by default.
Image size – This setting determines the size of images in the form. It is set to Original by default. However, you can set it to very small, small, medium or large.
Use external app for audio recording – Check this setting if you want to use a different app to record audio.
Finalize forms on import – This setting is selected by default. When the option is enabled, forms added directly to the instances/ directory are automatically set to Finalized, relevant for encrypted forms
See ODK Collect form management settings for more information.
Downloading forms to your phone
After configuring ODK Collect to your Ona account, you can now download forms to your phone or device. You can download forms from projects you’ve created (are an owner of) or shared with you and have been assigned Can Submit or a higher permission level on that project. Please read this blog post for more information on user permissions in ODK Collect.
Make sure you have an internet connection before proceeding with the following steps:
-
-
- Confirm you have the correct server configuration (as explained in Configuring ODK Collect with your Ona account.
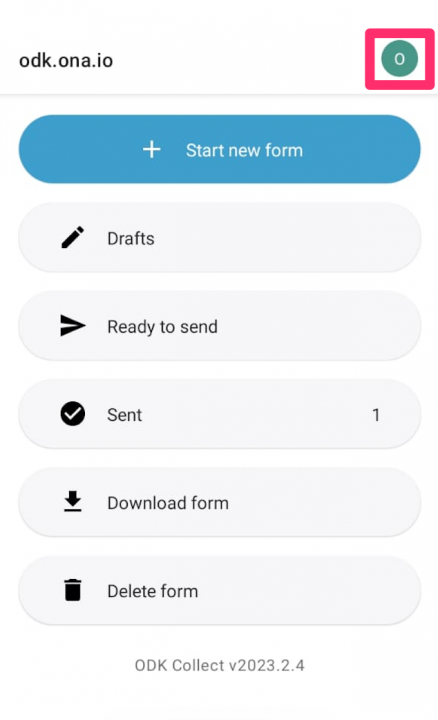
- Go back to ODK Collect’s Main Menu and click on Download Form;
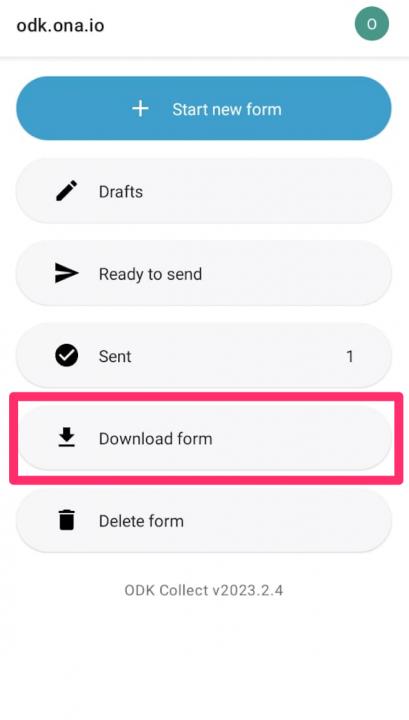
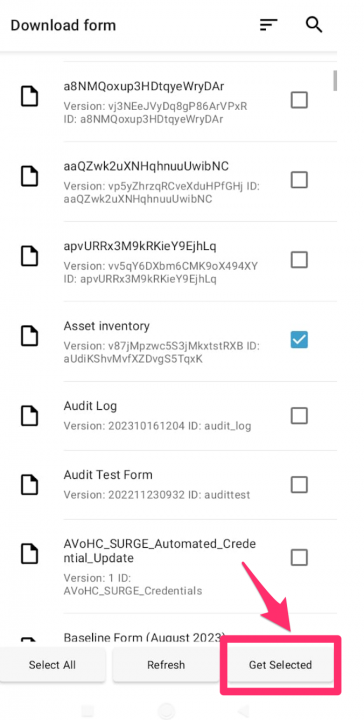
- All of the published and active forms from your Ona account will be displayed. Tap on the checkbox next to the form(s) you want to download, then tap on Get Selected to download the form(s) to your device;
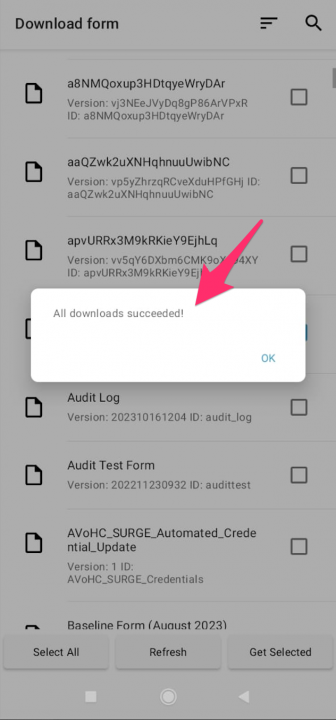
- The download result will pop up in a window. Click OK. You’re ready to start collecting data!
-
The video tutorial below demonstrates how to go about this process:
Fill Blank Forms
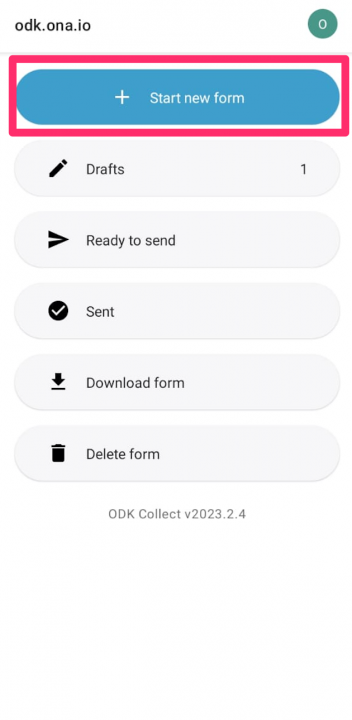
Once you have downloaded the forms to your device, you’re ready to start collecting data. Tap on Start New Form and select the form you’d like to complete.
Review Responses
Once you have completed your survey, you can review and edit the fields of your form to check for errors before saving. Tap on the Go to prompt icon, and scroll up and down to review all your responses.
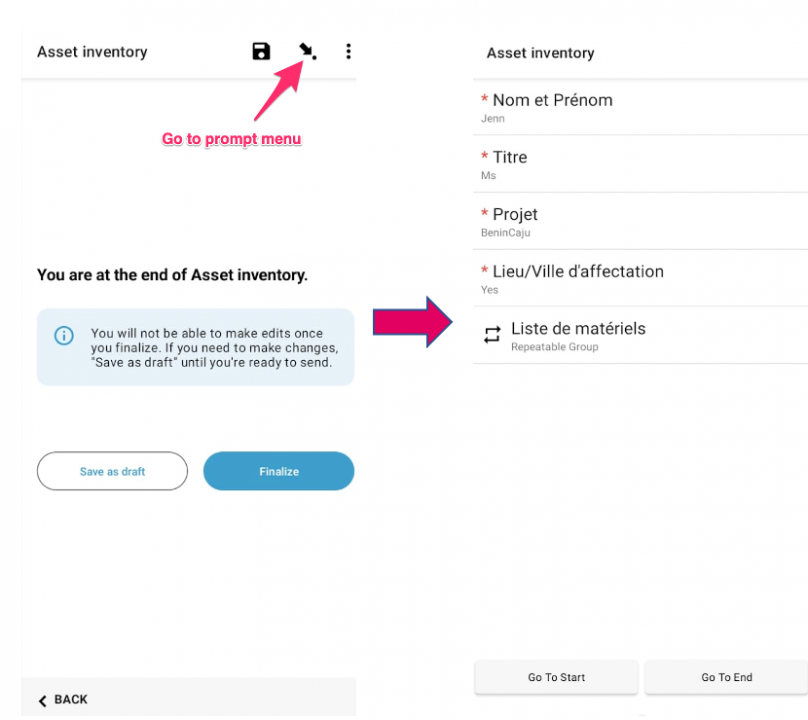
Note:
Use Go to prompt function at any time when filling your form to go to the end of the form.
Edit Saved Forms
Forms that are not marked as finalized are saved as drafts in the Drafts menu in ODK Collect. From the home screen in ODK Collect, you can see the number of saved draft forms in parentheses.
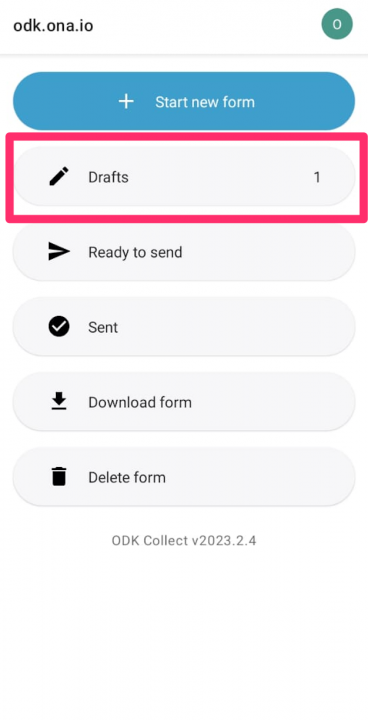
Tap on Drafts. You’ll see a list of your saved draft forms. You will also see any forms that were marked as finalized but not yet submitted to the server. Tap on the name of the form you want to edit. Once you are finished editing your form, you again have the option to mark the form as finalized before pressing Save Form and Exit.
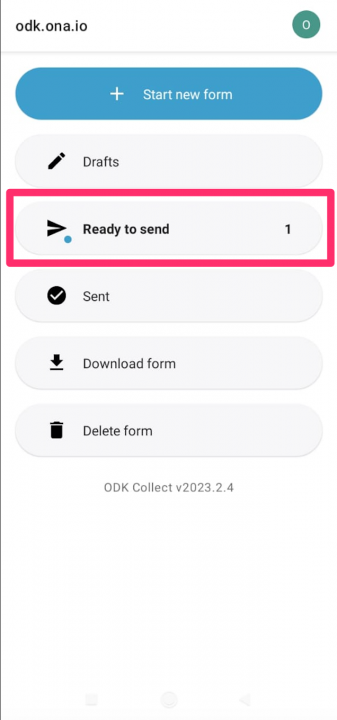
Send Finalized Form
Forms that are marked as finalized appear in the Ready to Send menu in ODK Collect (note: forms marked as finalized can still be edited from the Drafts menu up until they are successfully submitted to the server).
Once you have established an internet connection and are ready to submit your form to the server, tap on Ready to Send from the ODK Collect main menu.
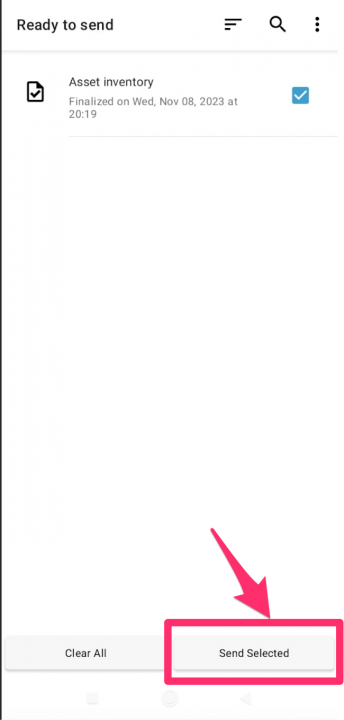
Check the form(s) you are ready to submit to the server and tap on the Send Selected button.
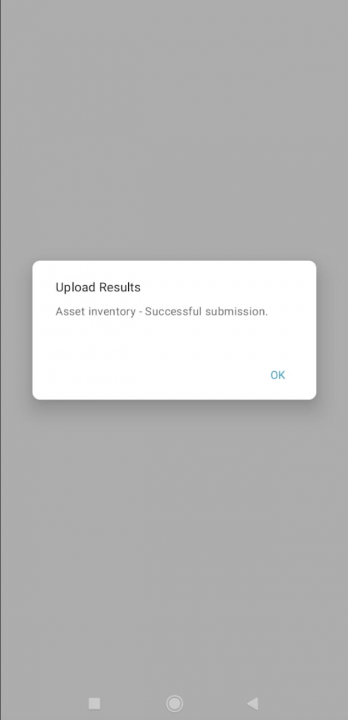
Upload results will pop up in a window to show if the form has been successfully uploaded to the server.
Note:
If you are having difficulties submitting your forms to the server, check your internet connection. For persistent connectivity problems, consider using ODK Briefcase, which can be used to extract form submissions from a mobile device without an internet connection.
The video tutorial below demonstrates how to Fill Blank Forms, Edit Saved Forms and Send Finalized Forms.
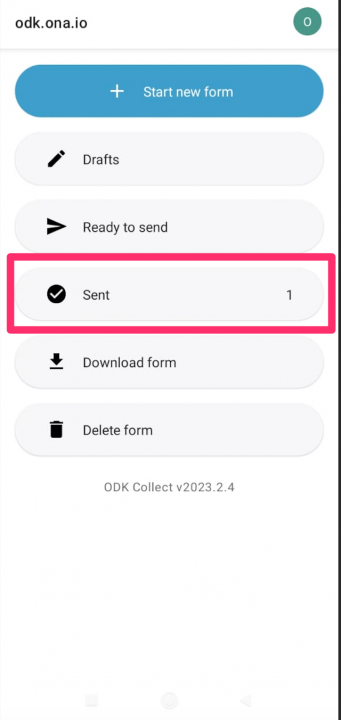
View Sent Forms
Forms that have been submitted successfully are saved in the Sent menu in ODK Collect. Tap on Sent to see the forms you have submitted. Tap on the name of the form you want to view. You will see the responses entered in the form.
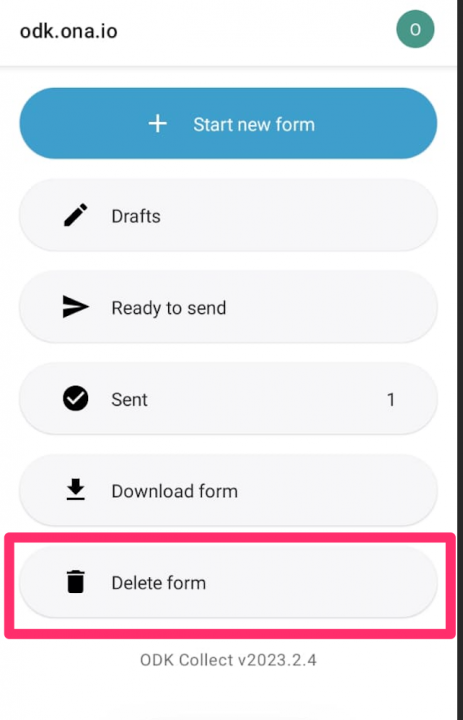
Delete Forms
Deleting forms is done through the Delete Form menu in ODK Collect.
On the Saved Forms tab, you’ll find a list of all forms that were submitted to the server as well as all forms currently saved as a draft in ODK Collect. To delete each form instance, mark the checkbox next to the name of the form and tap Delete Selected.
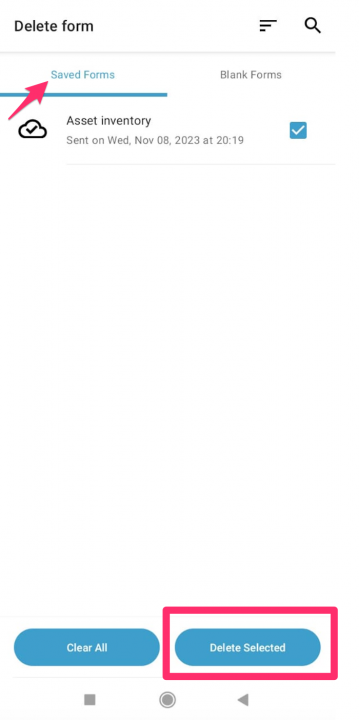
Note:
Deleting a form only deletes it from the phone; it does not delete the form submission from the server, if it was already submitted. Be cautious when deleting saved form drafts, as this cannot be undone. One can distinguish between saved forms and sent forms by reading the Saved on… vs. Sent on… date underneath the form name.
On the Blank Forms tab, you’ll find a list of all blank forms currently downloaded on your phone. To delete a blank form instance, mark the checkbox next to the name of the form and tap Delete Selected.
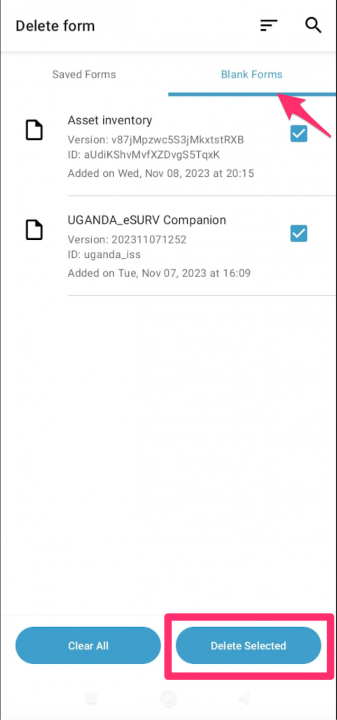
A dialog box will pop up prompting you to confirm the deletion; tap Delete Forms to continue.
The video tutorial below demonstrates how to View Sent Forms and Delete Forms.
Hint:
It’s a good idea to delete an older version of a form before downloading a new version of the same form to your phone. This will help prevent users from opening and entering data in the wrong version of the form.
Note:
Once you delete a form, it will no longer be on your phone, you will lose it forever!
Tips on using ODK Collect
ODK Collect has a number of user settings that can be adjusted to better meet the context and needs of a project or simply a data collector’s personal preference. While this list is by no means exhaustive, we’ve found that the following features have been very useful for our users.
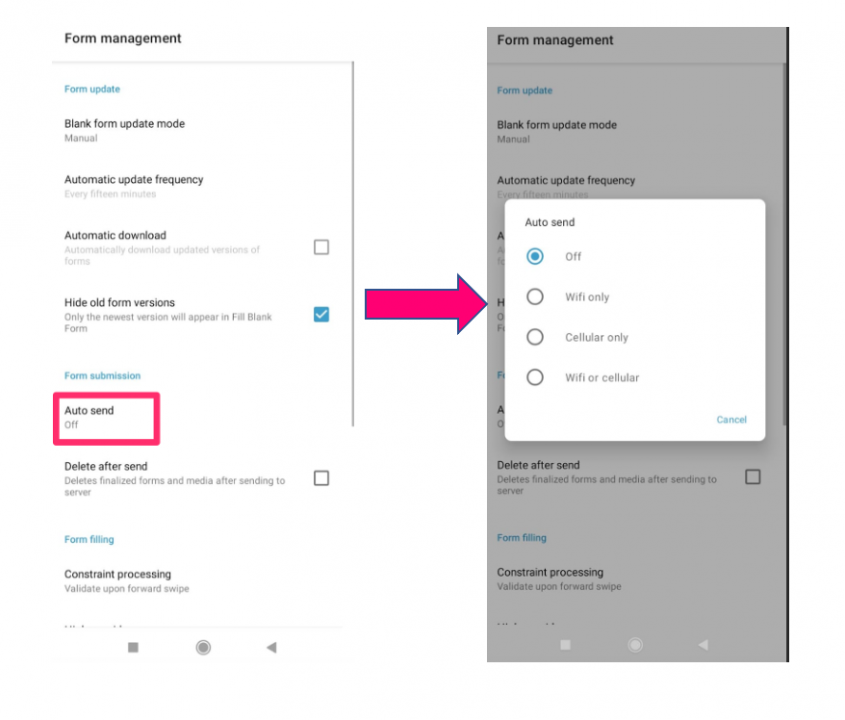
Auto-sending of finalized forms
This feature enables you to automatically send finalized forms to the server as soon as there is an internet connection. This feature works even if you’re not currently using ODK Collect.
Once enabled, auto-send will attempt to send forms to the server automatically once they are marked as finalized and saved, essentially allowing the user to bypass sending the forms manually through the Ready to Send menu. If there is no internet connection, ODK Collect will retry sending the form at intervals until it succeeds.
To enable the auto-send feature, go to Settings in the ODK Collect main menu. Tap on Form management then tap on Auto send. Under the Auto send section, you can choose to auto send with Wifi only, Cellular only, and Wifi or cellular.
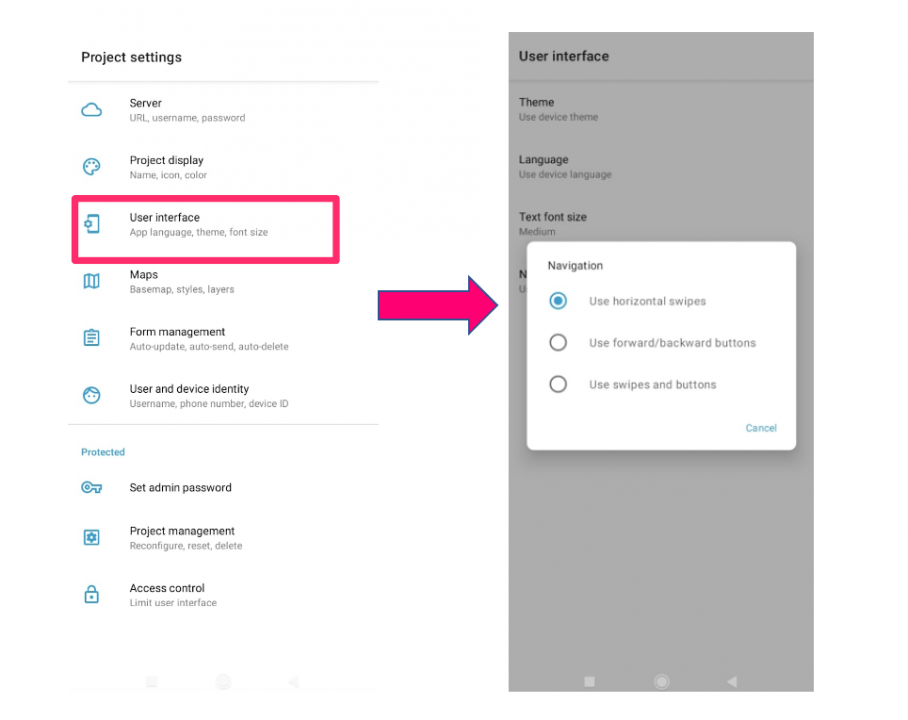
Navigation settings
One can switch between swipes and forward/backward buttons or both for navigation.
To change your navigation settings from ODK Collect’s General Settings. Under the User Interface section, tap on Navigation, you can choose to use horizontal swipes (default settings), forward/backward buttons, or swipes and buttons.
Bulk configuration of devices
This feature makes it easier to configure ODK Collect on many devices with QR codes. Instead of configuring one device at a time, you can easily configure all the devices at once.
- From ODK Collect’s Main Menu, tap on the menu button and select Settings;
- Under Settings tap on Project Management,
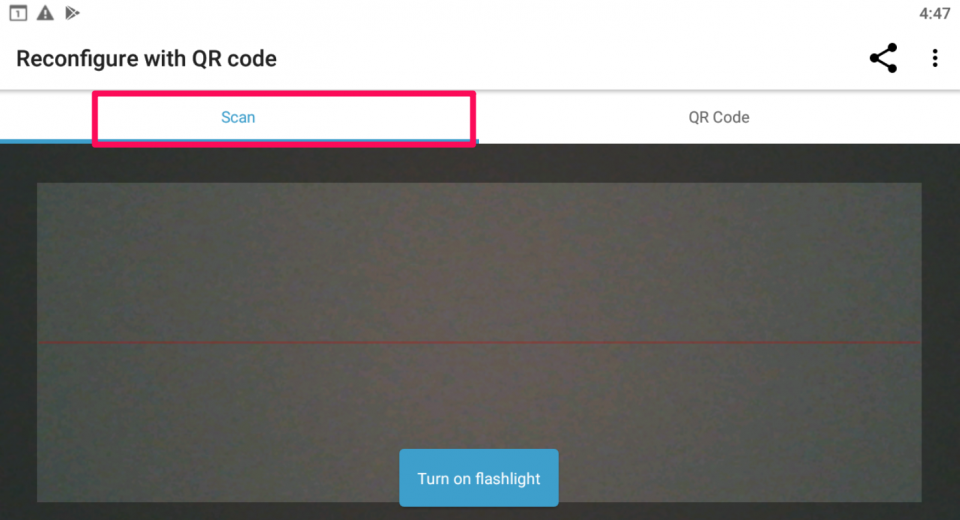
- Under the Project management tab on Reconfigure with QR Code you will see the Scan tab and the QR Code tab which has a QR code that represents all the settings of the device.
- Configure the other devices by opening up Settings, Project management, Reconfigure with QR Code then Scan code from other device. This launches a QR code scanner that you can use to scan the code from the reference device.
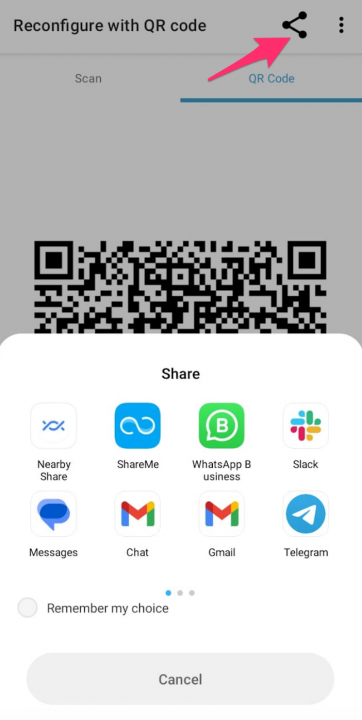
- You can also share the generated barcode as an image. Tap on the share icon under Import/Export Settings then choose how you would like to share it.
Follow the following steps to Scan the barcode to configure ODK Colelct to the Ona account,
-
- Click on the account menu
- On the page that will open, click on Add Project
- The screen where you are required to scan the barcode will open. Scan the barcode provided and you will automatically be authenticated to the account. After a successful scan, you will get a notification showing a switch to the specific project you have specified as shown in the screenshot below.