Locations can be identified by a name, an address, a landmark, etc. However, locations are more precisely defined by GPS coordinates or sets of GPS coordinates. Once the GPS coordinates of a location are collected, it can be difficult to get the same GPS to identify the same location again. It would be easier to select the location based on previously collected GPS. The Select Location widget allows users to visualize collected geopoints on a map to ensure they are at the correct location and to select a location by its GPS rather than its name, simplifying possible naming issues or duplicates. Users can also enhance information pulled from the location by adding additional properties to the GeoJSON
The Select Location widget can be used in a variety of ways to enhance and simplify your data collection. Some examples include:
- Mapping and selecting a location, like a health facility, school, or water point, rather than collecting the GPS coordinates at each visit hence improving data quality and location accuracy.
- Easily find a location near you while collecting data to make planning your data collection visits easier
- Provide additional context to data collectors, such as the total catchment population for a health facility.
- Pull information from a previous visit based on a selected map location to provide data collectors with additional information.
- And many others as the Select Location widget is enhanced
Creating an XLSForm using the Select Location Widget
Enabling the Select Location widget in your XLSForm is easy. There are two ways you can enable the Select Location widget on your XLSForm:
- Adding the geometry to your multiple-choice options
- Adding a GeoJSON file to your form media files
NOTE: In each way, you are selecting a location from a map view
Adding Geometries to Multiple-Choice Options
If there are not too many locations, adding the geometries to the different location choice options on the choices sheet is easy:
- Create a multiple-choice select_one question, add the choice option list name, add a name and label for the question, and add map under the appearance column. Add a choice_filter column with a true(), if you have no other choice filter, to make the values appear on the map view.
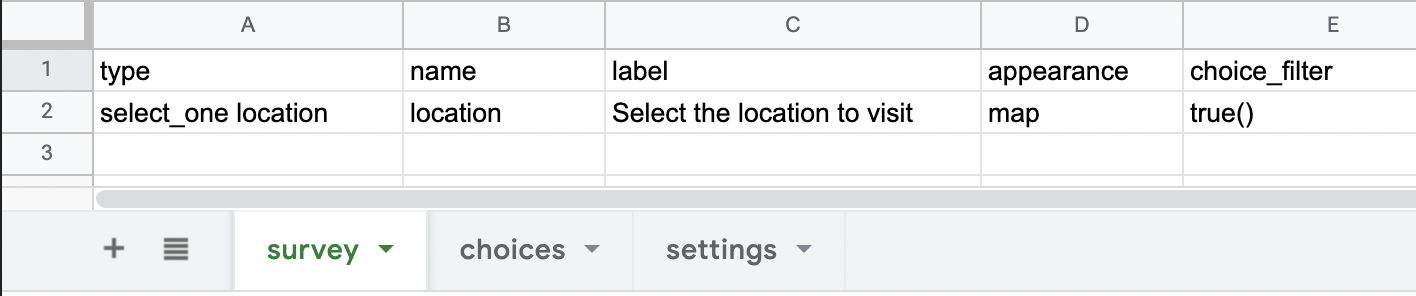
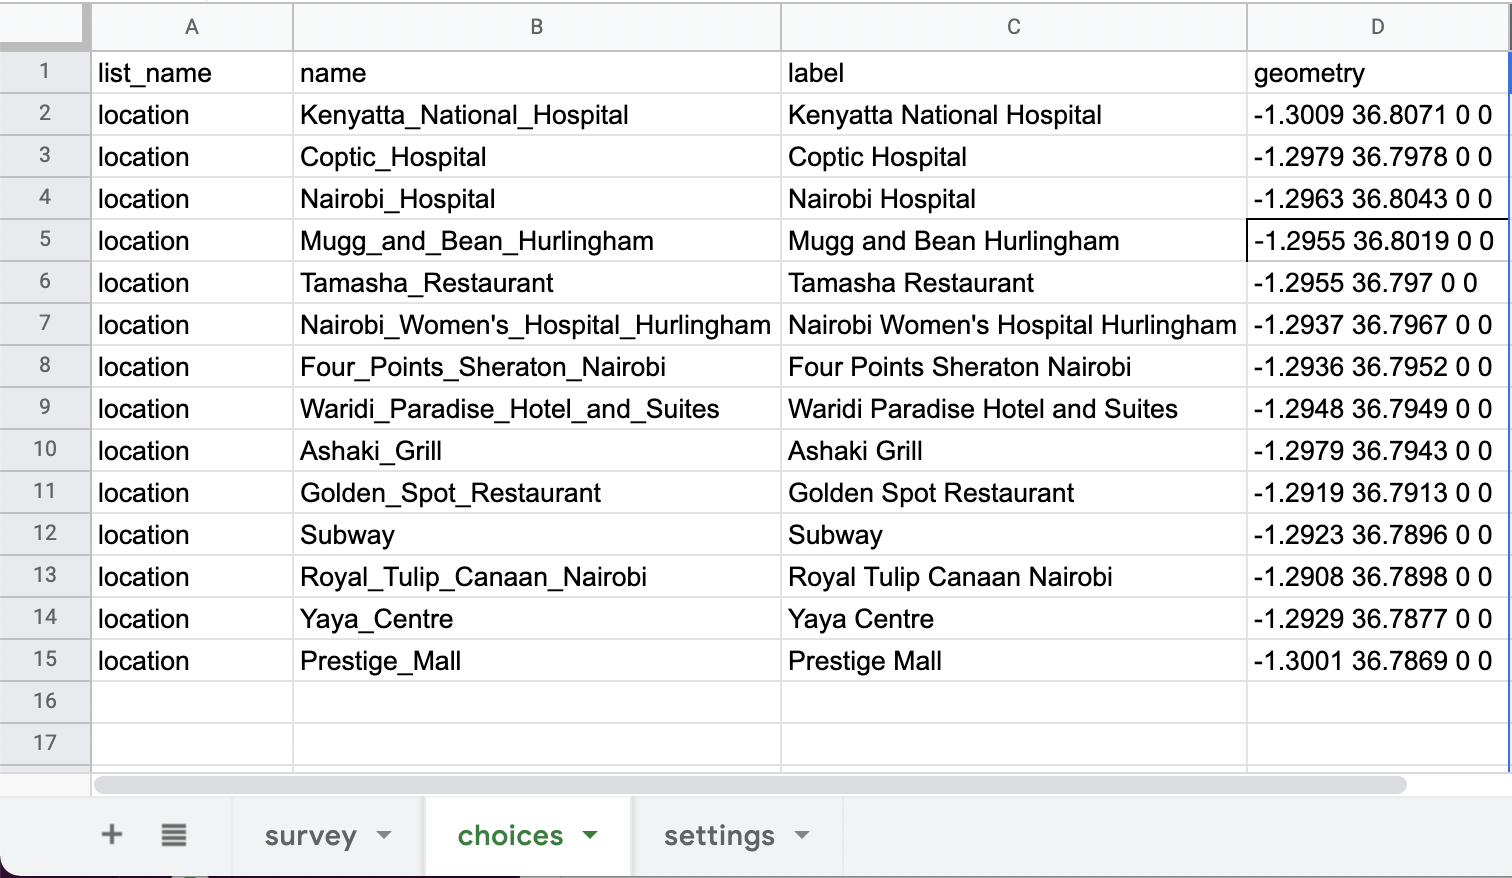
- On the choices sheet, add each location’s name and label and the locations’ choice option list name.
- Add another column heading after the label column – geometry – to the choices sheet. Place the location’s geometry in the geometry column.
NOTE: The geometry has to be formatted in the ODK format, or four numbers separated by spaces: latitude, longitude, altitude (in meters), and accuracy radius (in meters)
Click this link to review the example above and/or download it for your own use
Adding a GeoJSON File to your Form Media Files
If you have a large number of locations or frequent changes to the location list, Ona recommends adding a GeoJSON file as a form media. To access the GeoJSON data in the survey, you will need to create or update an XLSForm:
- Create a multiple-choice select_one_from_file question, and add the choice option referencing the name of the GeoJSON, including the file type. For example, the GeoJSON file is named facilities, the type column should have select_one_from_file facilities.geojson. Make sure you add a name and label for the question, and add map under the appearance column. Add the parameters defining the value (id recommended) and label (title recommended)

- Add your GeoJSON under the form settings, under the form media files, after uploading the form to Ona Data.

Generating a GeoJSON File
There are two major ways you can generate a GeoJSON:
- Generate your own GeoJSON
- Generate a GeoJSON by uploading the data using the upload a data feature or from form data.
Generate your own GeoJSON
If you already have a generated GeoJSON file, you can simply use that. If you want to generate your own points, you can also use external tools found on the internet. Geojson.io is one example of an external tool to easily generate a GeoJSON.
NOTE: If you have multiple GPS coordinates per feature, only the FIRST set of coordinates will be used.
Generate a GeoJSON as a Form Media File
You can also create a GeoJSON by linking it as a media file, which is unique to the Ona Data platform. You can create this GeoJSON from a form with geopoint(s), outside of a repeat group.
NOTE: If you only have a CSV of the data or previously collected data, you can also upload the dataset to generate an XLSForm allowing you to use the data to generate a GeoJSON.
To generate a GeoJSON as a linked media file, kindly follow the steps below:
- Navigate to the form Settings page for the form requiring a GeoJSON, and select Form Media Files.

- Select Select dataset to link, and a pop-up window will appear
- Fill in the window with the appropriate information:
- Select the Project – location of the form used to create GeoJSON
- Select the Dataset – the form used to create GeoJSON
- Select GeoJSON for the Download as – file type generated
- Select the geopoint data field in the form to use as GPS coordinates for Geopoint
- Select the geopoint label/title data field in the form for the Title
- Select the other data fields in the form you will want to display/use as a part of the GeoJSON (i.e. marker-color, marker-symbol, contextual information, etc.) for the Fields. If you select a field you no longer need, select the x next to the field name to remove.
- Name your GeoJSON (as noted in your XLSForm) in the File Name

- Click Link a dataset to generate the GeoJSON

NOTE:
- If you need to update or made a mistake, you will have to delete and regenerate the GeoJSON
- Currently, only point geometry (i.e geopoints) is supported by ODK Collect. Traces and geoshapes are expected to be supported later.
Visualizing the GeoJSON on the Map Tab
Once you have submitted data, you may want to compare the submitted data to the data on the GeoJSON. Navigate to the form’s page on Ona Data and select the Map tab. The GeoJSON layer will appear by default. However, you can toggle it on and off via the GeoJSON icon, highlighted in the red box below.
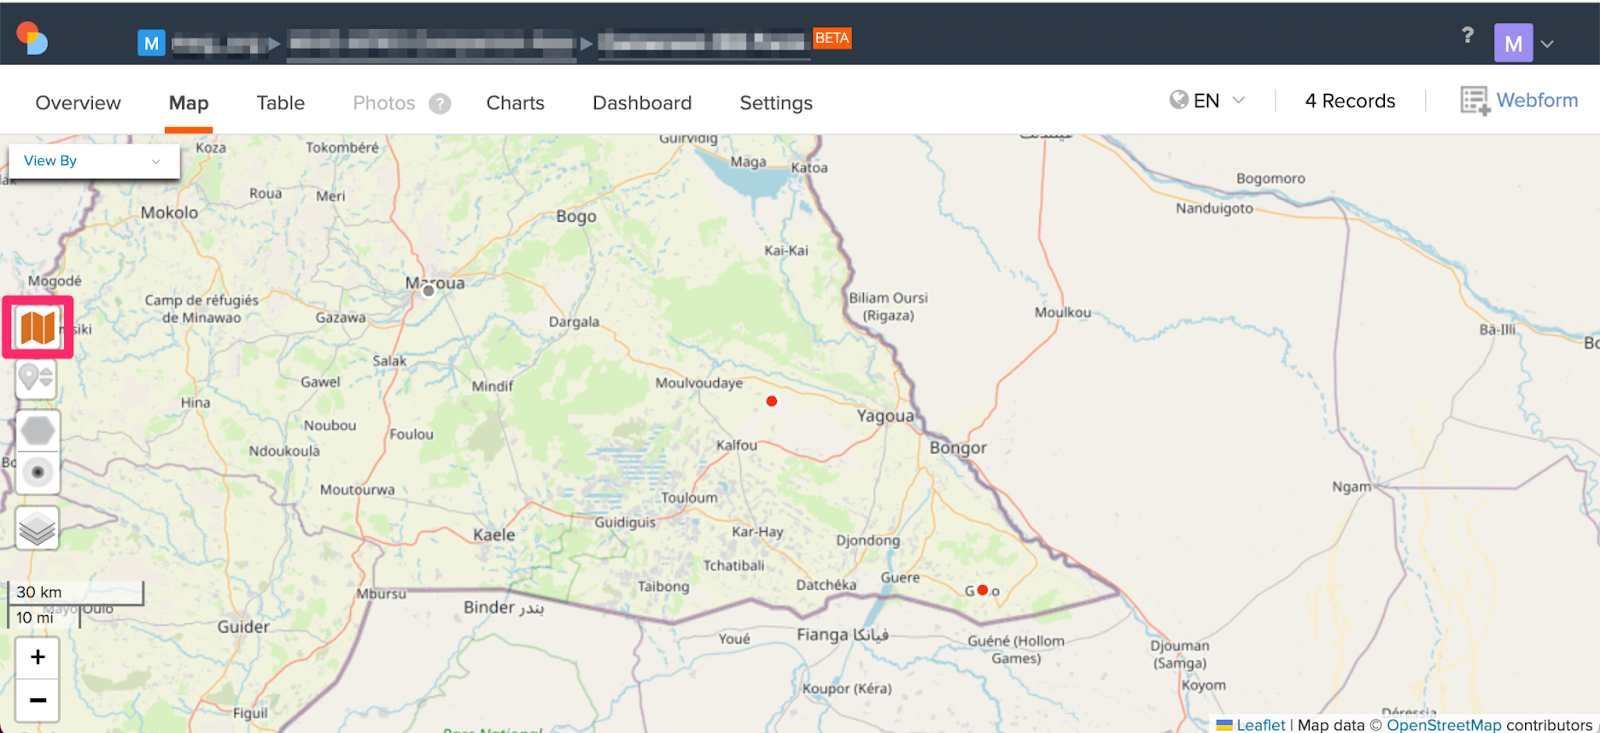
The GeoJSON layer points are the dark gray points. If you click one of the GeoJSON layer points, a pop-up window with the GeoJSON title and feature properties included in the GeoJSON will appear as shown below.
NOTE:
- Only point geometry (i.e. geopoints) is currently supported for the GeoJSON layer on the Map tab.
- Only one GeoJSON layer will be mapped on Map Tab
- Locations generated using the geometry column in the choices sheet are not added as a layer on the Map tab.
Example form(s)
Some useful applications for the Select Location widget on ODK Collect include:
- Saving the GPS coordinates of the selected location, only the ID (usually a number) is saved when the location is selected from the map.
- View previously collected points (using last-saved) still saved on ODK Collect
Example 1: Location selection and facility tasks