Question Settings
You can add advanced settings for each question by selecting the Settings button as shown below.

1. Question Options
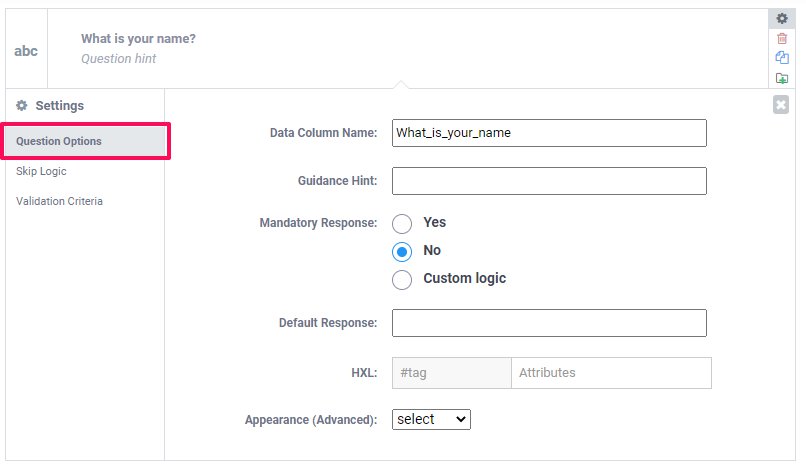
Question options have the following features:
- Data Column Name – This specifies the unique variable name for the entry. When creating a form, ensure that two entries do not have the same name. (Optional) Rename the column name to have a unique_id. Only letters, numbers, and underscores are allowed (separate the words using underscores, spaces are not allowed).
- Hints – Hints will be displayed in the data collection form beneath the question to direct users on how to answer the question. Read more on adding hints to your form.
- Mandatory Response – This option should be selected if the question requires a response before submitting the form.
- Default Response – Adding a default field means that a question will be pre-populated with an answer when the user first sees the question.
- Appearance – This allows you to use different appearance attributes to determine how questions will be formatted in the form.
2. Adding a Skip Logic
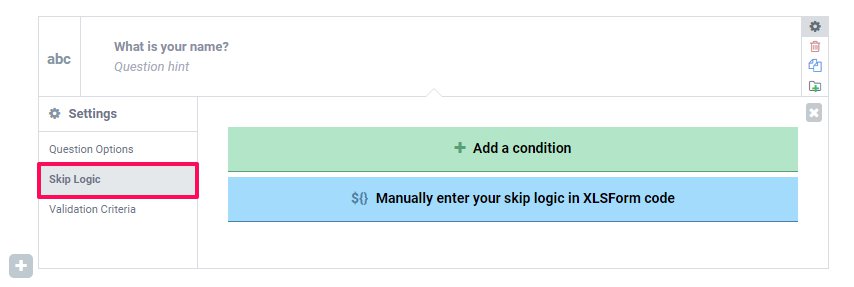
- Adding a condition – By default, all questions are visible in the form. This function enables you to skip a question or make an additional question appear based on the response to a previous question.
Below are steps to follow when adding a skip logic.
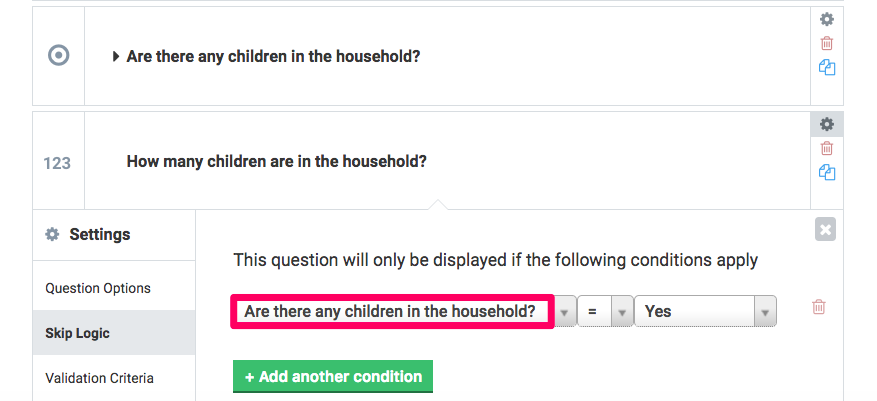
- Click on Add a condition, and a drop-down list of the previous questions will be displayed.
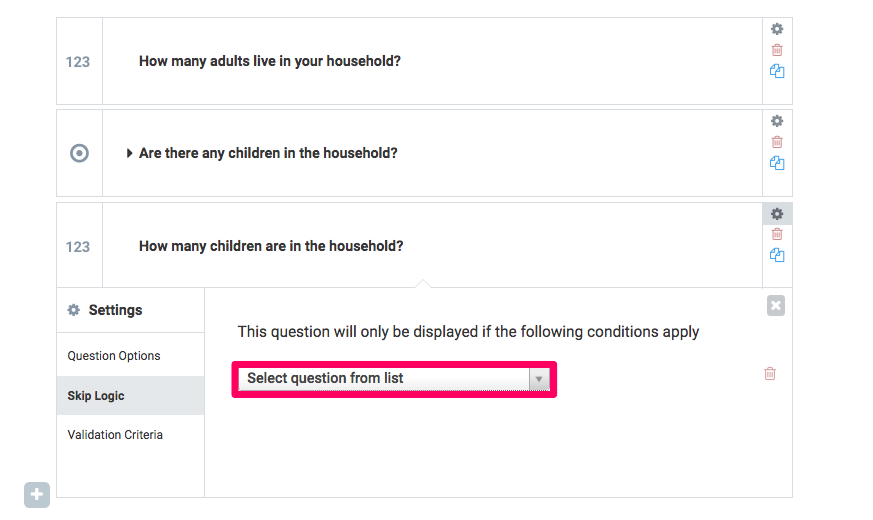
- Select the relevant question as shown below.
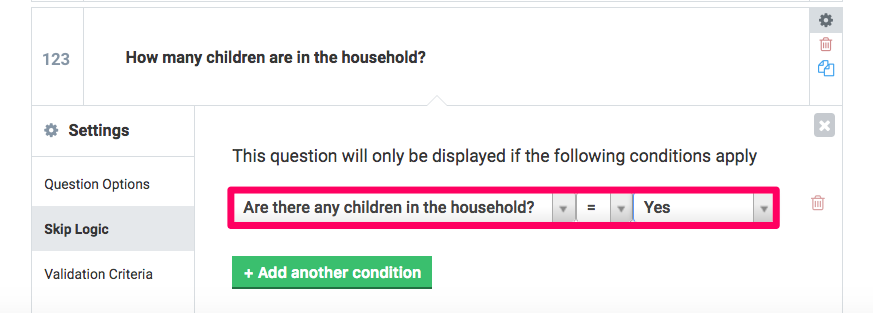
- Enter the relevant condition that should be met before the question is displayed.

- The condition set for the below example means the question will be displayed when the choice option ‘Yes’ is selected for the question Are there any children in the household?
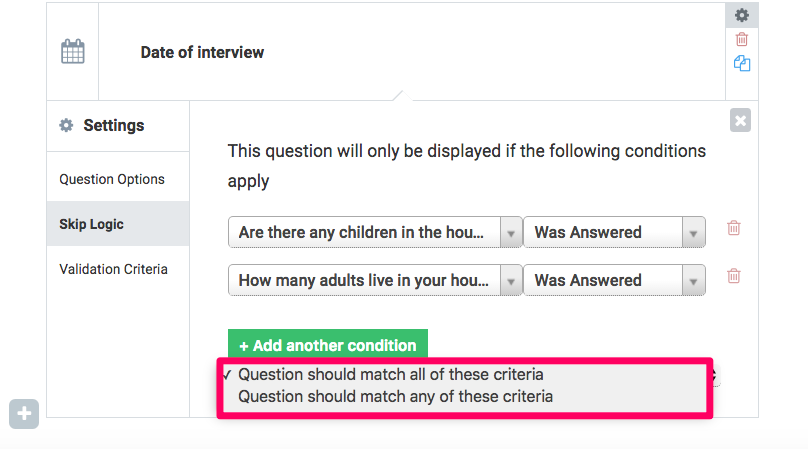
- You can enter more relevant conditions or skip logic by selecting Add another condition as shown below.

- If you have more than one relevant condition for a question, you can determine whether the question should match all or either of the criteria set.
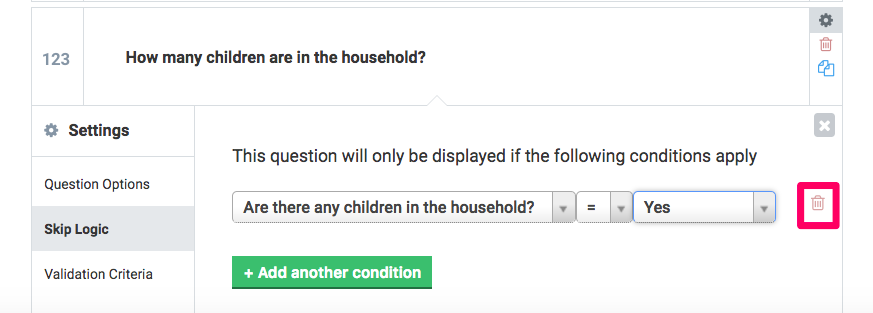
- Delete a set condition by clicking on the trash can icon highlighted below.
- Manually enter your skip logic in XLSForm code – You can also enter skip logic using XLSform code.
3. Validation Criteria or Constraints
Constraints allow you to avoid invalid responses from the interviewers and respondents. When an invalid response is entered, a message is displayed to help the user understand why. Add a constraint, similar to how you did a skip logic, by adding a condition or using XLSForm code. Read more on constraints and find more examples.
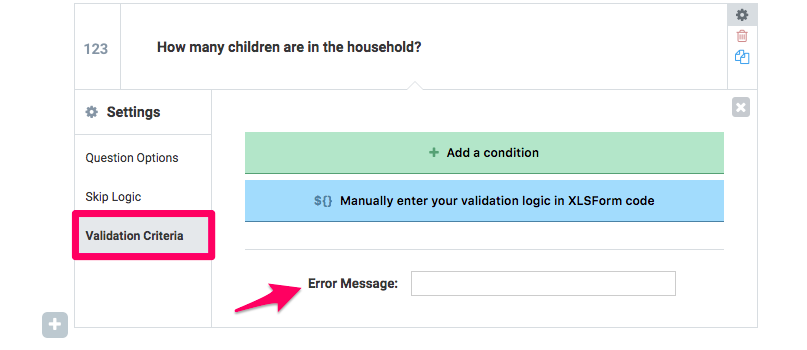
To add a constraint select the validation criteria under the question settings as shown. Add a custom message to better guide the user, or a default error message will appear. This is the message the respondent will receive after entering an invalid response.
