Tableau is an interactive data visualization software that helps in the easy visualization of data and the creation of beautiful dashboards. Ona has integrated this as an App to enable you to visualize data collected on Ona. You can easily connect form submission data on Ona to Tableau and update the data in Tableau, if any changes are made in the server, with only a few steps.
Using the Tableau App
Finding the Tableau App on Ona
To find the Tableau App on Ona:
- Log into your Ona account, go to your project, and then to the form whose data you would like to work on in Tableau.
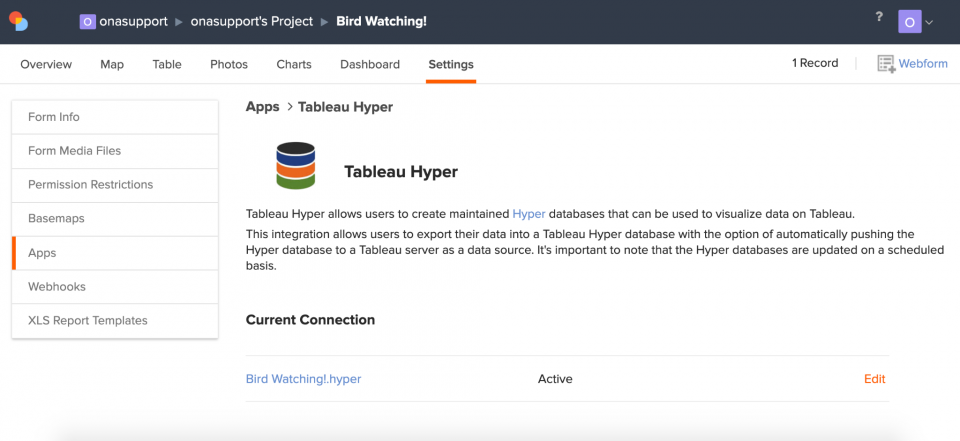
- Go to the Settings of this form, and select Apps.

- Select Tableau from the list of Apps integrated into Ona and click Next.
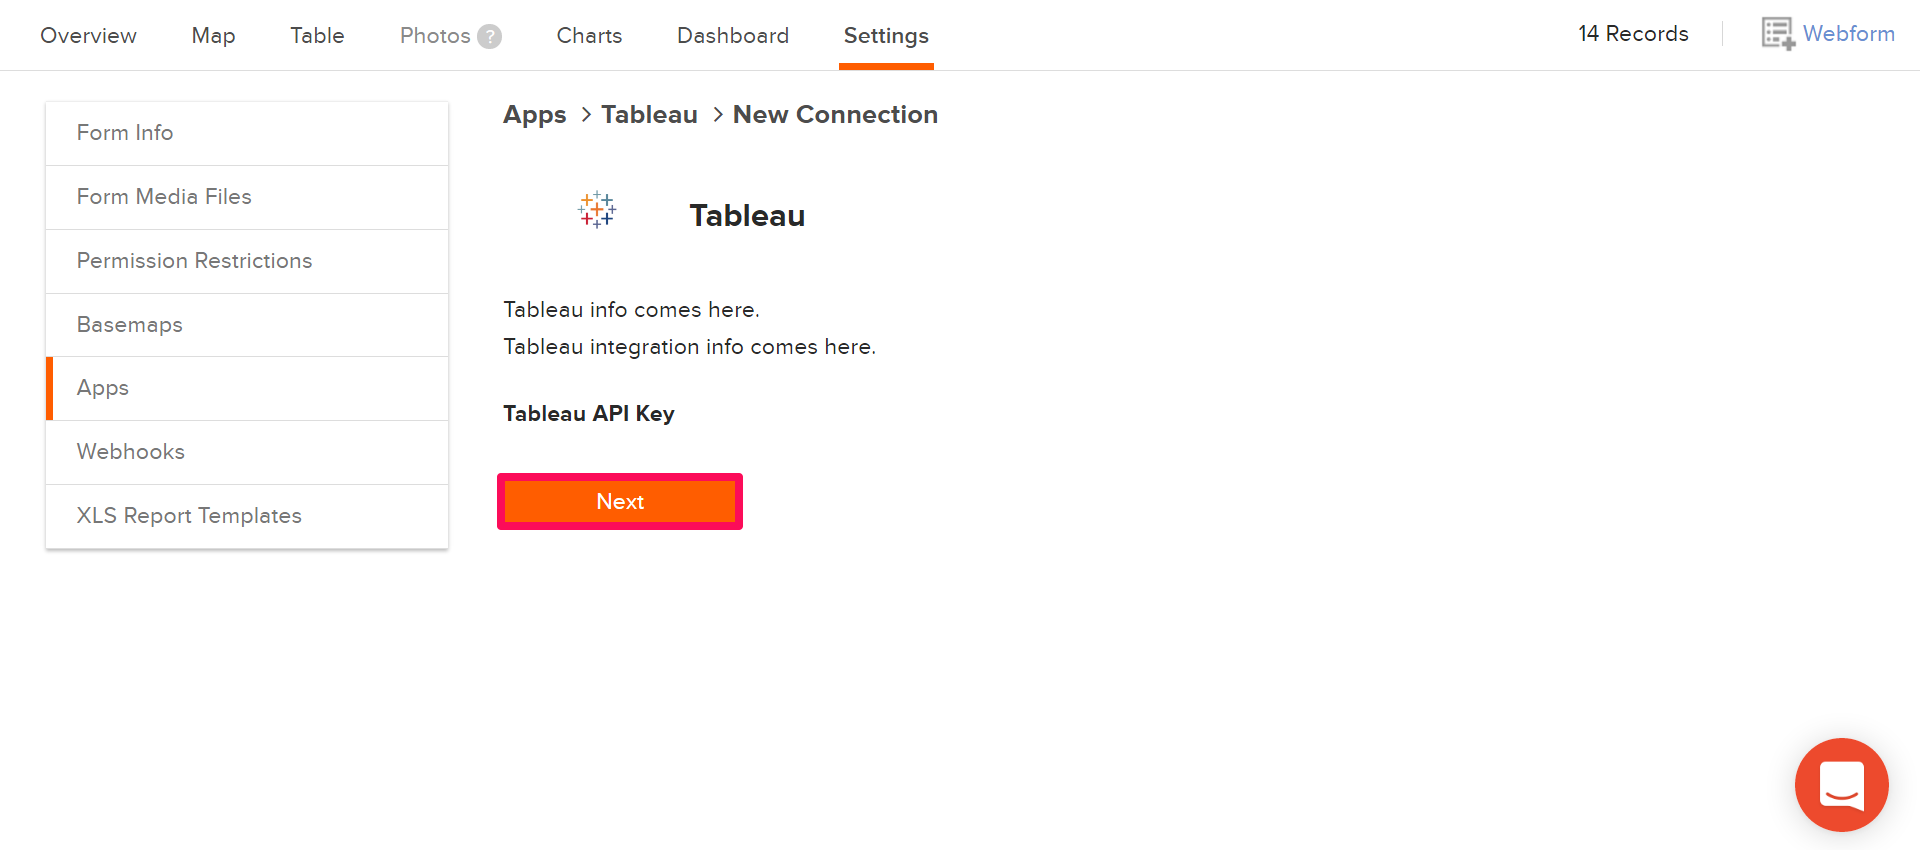
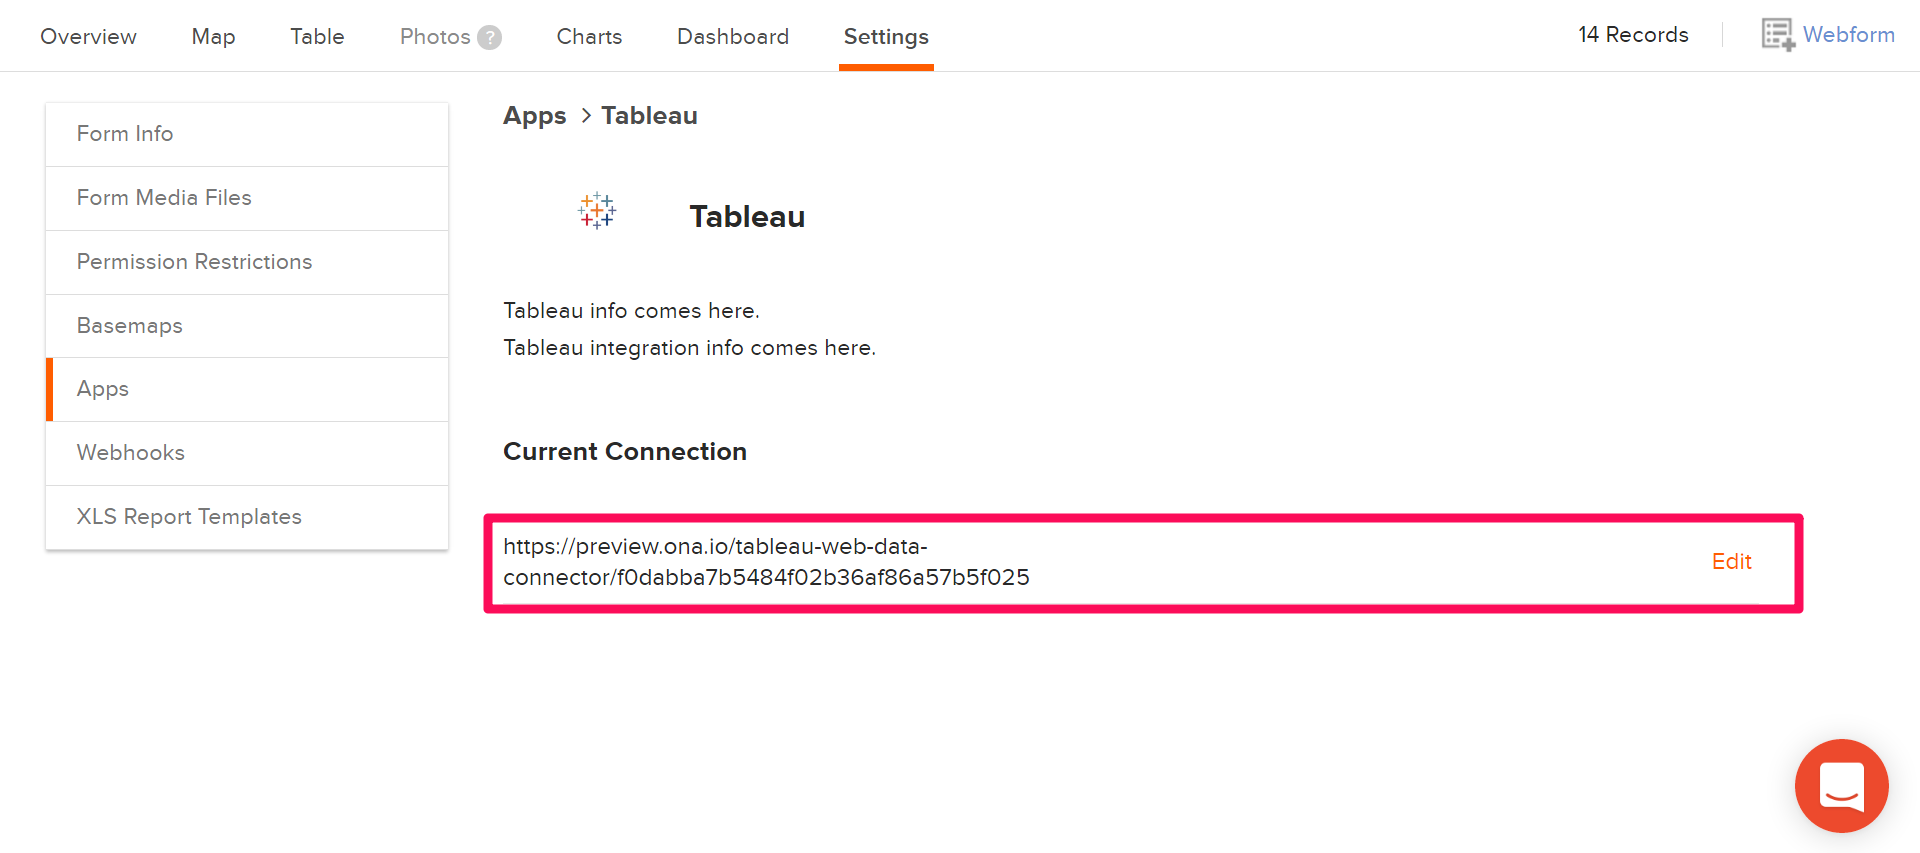
- Copy the URL displayed onto your clipboard.
Connecting your data to Tableau
Once you have the URL on your clipboard, open your Tableau software and proceed as follows:
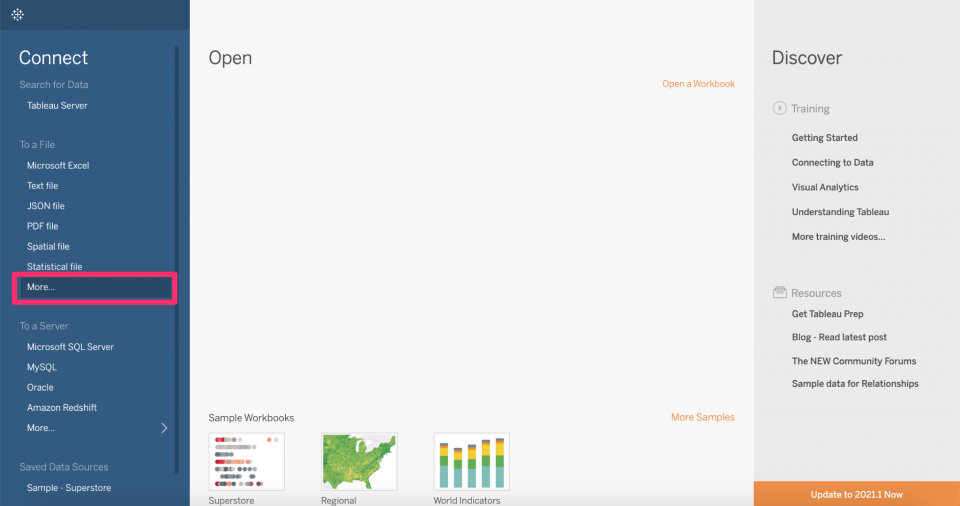
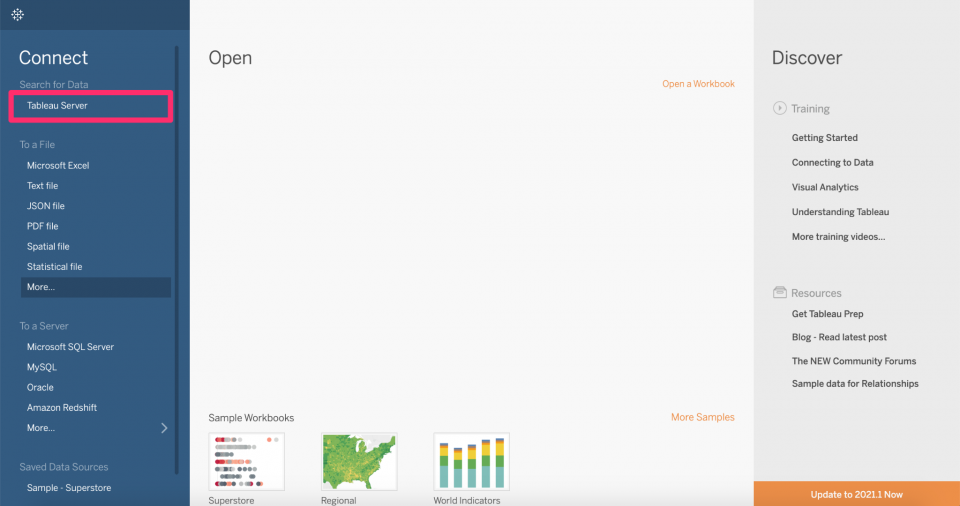
- On the left side of your Tableau window, you will see the option to connect to either a file or a server. Under the To a Server option, select Web Data Connector if it is listed under that option. If not, click on More… and select Web Data Connector from the options that appear.
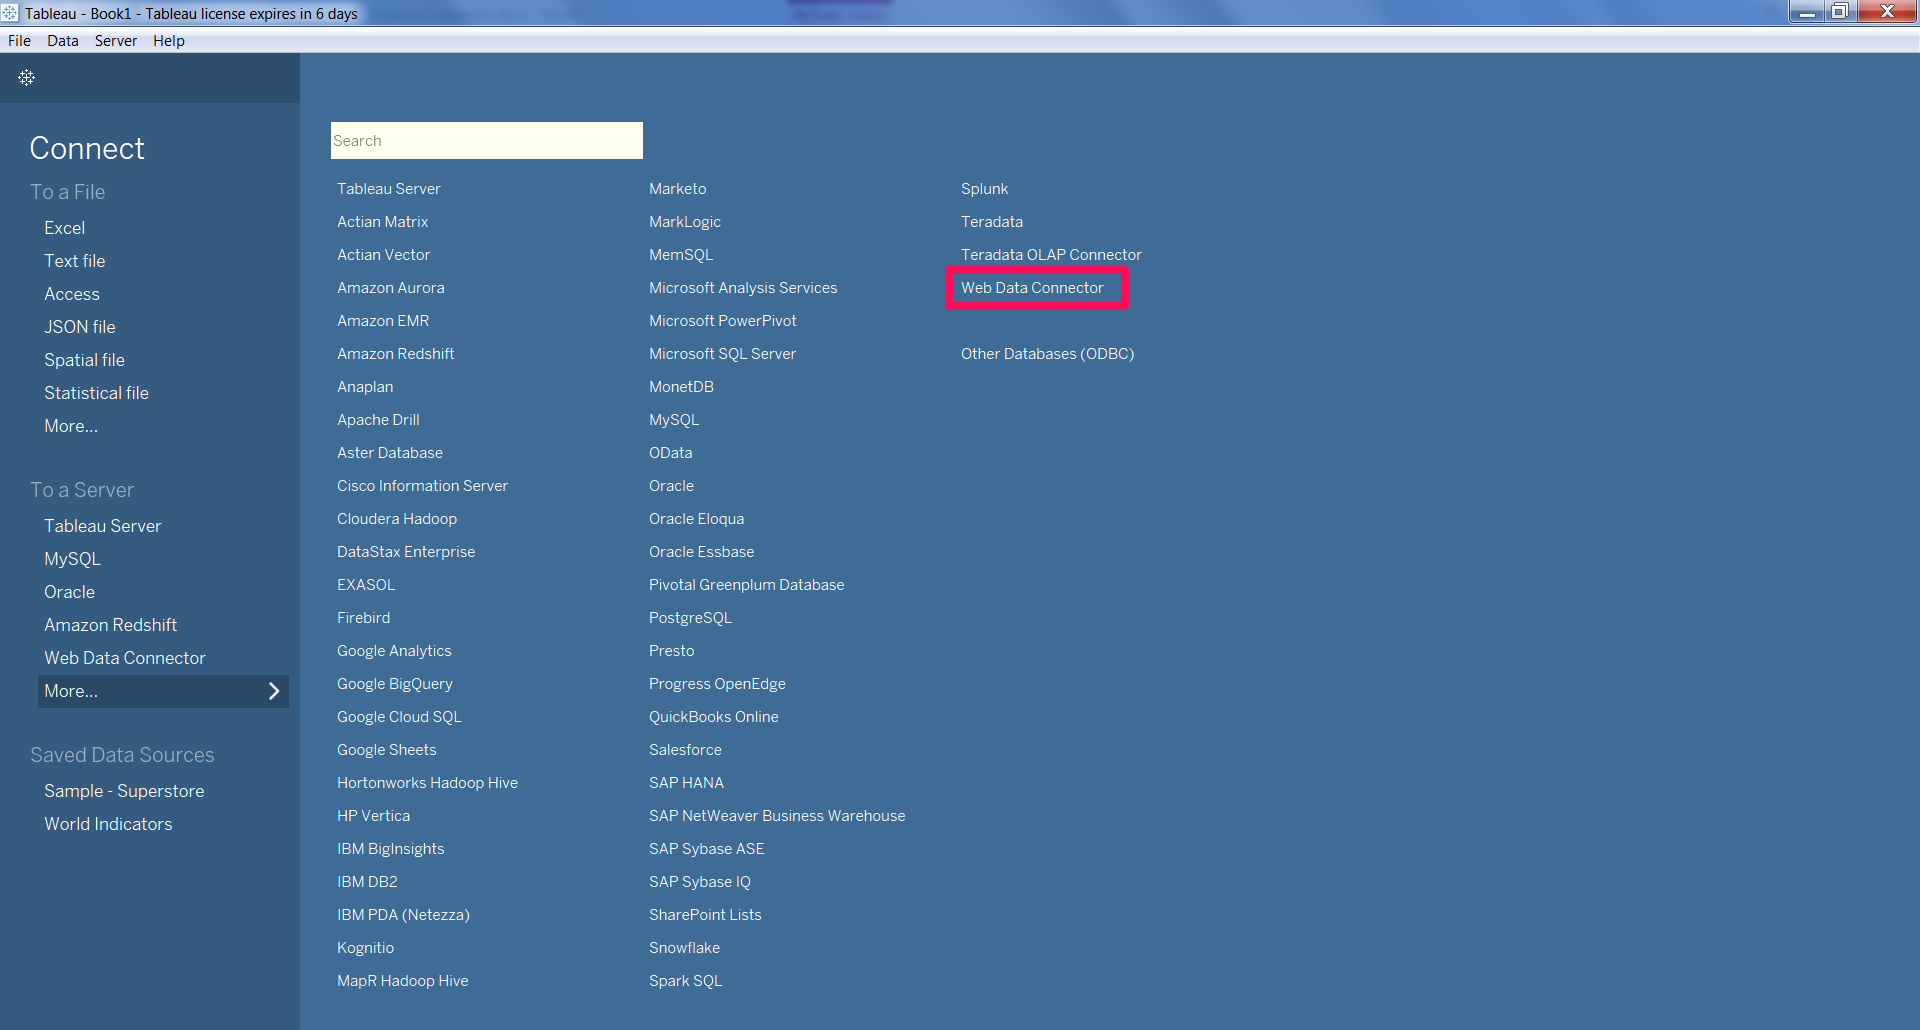
- A Web Data Connector window will appear with a text box. Paste the URL copied earlier from your clipboard into this textbox and press the Enter key.

- The server will load, and a green button written Get Ona Data will appear. Click on this button and the schema will load.

- Click on the Update Now button, and the data from the form you chose on Ona will be loaded into Tableau.
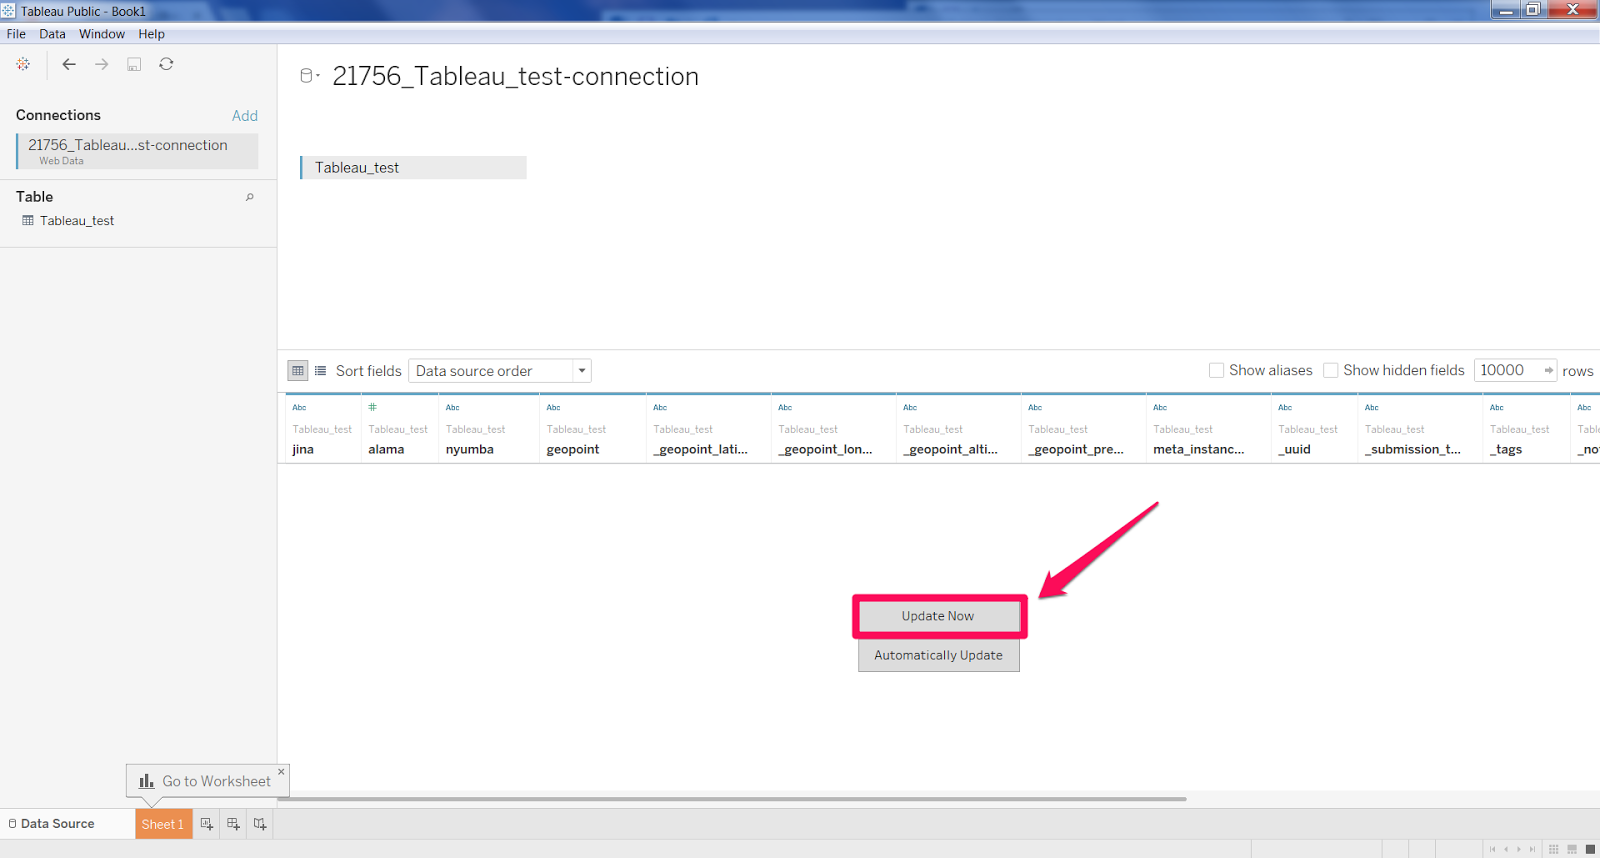
- You can then create your charts on Tableau using your loaded data.

Refreshing data from Ona into Tableau
Tableau Public:
After you have loaded data into Tableau, you may add new submissions to your form in Ona. To update the data with these new submissions on Tableau:
- Go to the Menu Bar on Tableau and click on Data.
- Place your pointer on the data source that you want to update, and a list will appear to the right.
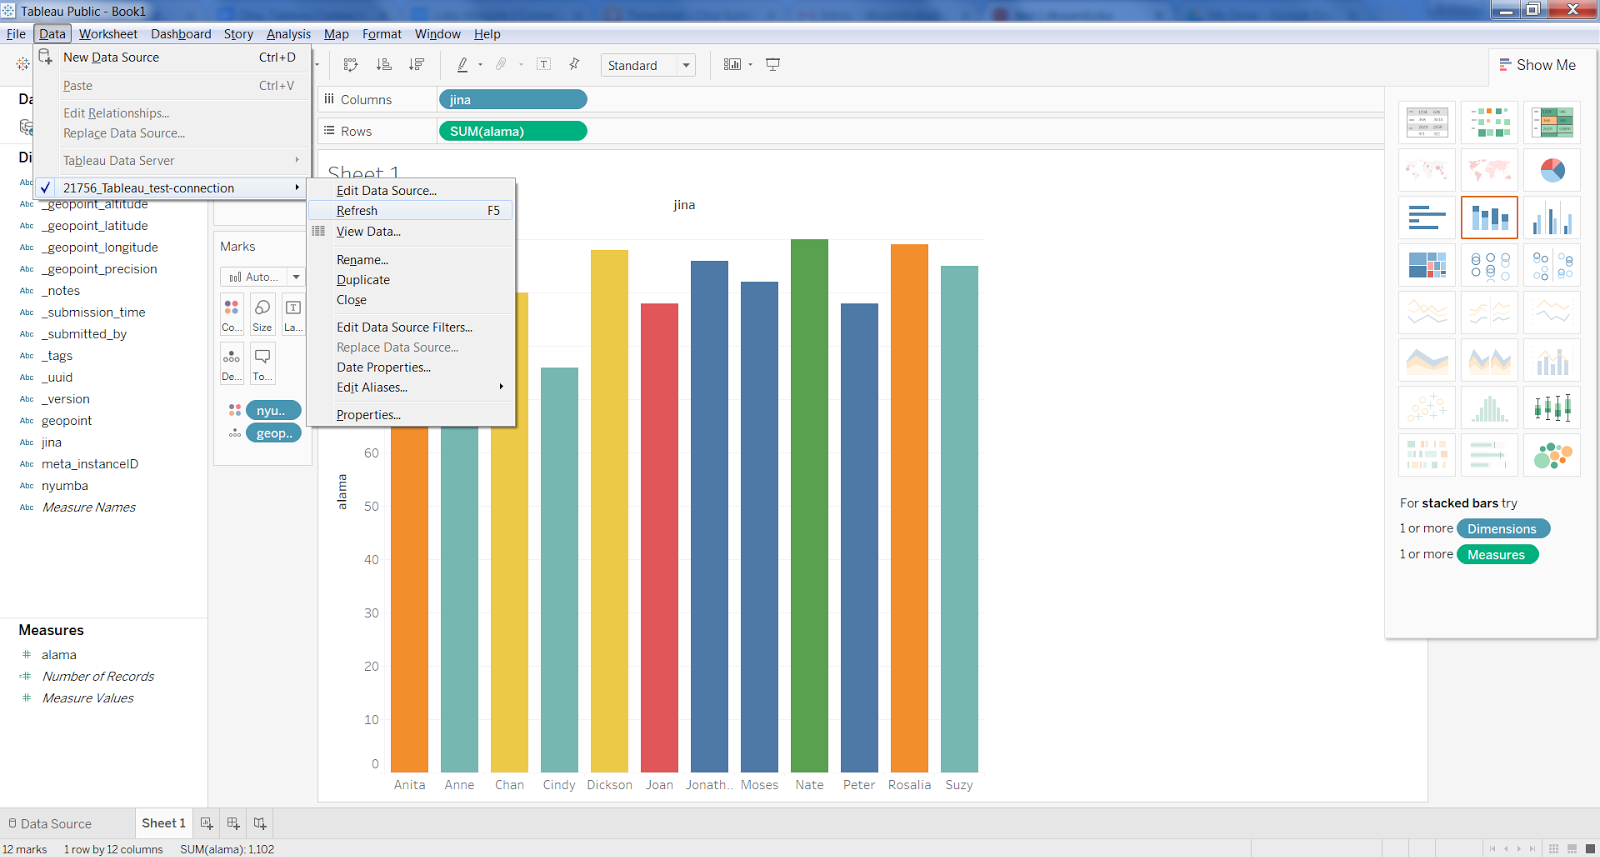
- Click Refresh, and you will see a warning message pop up. Alternatively, you could press F5 on your keyboard. Click Yes on the warning message and your data and charts will be updated.
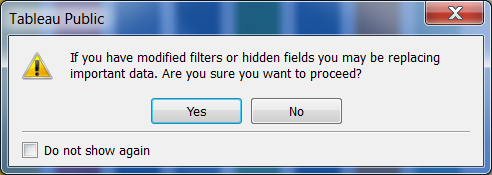
Tableau Desktop:
- Go to the Menu Bar on Tableau and click on Data.
- Place your pointer on the data source that you want to update, and a list will appear to the right.
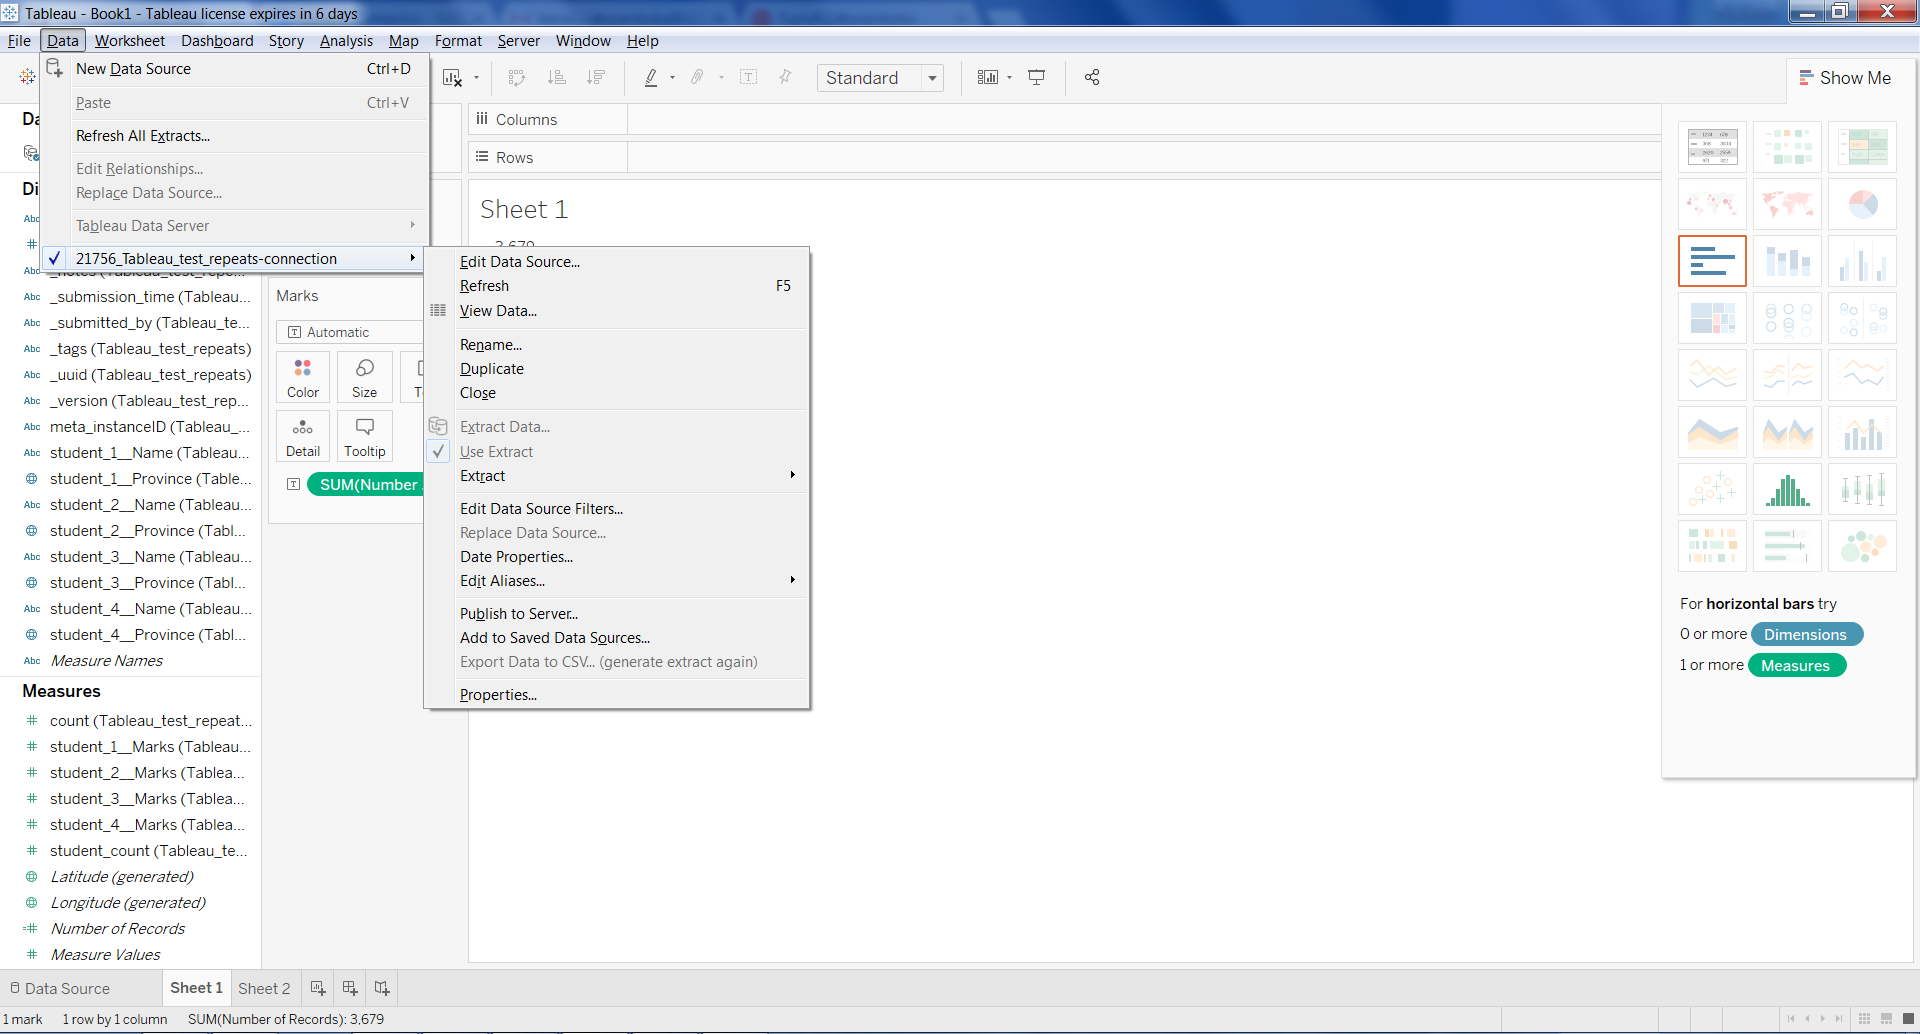
- Scroll down to Extract, and another list will appear to the right.

- On this sub-menu, there will be two main options in regard to refreshing your data:
- Refresh (Incremental) – This will pull in the new records only. This is recommended as it will take less time.
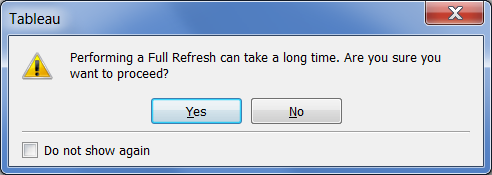
- Refresh (Full) – This will overwrite the data that has been pulled in earlier with all the data from Ona, including new records. A warning message will pop up to warn you about the duration this could take. Click Yes on the warning message. Your data and charts will be updated.
Adding another Form/ Data Source
If you would like to link data from one form with another form, you could add another data source.
To do this:
- Go to the Menu Bar on Tableau and click on Data.
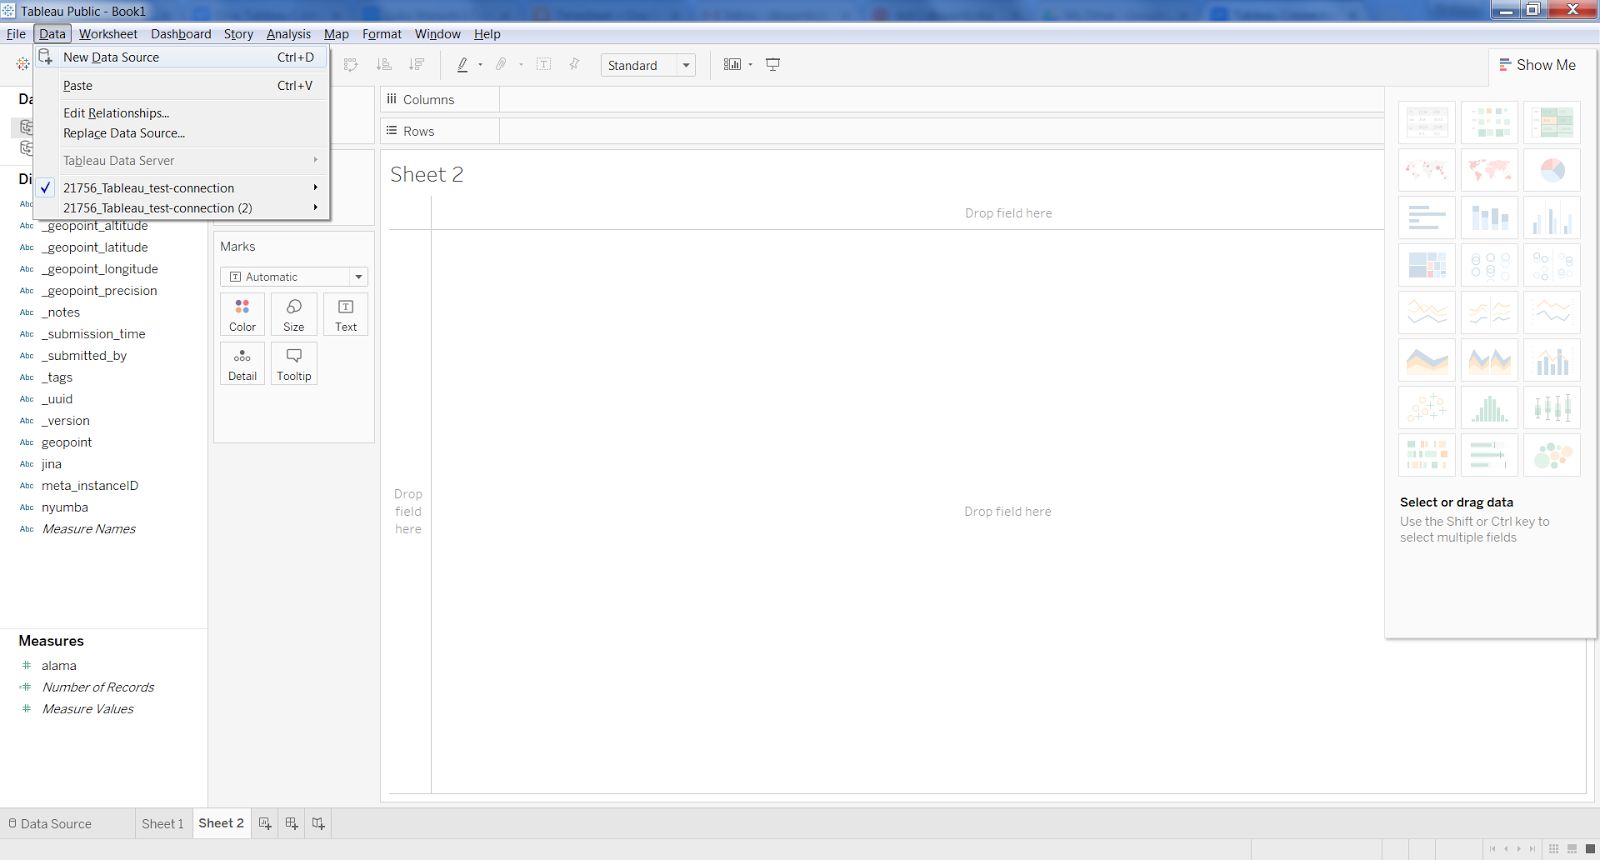
- Click on New Data Source and repeat the steps explained above on connecting to Ona up to loading the data into Tableau. You can now toggle between your data sources by clicking on them on the upper left side of your screen.
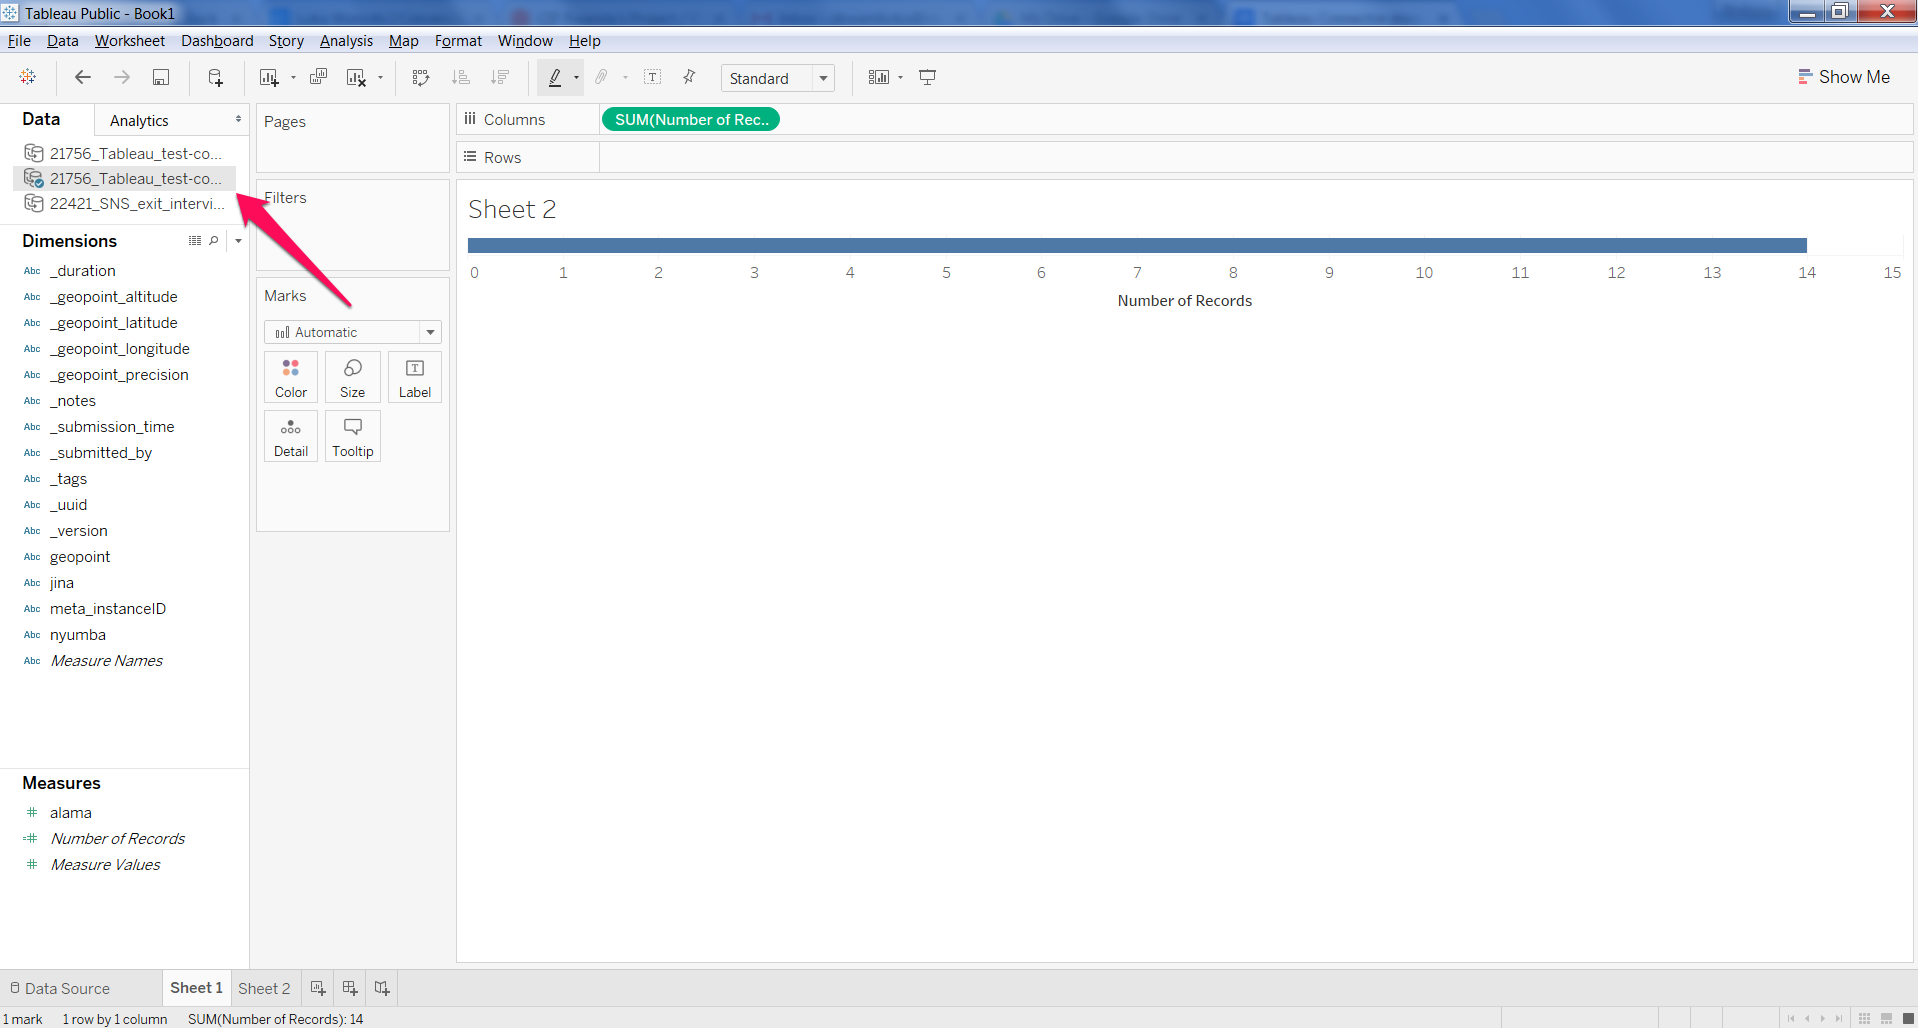
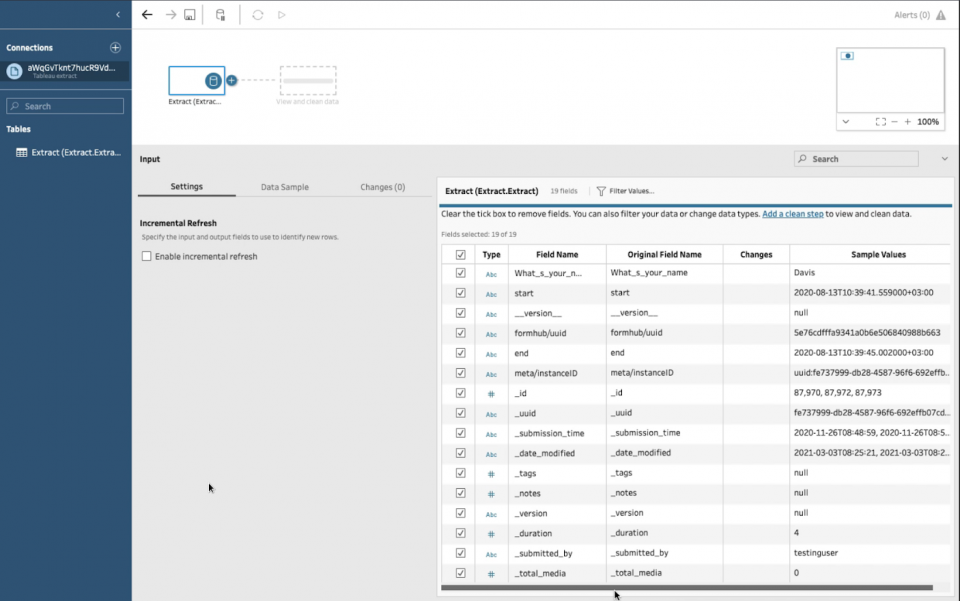
NOTE: For forms with a lot of columns (over 300), the data may not load on the initial table view, but is already in Tableau. Go ahead and click on Sheet1 to create an extract.
The video tutorial below summarizes the entire process of connecting to Tableau and refreshing data:
Using Tableau Prep
Finding the Tableau Prep connector
To find the Tableau App on Ona:
- Log into your Ona account, go to your project, and then to the form whose data you would like to work on in Tableau.
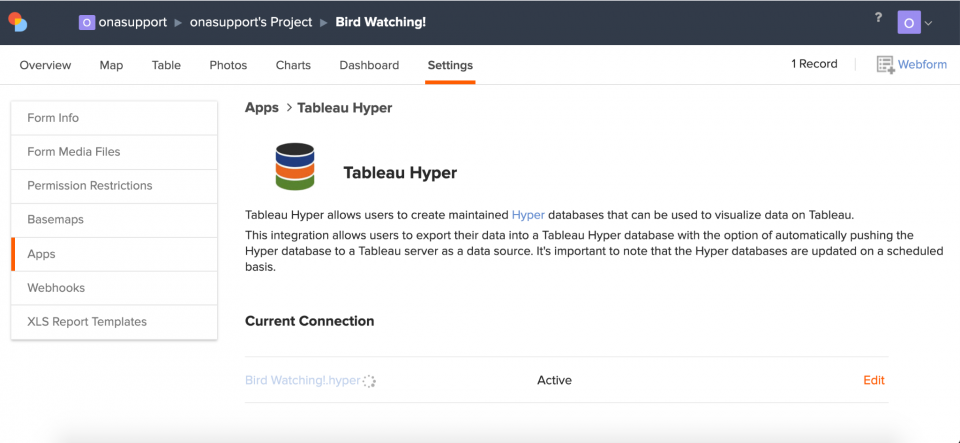
- Go to the Settings of this form, and select Apps.
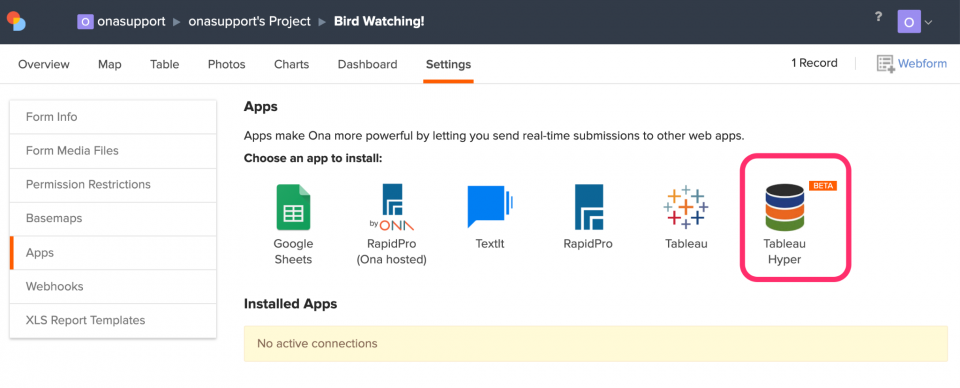
- Select Tableau Hyper from among the Apps integrated into Ona. Select Next.
- First-time users will be redirected to an authorization page.
- You will need to log into your Ona account again

- You will need to authorize the Tableau Hyper connector access to your account. Click Authorize.
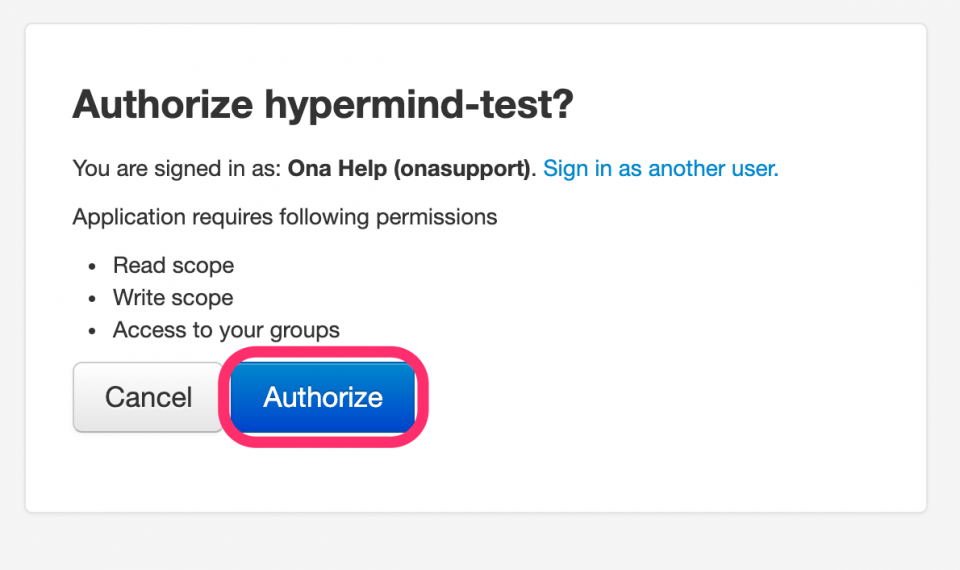
- You will need to log into your Ona account again
- Once the authorization has been given, you will be taken back to the form’s Overview page. Navigate back to the Apps page in the form’s Settings, and repeat steps 2 and 3.
- There are two options available for how the data will be updated using the Tableau Hyper App:
- Select Yes, if you would like to periodically sync and publish to a Tableau server.
- Select No, if you would like to download the hyper database.
- If you select No, the connection will be started automatically. Go to the section Uploading to Tableau Prep after this step.
 The connection can take up to 15 minutes to finish.
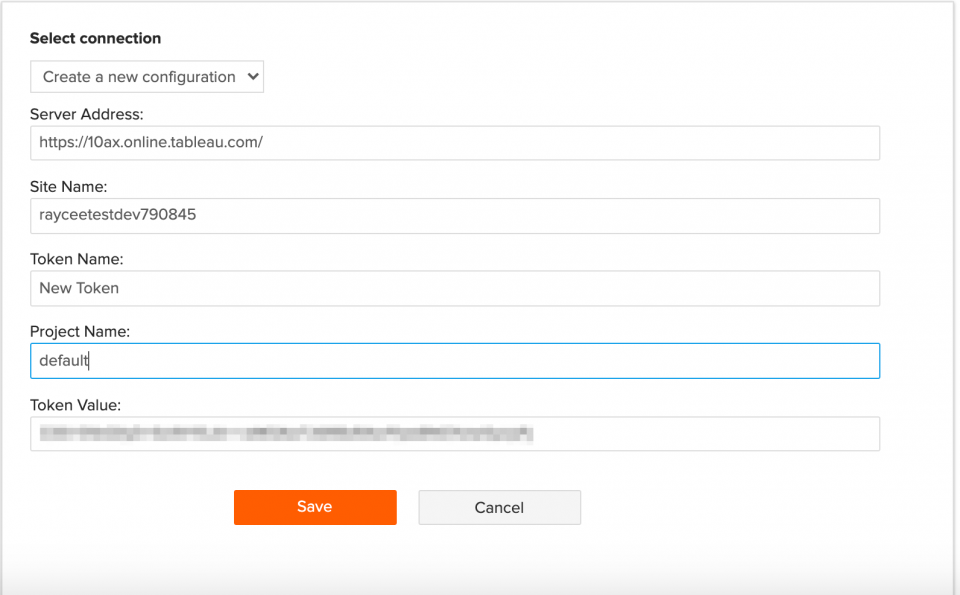
 - If you selected Yes, a window to enter additional information will appear (as shown below).
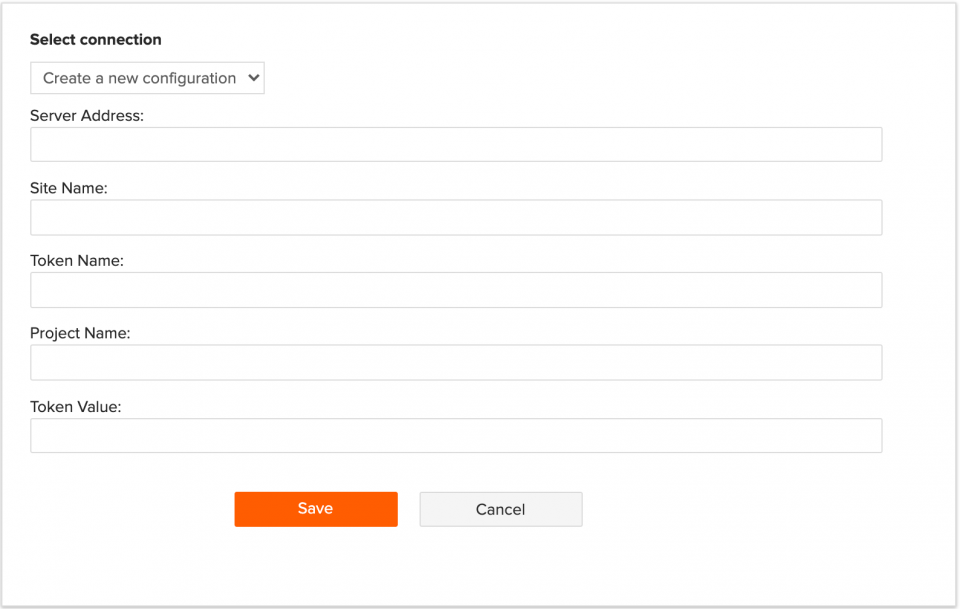
- Select Create a new configuration as the type of connection.
- The rest of the information will be entered using the information provided in the next section (Publishing to a Tableau server).
Publishing to a Tableau server
If the App will be periodically syncing and publishing to Tableau, you will need to publish to the Tableau server. To publish to the Tableau server:
- Navigate to the Tableau server: https://10ax.online.tableau.com/ and log in using your Tableau Online account.
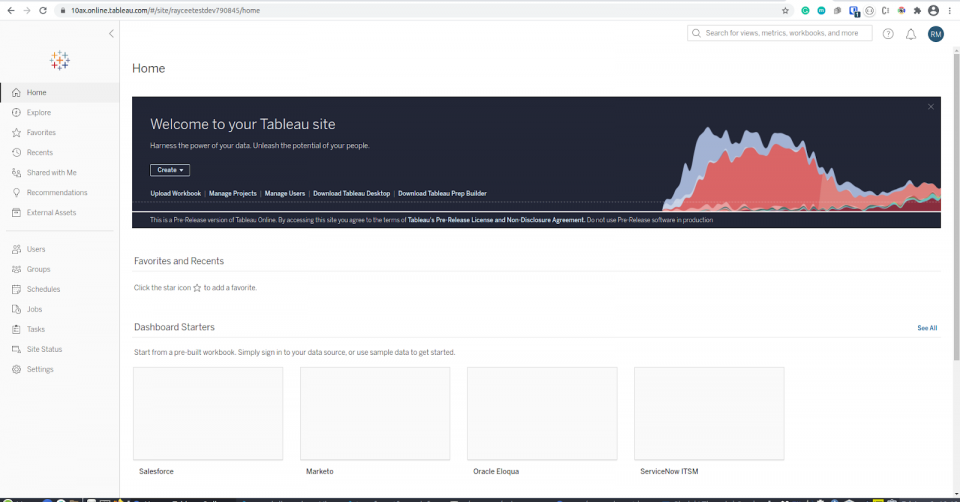
- Once you log in to Tableau online, the URL will look something like the one below:
- https://10ax.online.tableau.com/#/site/rayceetestdev790845/home
- From this Tableau account, you can get the values required to configure the new connector (step 10 of the Finding the Tableau connector section):
- Server address
- This is the first part of the URL you just created an account on: https://10ax.online.tableau.com/
- Site name
- This is part of the end of the URL you just created (after /#/site). An example is rayceetestdev790845 from the URL above in step 2.
- Token name
- This will be found on the Tableau online account you just created.
- Project name
- This will be found on the Tableau online account you just created.
- Token value
- This will be found on the Tableau online account you just created.
- Server address
- To find the Token name and value:
- Click your profile in the top right corner, and select My Account Settings.
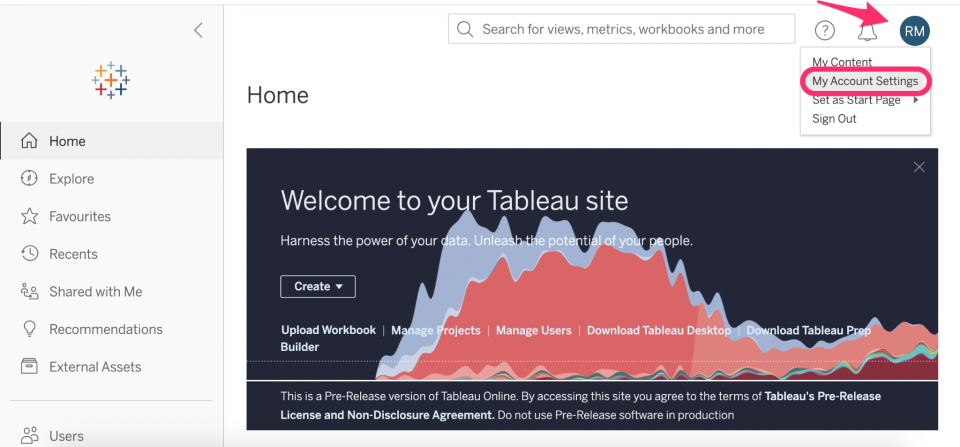
- Scroll down to Personal Access Tokens, type in the desired name of the new token and click Create new token.
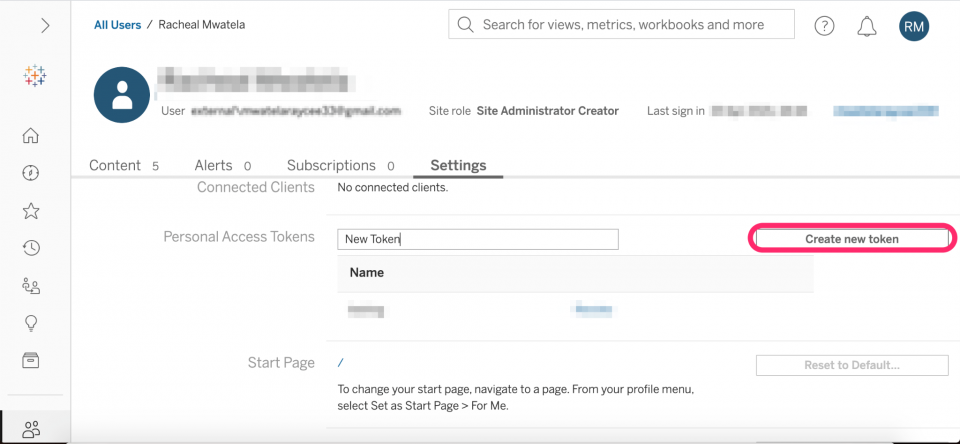
- A window will appear displaying the token name and token value.
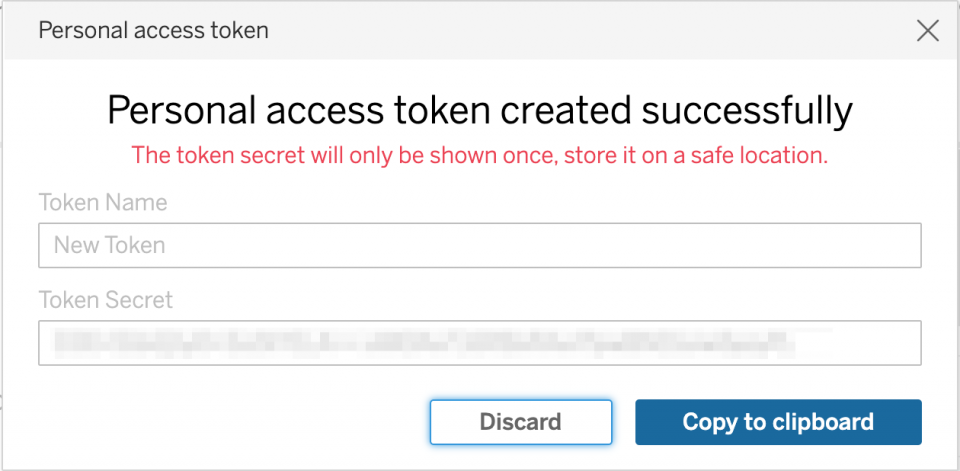
- NOTE: Make sure you copy and paste to a safe location as this token will only display once.
- Copy this into the new connector information on Ona Data.
- Click your profile in the top right corner, and select My Account Settings.
- To find the Project name:
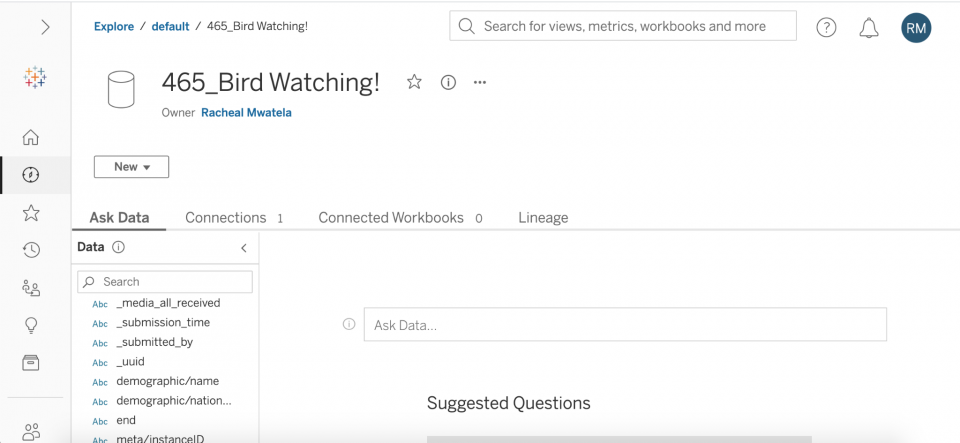
- Click on Explore from the side panel (second icon from the top)
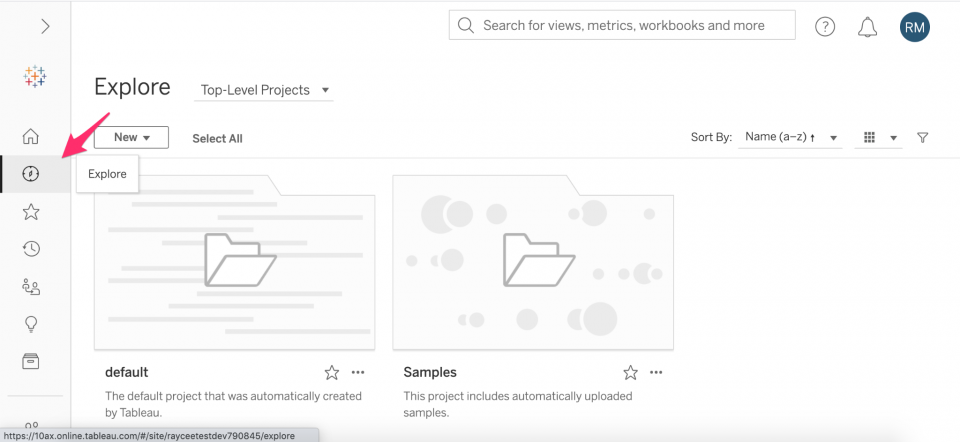
- Either create a new project or select from the list already there.
- Click on Explore from the side panel (second icon from the top)
- Once all the information is added to the new connectors (as shown below), click Save.
- This will redirect you to the connection page, where the form syncing takes about 15 minutes depending on the size of the form and the amount of data.
- Back on Tableau online, click on the project name to which you pushed the form data to see the data.
Uploading to Tableau Prep
Once you have created your connection to automatically push data to a Tableau server or chosen to use a hyper file, you will need to upload to Tableau Prep. There are two options:
Option 1: Using the downloaded hyper database file (Selected No in step 6 of the Finding the Tableau connector section)
- Download the hyper database file from Ona by selecting the hyperlink (shown below)

- Then, go to Tableau (desktop or online version) and select Tableau extract or More.., under Connect > To a File, and select the hyper file you just downloaded in the previous step to upload the hyper database file.
- You can then modify your data and generate flows from here.
Option 2: Connecting to Tableau server (Selected Yes in step 6 of the Finding the Tableau connector section)
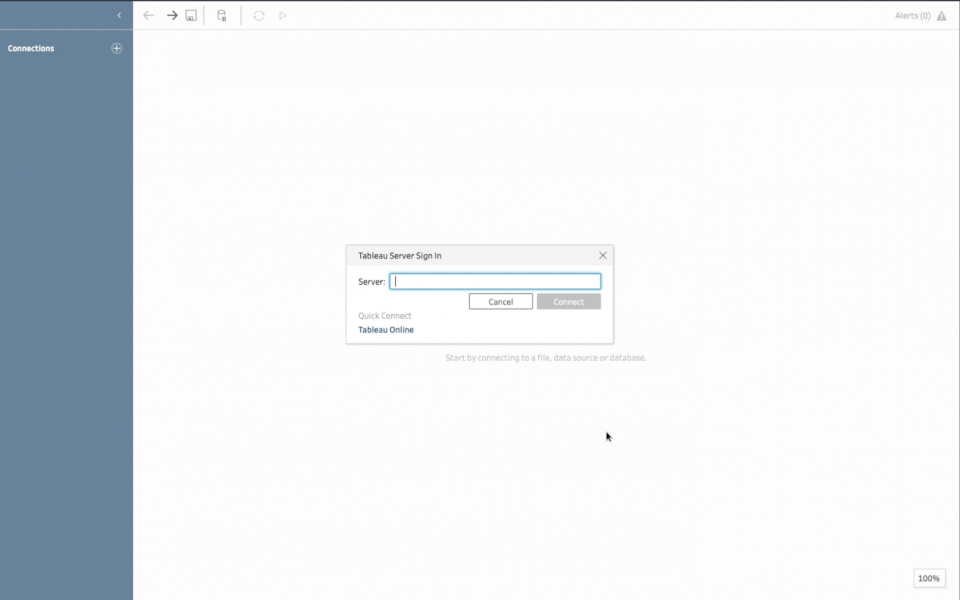
- Click Tableau Server
- Once the Tableau instance loads, select the option for Tableau Server. You will receive a prompt requesting you to add the server address you would like to connect to. You can enter the same server address as you added in step 2 of the Publishing to a Tableau server section. It should look something like this: https://10ax.online.tableau.com/.
- To sign in:
- For Tableau Server, enter your username and password.
- For Tableau Online, enter your email address and password.
- To sign in:
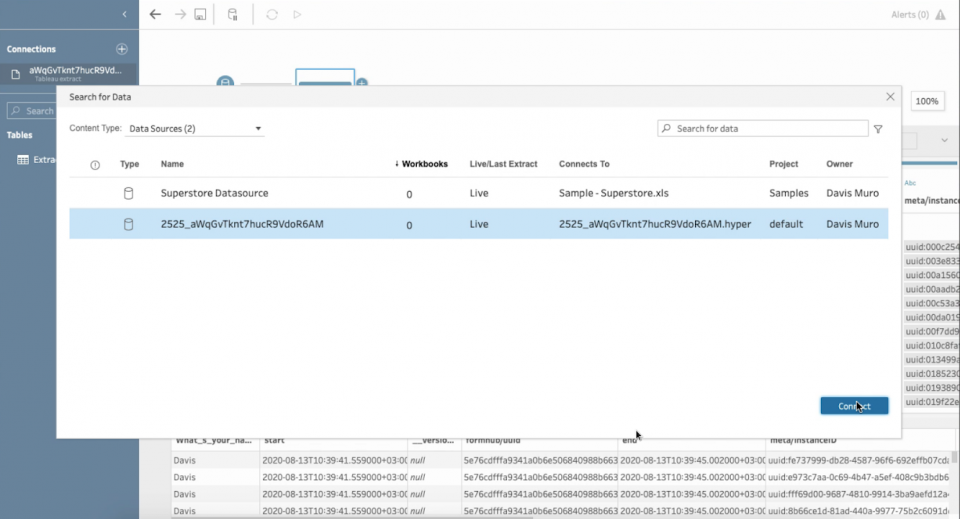
- After entering the Server URL, click Connect. A search popup will appear and request for the content type (Data source).
- Select a data source from the list of published data sources. (Data that you don’t have Connect permissions for are grayed out.)
- Select the data source you would want to open and click Connect once you are done.
- On the left pane of Tableau, the data source you selected will load, and you can begin to work on a flow or view.

Connecting a form with nested repeat group data to Tableau
Connecting your data to Tableau with a form with a nested repeat group, a group of questions repeated multiple times within another group of questions repeated multiple times, is slightly different compared to a regular form. Nested repeat groups result in multiple tables, where each repeat group is a new table.
For our example, we have two nested repeat groups named child_repeat and school_repeat in the form below, where the school_repeat group is within the child_repeat.
| type | name | label | count_repeat |
| text | name | What is your name? | |
| integer | children | How many children do you have? | |
| begin repeat | child_repeat | ${children} | |
| text | Name | What is your child’s name? | |
| integer | Age | How old is he/she? | |
| select_one y_n | School | Does he/she go to school? | |
| integer | schools_attended | How many schools have you attended | |
| begin repeat | school_repeat | ${schools_attended} | |
| text | school_name | What school does your child go to? | |
| select_one y_n | sports | Does the school have a sports program? | |
| end repeat | |||
| end repeat |
Once the form is connected to Tableau, three tables will be imported: data, child_repeat, and school_repeat. These tables are named just as you have named your repeat groups within the form. Each repeat group results in its own table.

The first table (data) will contain answers for all the other form questions outside the repeat groups, for example, the name and number of children.

The second table (child_repeat) will contain data pertaining to the first repeat group within your form, which in our case is the child_repeat.

The third table (school_repeat) will be quite similar to the second table. It will contain data collected from the second repeat group.

In Tableau, you will need to drag the tables on the white space to the right and create relationships among the tables. Please see this Tableau documentation to learn more about relationships in Tableau. To create a relationship between tables, click on the horizontal line that connects two tables together. A dialogue window will appear that will allow you to select the columns to be used as a join on each of the tables.

The first table (data) and the second one (child_repeat) will be joined on the_id and _Parent_Id columns respectively. The second table (child_repeat) and the third one (school_repeat )will be joined on similar columns: _id for the child_repeat table and _parent_id for the school_repeat table.

Once done, you can create your charts on Tableau using your loaded data using all the repeat group tables as though they were one.

Limitations of Tableau Web Connector
When designing forms intended for integration with Tableau, it is important to be aware of the following limitations to ensure a successful connection and avoid integration issues. Below are key constraints and recommendations:
1. Duplicate Choice Options
- Limitation: Forms with duplicate choice options or where the allow_duplicate_choice If the setting is enabled, you will encounter issues when connecting to Tableau.
- Recommendation: Ensure all choice options within the form are unique and avoid enabling the allow_duplicate_choice setting.
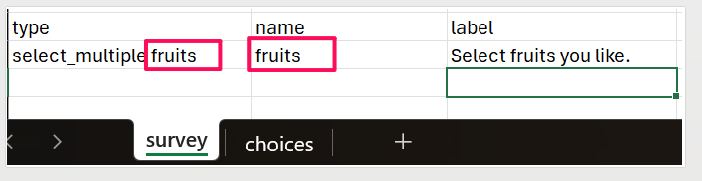
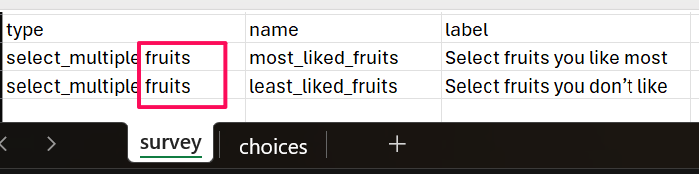
2. Select Multiple Questions and Choice List Names
- Limitation: Select multiple questions with a choice list name that matches the variable name will not work with Tableau integration.
- Recommendation: Ensure that choice list names differ from variable names in select multiple question types
3. External Selects
- Limitation: Forms using external selects may not always function properly when connecting to Tableau via the Web Data Connector (WDC). This includes using the select_one_from_file and select_one_external functions.
- Recommendation: Test forms with external selects for compatibility and consider alternative design options like changing the choice options to the choices worksheet if integration issues persist.
4. More than one Select Multiple questions using the same choice list
- Limitation: If a form includes more than one select multiple question that references the same choice list, it may fail to work with Tableau WDC.
- Recommendation: Use distinct choice lists for each select multiple question within the form.
5. Column limit
- Limitation: Tableau can only connect to forms with a maximum of 700 columns. Forms exceeding this limit will not integrate. If you have a form with more than 700 columns you will get an error on Tableau when updating the schema
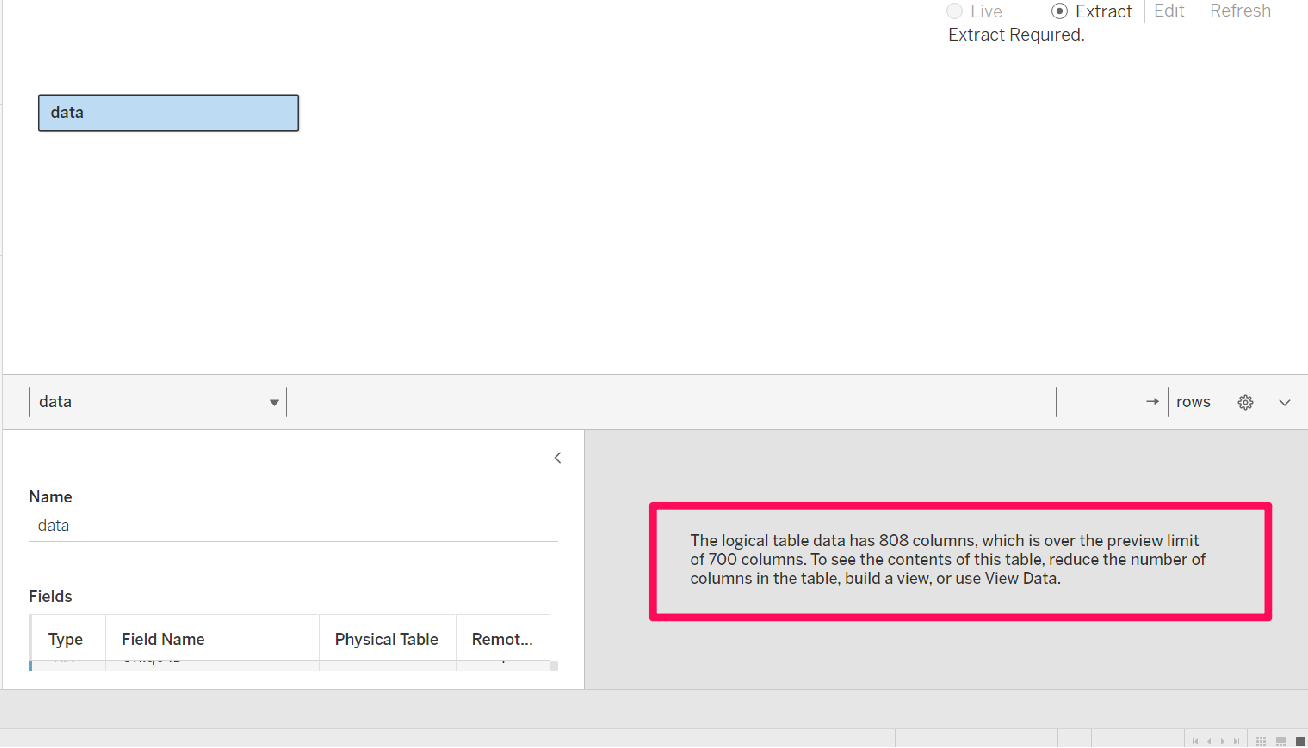
- Recommendation: Design forms with fewer than 700 columns by optimizing the structure and consolidating questions where possible.