After collecting and submitting data to Ona Data, you may want to simplify data analysis and empower key decision-makers by creating a dashboard. You can create dashboards easily using visualization software, like Tableau or PowerBI. To push data into PowerBI from Ona Data, you can use the API. To use API, you need a Pro plan or a higher account. See the plans page for information on the different plans and this guide on how to upgrade your account.
There are two ways to push data from an Ona Data form to Power BI:
- Your Ona Data username and password
- Your API key
Before connecting your Ona Data form to PowerBI, you will need a form id and possibly, an API token.
Get Form ID
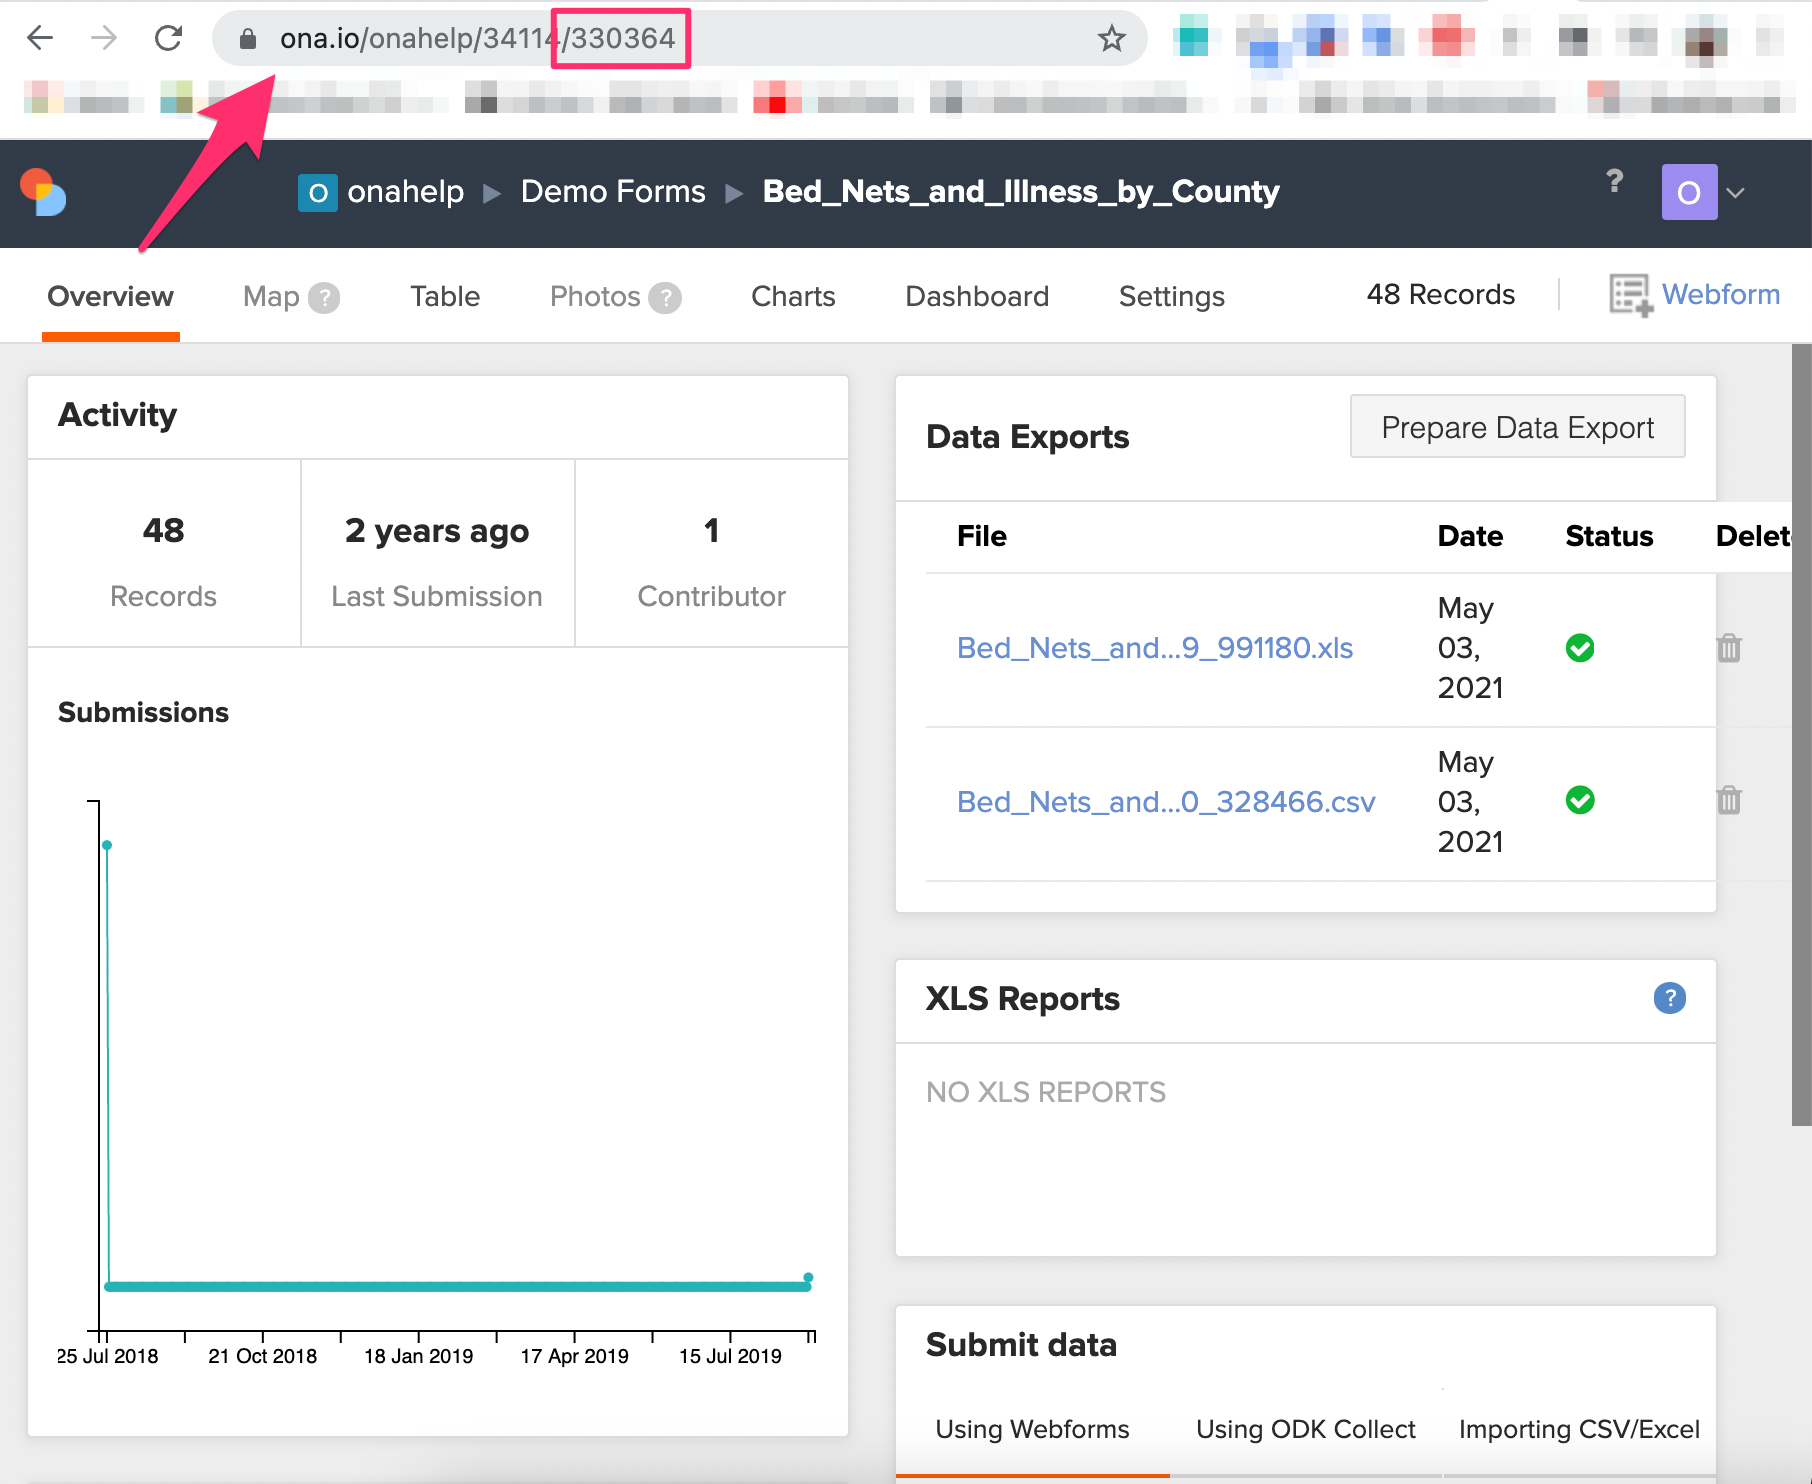
To connect data from an Ona Data form to PowerBi, you need the form id. To find the form id, log into Ona Data and navigate to the form’s overview page. The form id is the last part of the form’s overview page URL:
https://ona.io/<account_username>/<project_id>/<form_id>
In the example below, the red arrow highlights the forms’ URL location, and the red box highlights the form id. In this case, the form id is 330364.
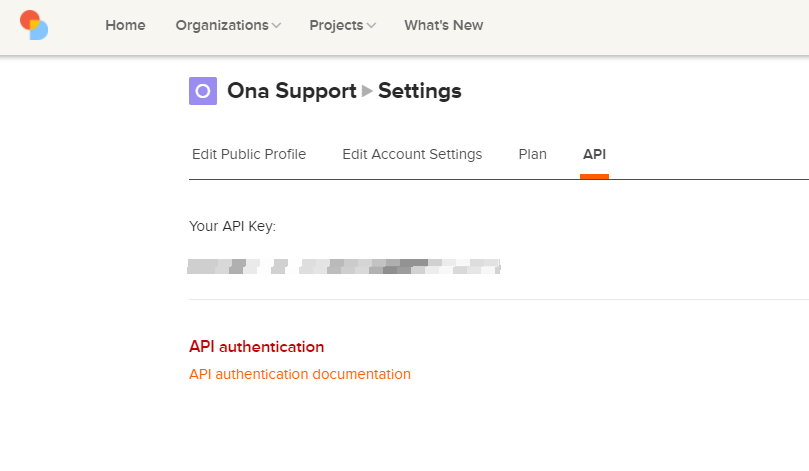
Get API Key
Each Ona Data account has an API key to help you access the data via the Ona Data API. See our API documentation for more information on the API capabilities. To access this key, go to your account settings page, and click on the API tab.
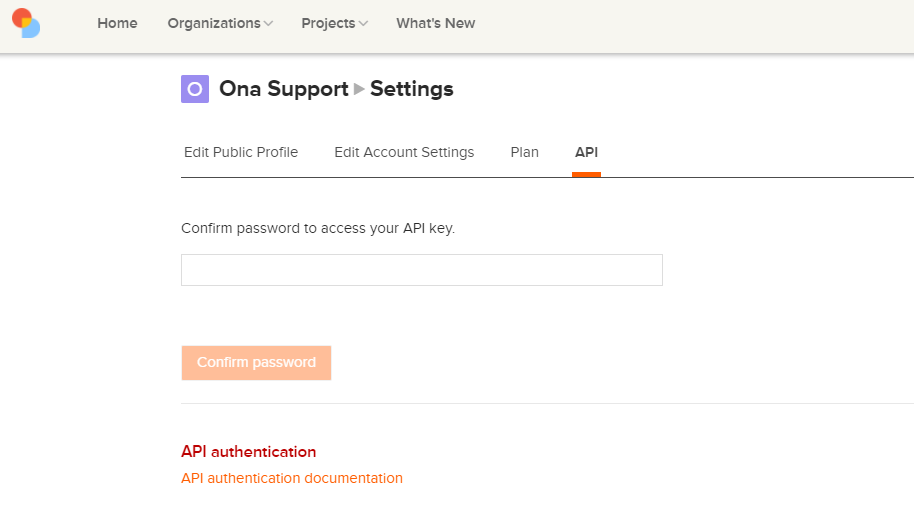
You will need to confirm your password to access the API key. Put in your Ona Data account password, and click on Confirm password. Then, your API key will appear, which is a string of alphanumeric characters. Copy it and keep it safe somewhere.
Caution: Do NOT share this API key with anyone who you do not want to have access to your data.
Connect the form to PowerBI desktop
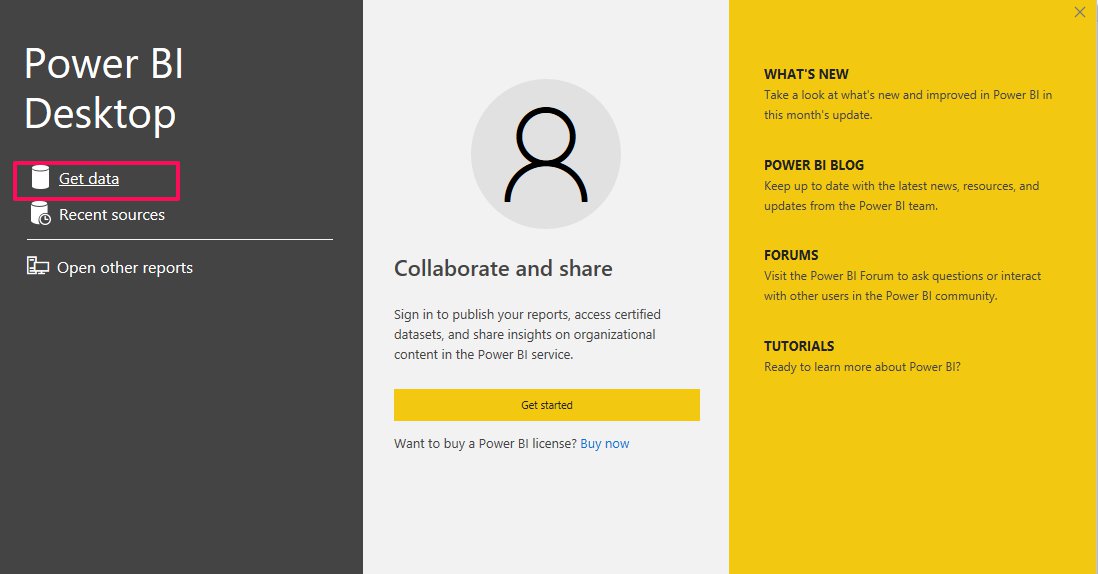
Once you have identified the form id and have the API key, launch PowerBI and connect using either method.
Option 1: Using a username and password configuration
From the welcome screen, select Get Data, as shown below.
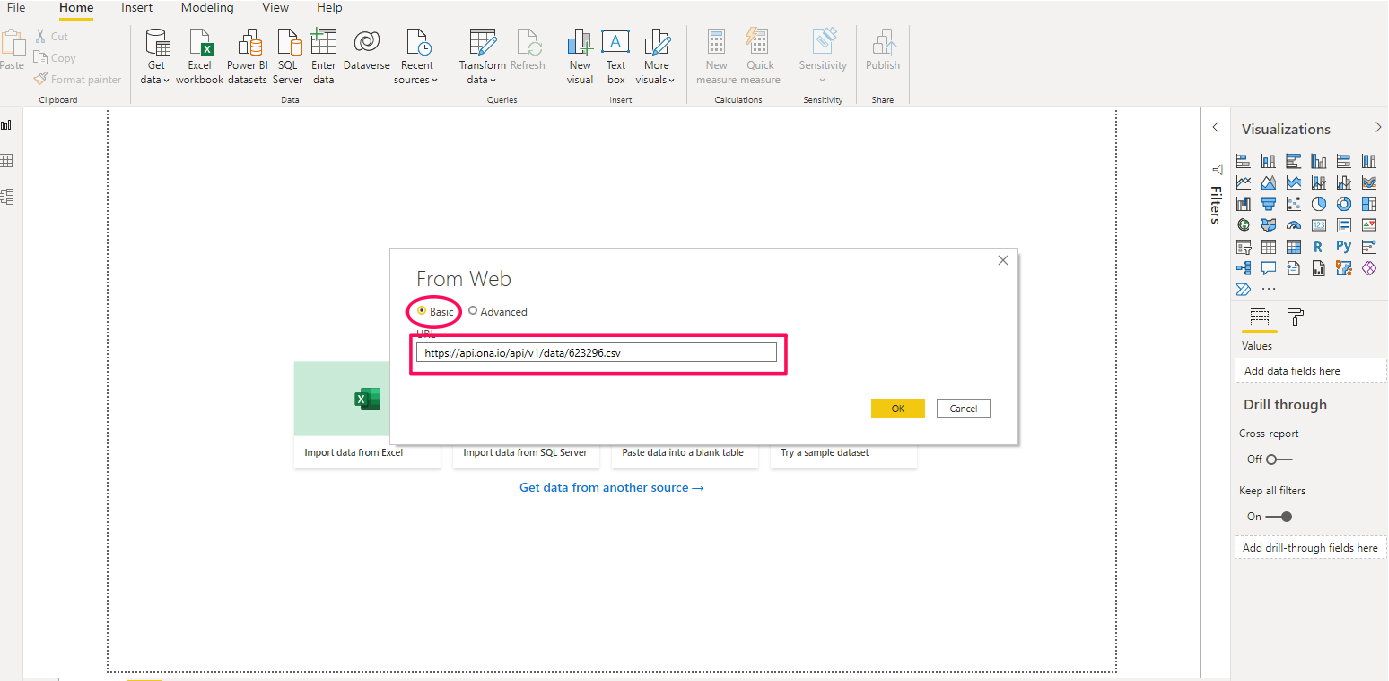
Another window will appear with a search bar. Type ‘web’, and select Web in the list.

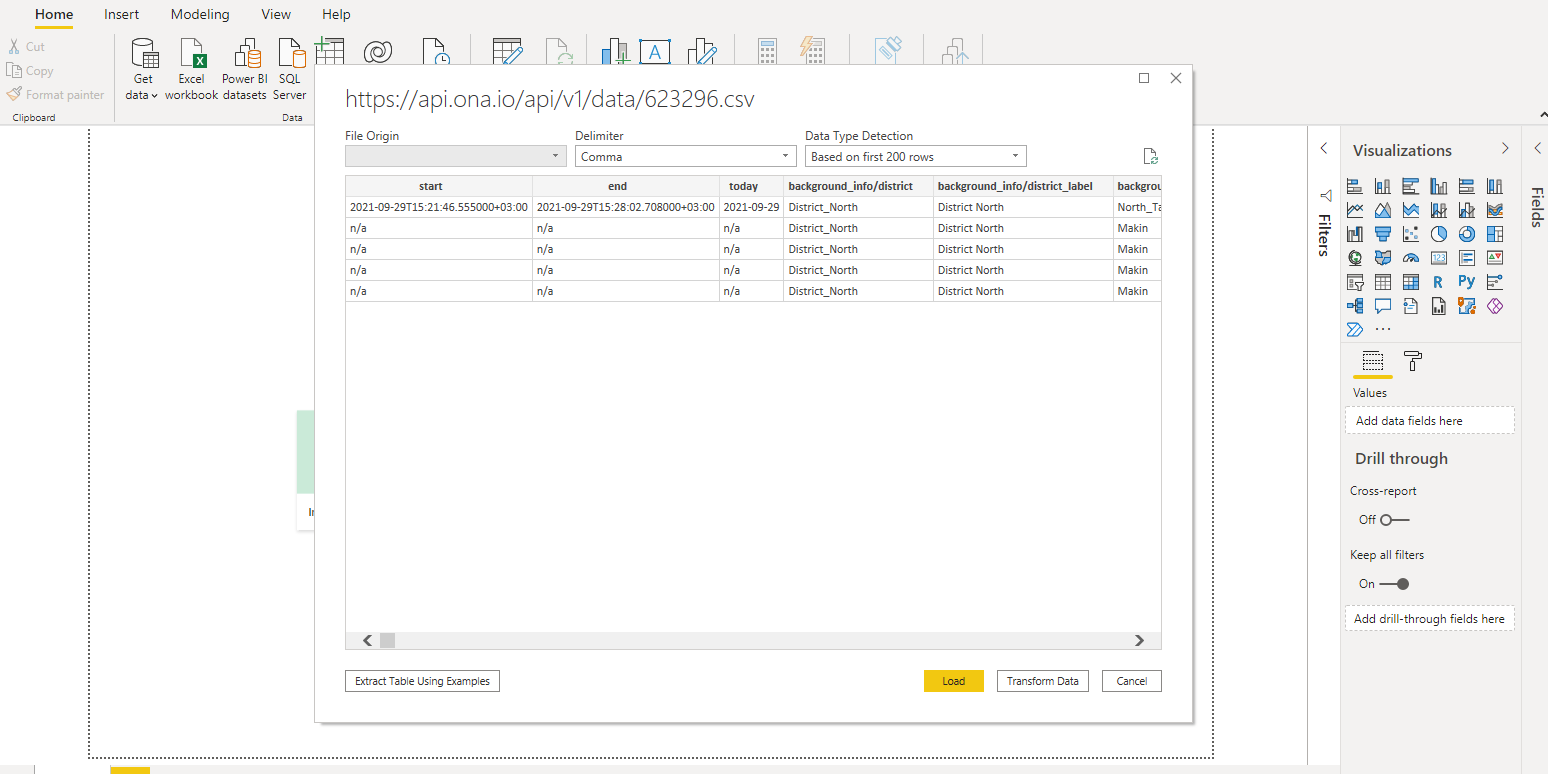
In the next window, enter the API CSV endpoint URL. To enter the URL, select Basic for the authentication type and enter the URL, similar to the one below.
https://api.ona.io/api/v1/data/<form_id>.csv
Replace the <form_id> with your form id, as found previously, and click OK.
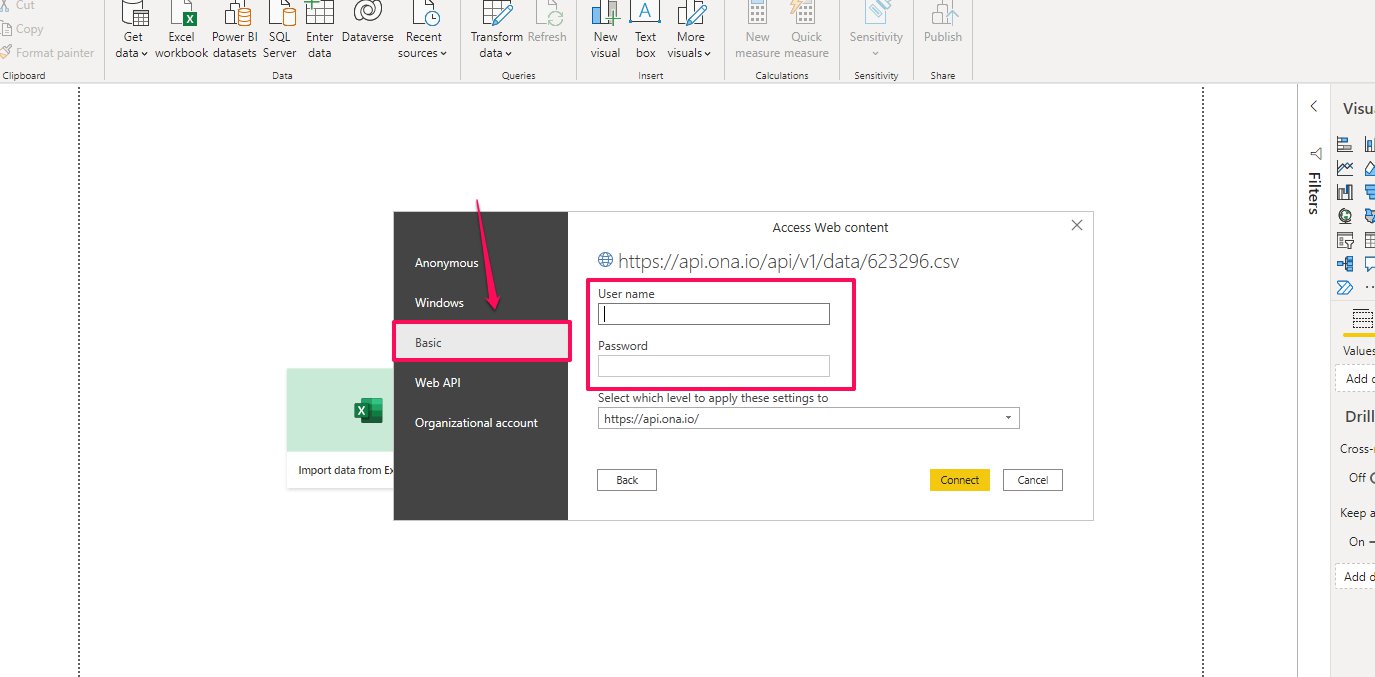
The next page will require you to enter your authentication credentials. Select the Basic section, and enter your Ona Data username and password. Click Connect to connect to your account and pull data from the desired form.
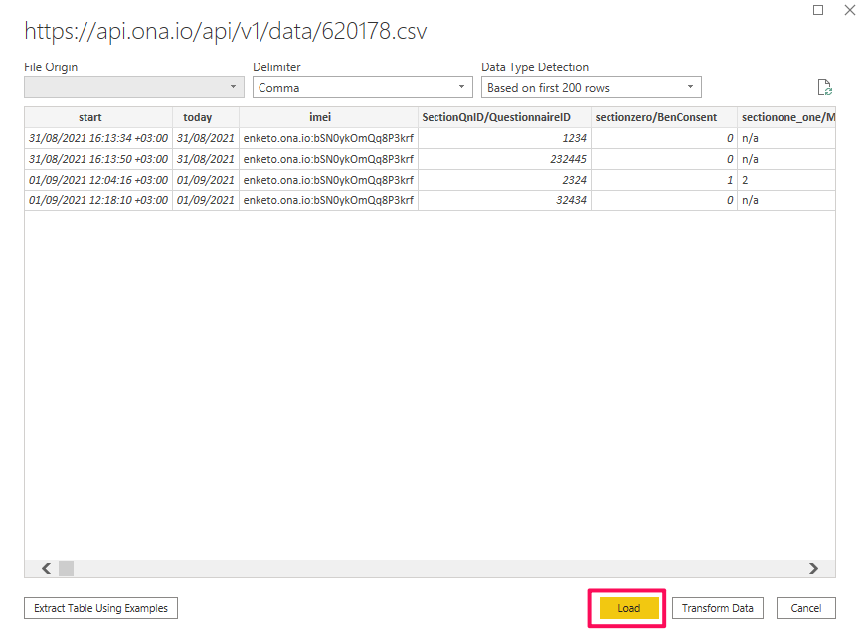
After connecting your account, a connection will be established. There will be an authentication error if your username/password combination or URL is not correct. The data will load as a table, as shown below.
NOTE: If you want to connect a filtered dataset to PowerBi then you can use the following as your URL https://api.ona.io/api/v1/dataviews/dataset_id/data.csv Where
dataset_idis the part of the URL when you open filtered dataset
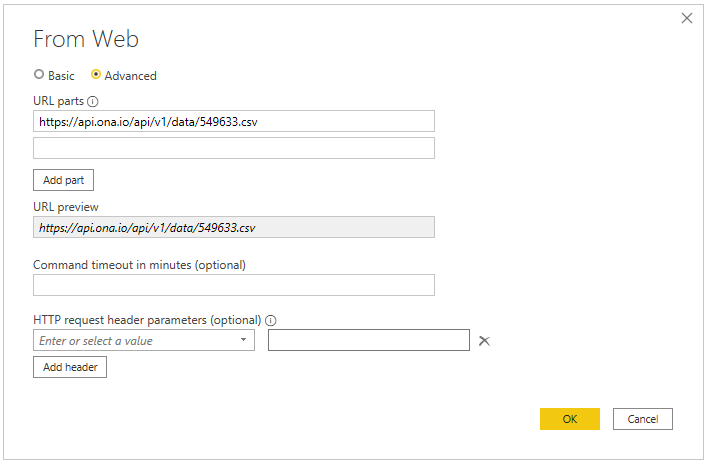
Option 2: Using the API key
This method can be used by users who do not authenticate using their account username and password. Once you have selected Web as your data source, choose the Advanced option and put in the same URL used in the first method under the URL Parts section. It should also appear under the URL Preview section as you type it in.
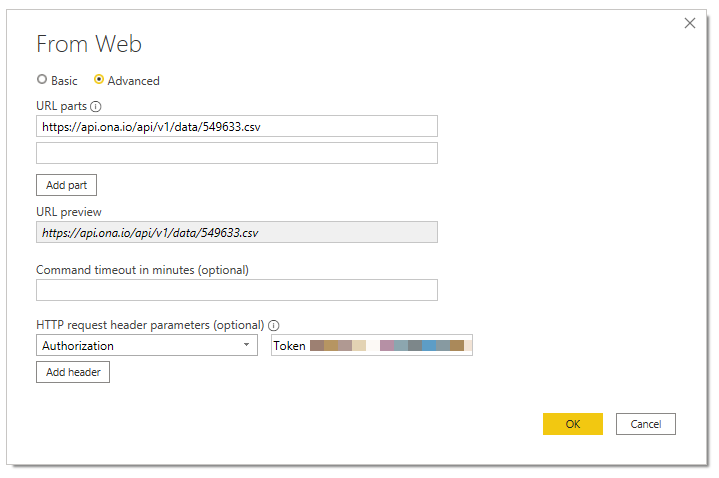
Under HTTP request header parameters (optional), type in the word “Authorization” on the first dropdown menu on the left. For the text box on the right, type in the word “Token” followed by the API key, we copied earlier, with a space in between.
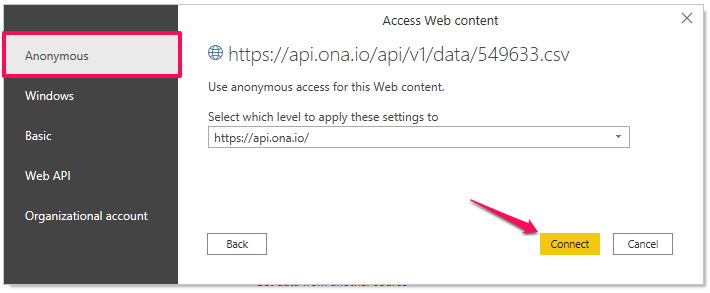
The next page will require you to enter your authentication credentials. Select the Anonymous section and leave everything else as default. Click on Connect to connect to your account and pull data from the desired form.
Loading Data
After successfully connecting to PowerBI and loading the table, click the Load button to load data and add a table to PowerBI, as shown below.
Start Creating Visualizations in PowerBI
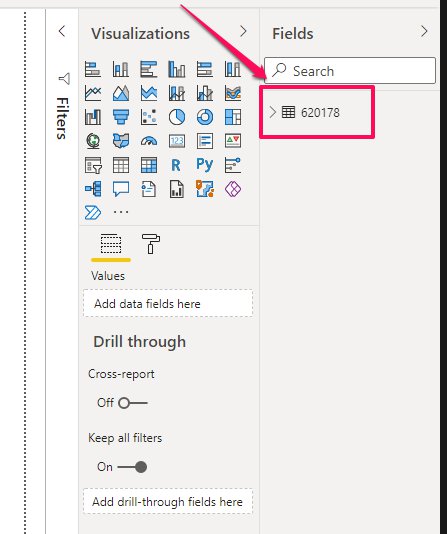
After loading the data, the table will be created in PowerBI with the form ID as the table name, near the fields section.
Click on the table drop-down, and all columns will open allowing you to start creating charts.

Transform/Clean Data
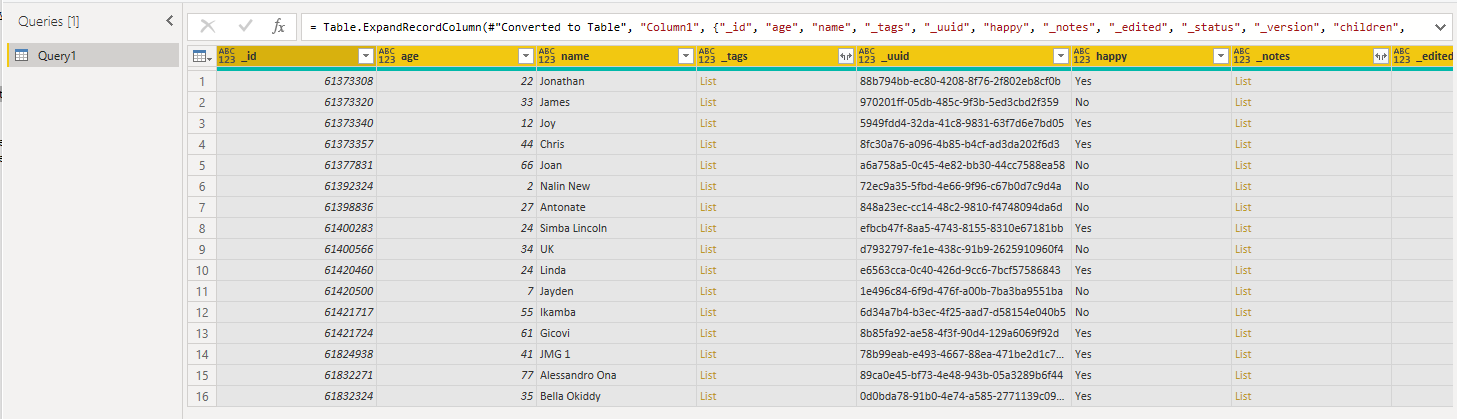
To transform/clean data, click Transform, and a power query editor will open with a table as shown below. Read more on how to transform data in this guide.
If you have a repeat group(s) in your form, it will be stored as a list, and you will need to expand the repeat group(s) as extra rows as shown below.

Once you are satisfied with the data structure, data types and column heading name, click Apply & Close. The query will create a table, which you can use to generate charts and tables.
How to Apply Pagination on PowerBi
When you have a large dataset or a form with many records, you may receive a timeout error when connecting a form to PowerBi using the API.

When you get the above error on PowerBi, you can apply pagination and connect your data to different pages. In this method, you can add the page parameter to specify the page number and page_size parameter to set the custom page size to the API URL specified above. The maximum number of items requested on a page via the page_size query parameter is 10,000 items.
To use pagination, open the PowerBi Desktop application. Under the home page, click Get Data, and select the Web option.

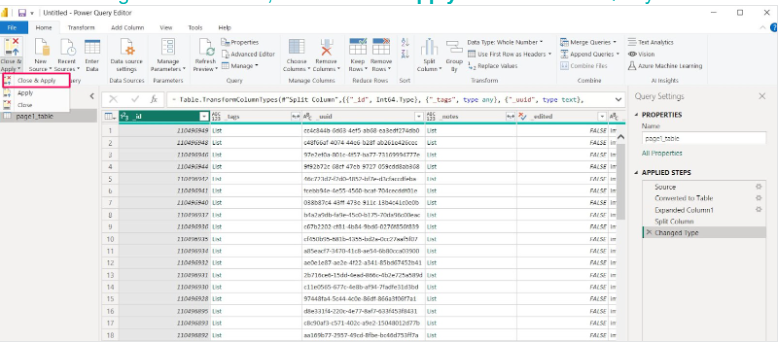
In the next window, select Basic for the authentication type (username & password), if you are using the endpoint for the first time. Enter the API data endpoint URL with pagination variables.
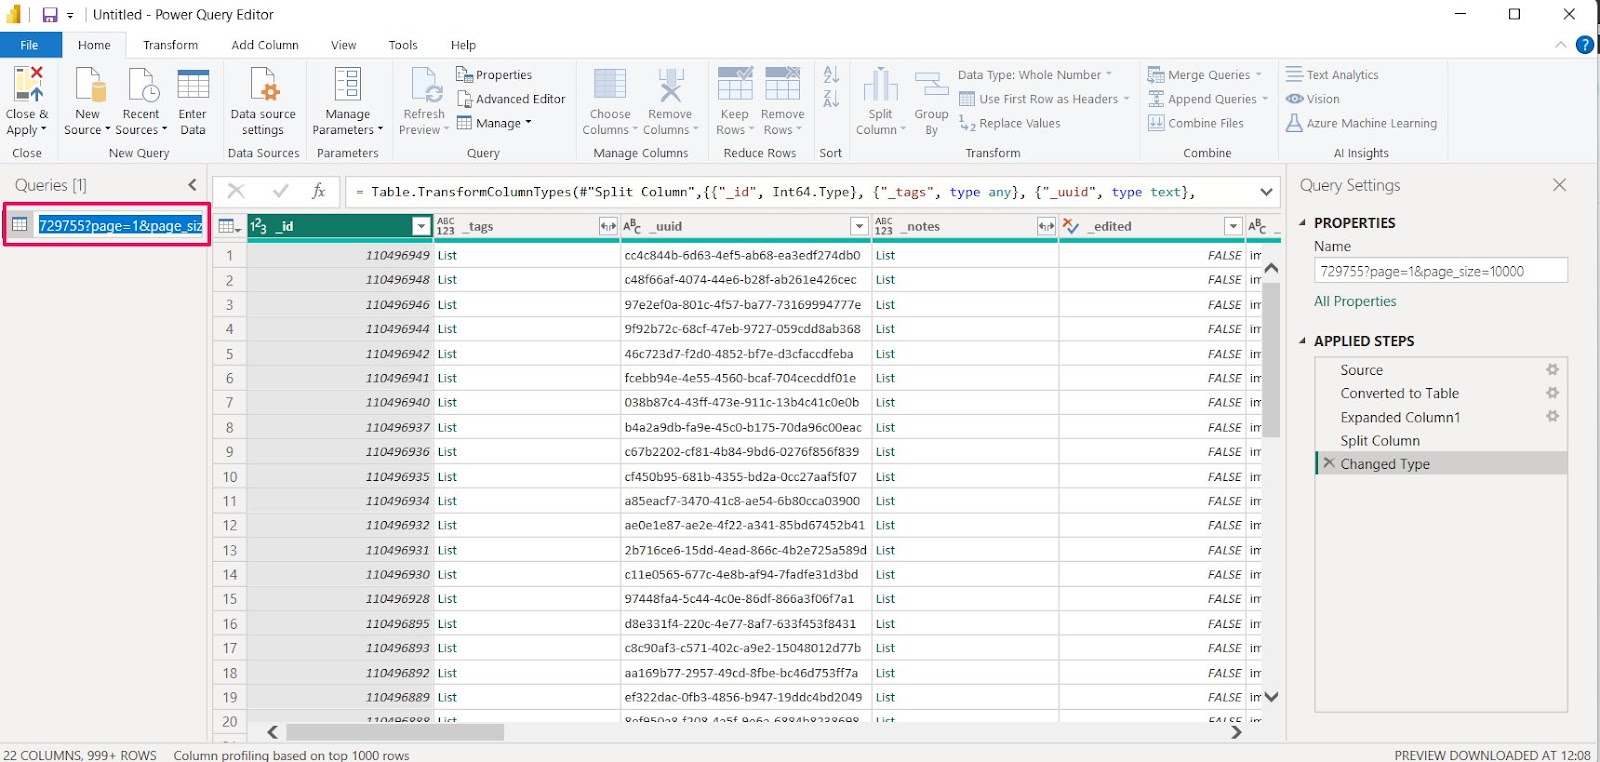
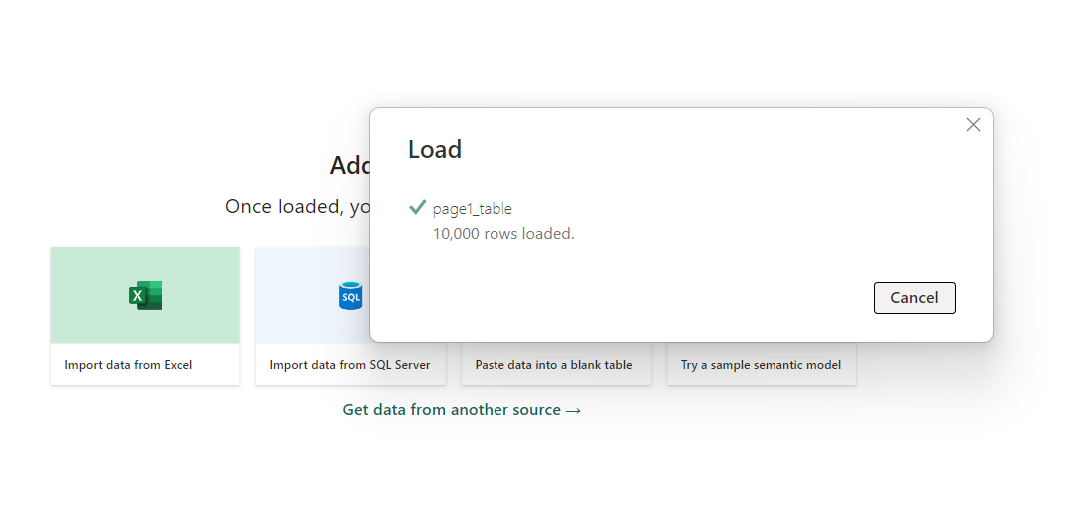
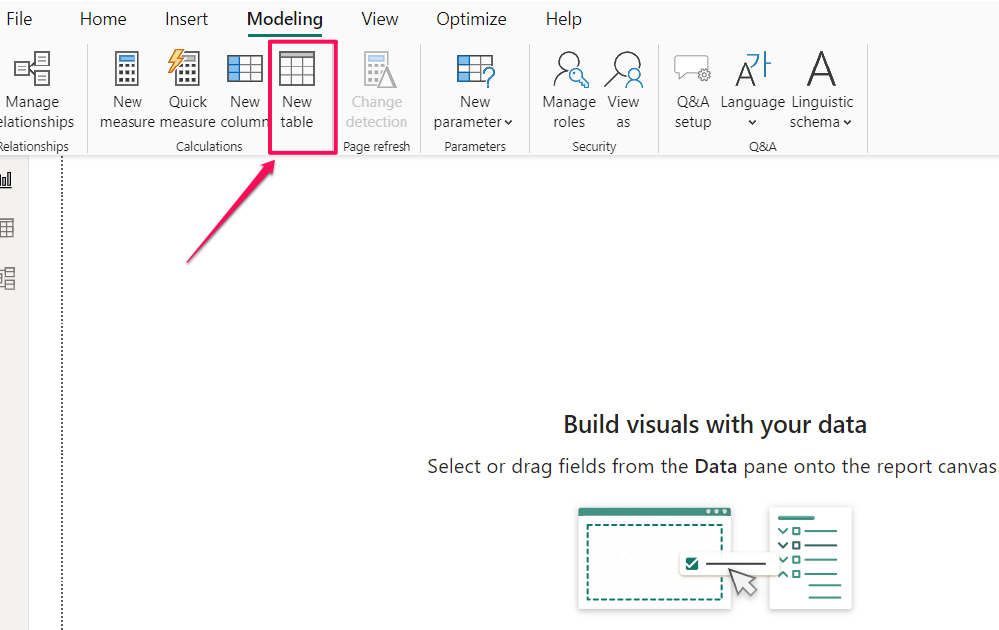
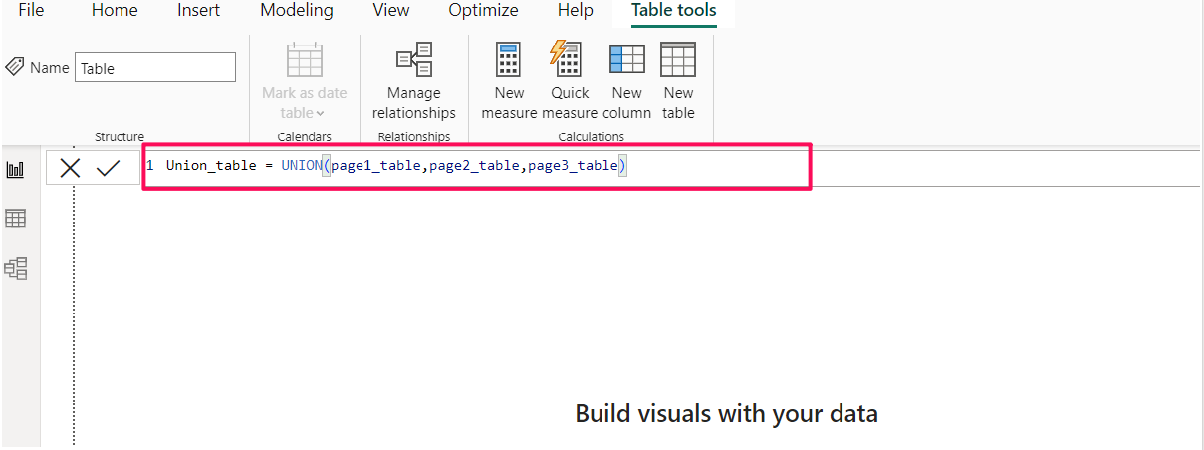
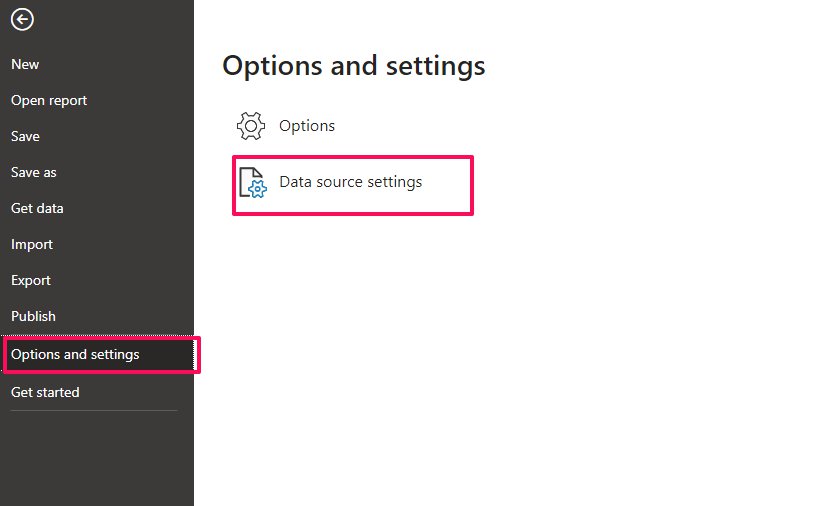
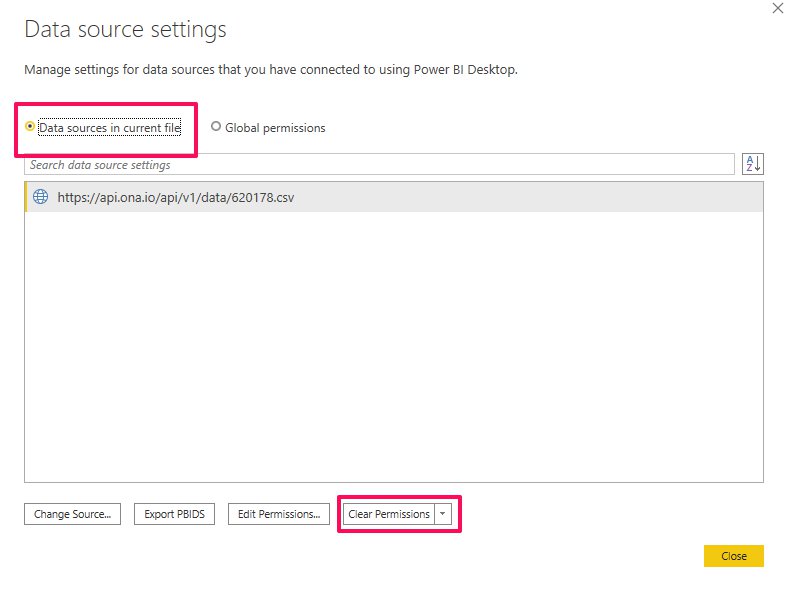
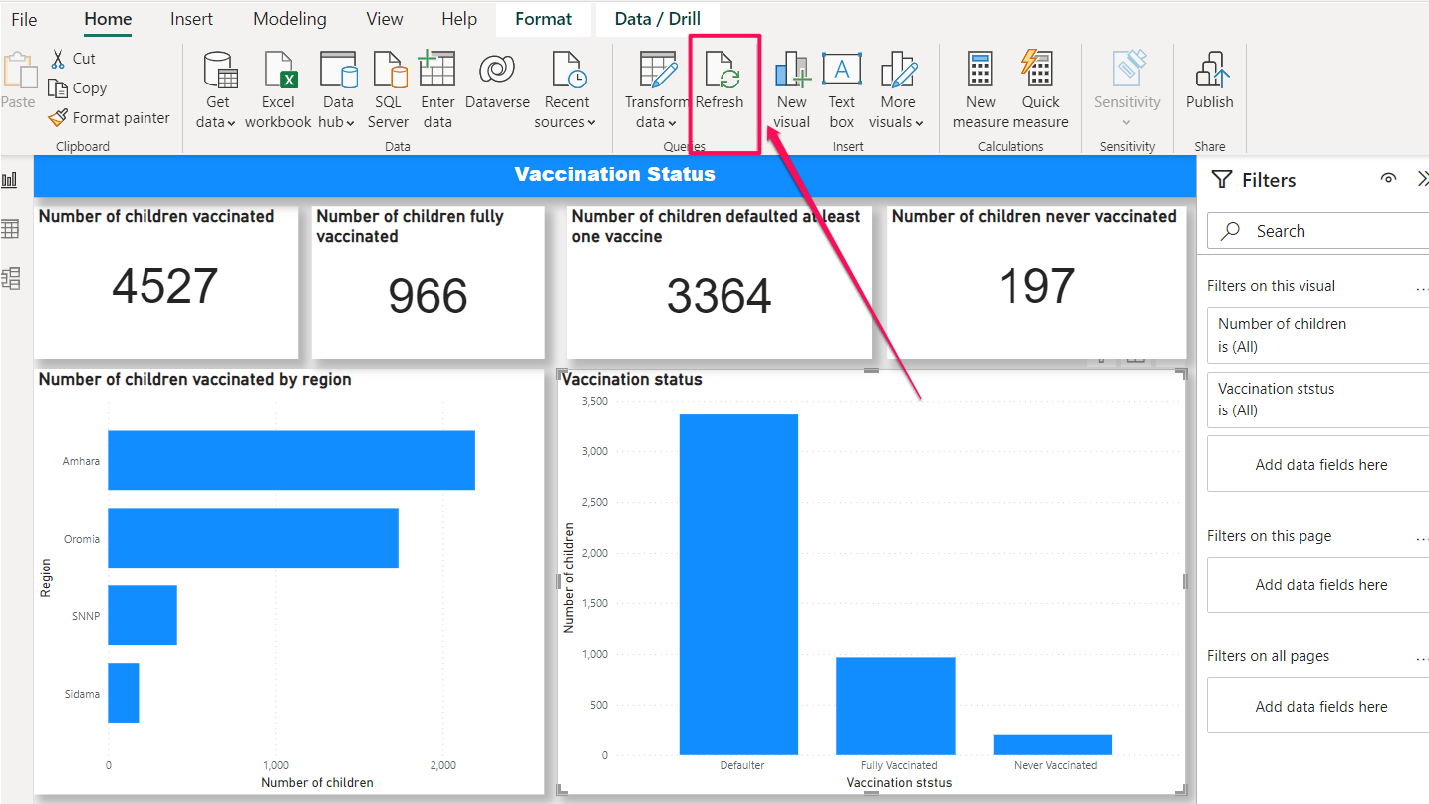
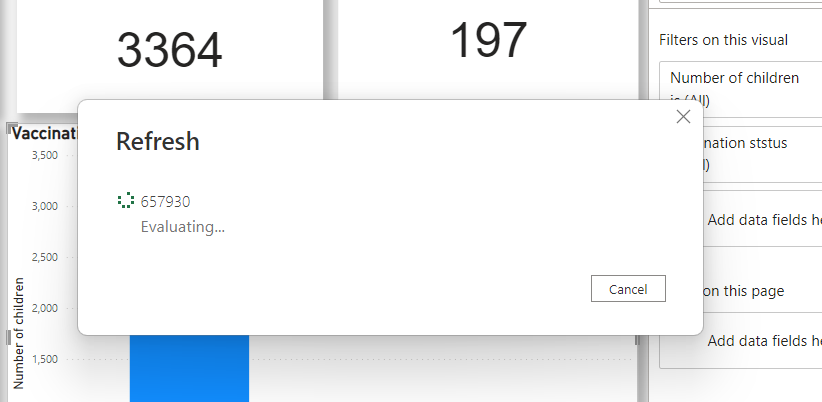
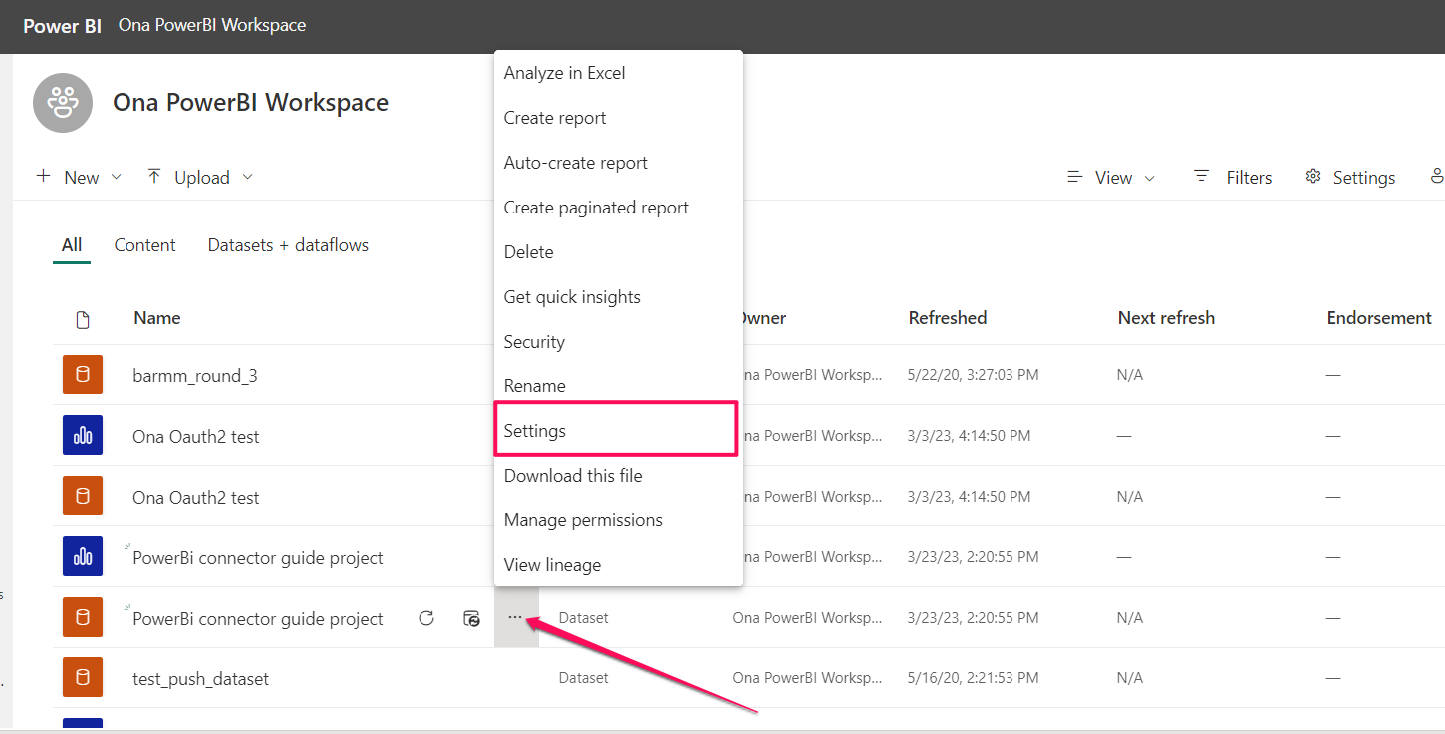
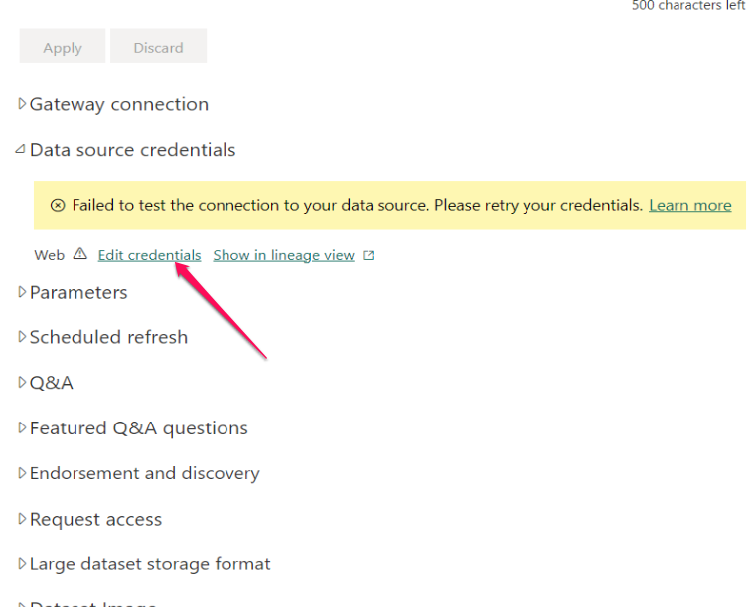
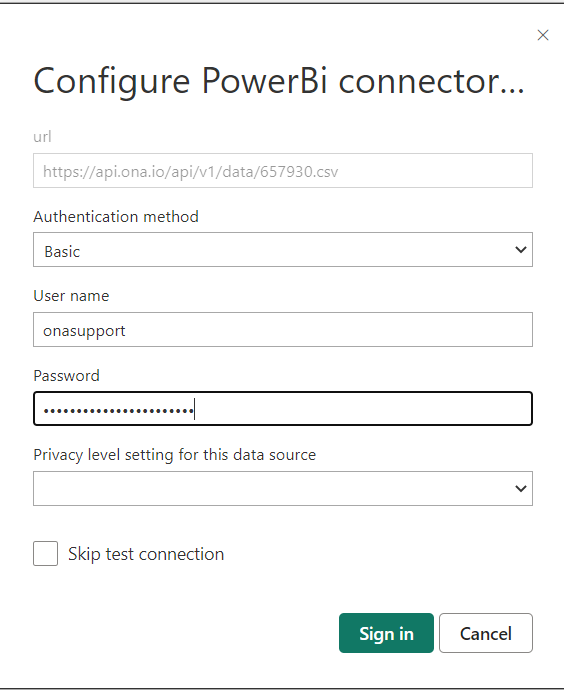
Give it a few seconds to connect and open the Power Query Editor page. On this page, the data will load, and you can rename the table name. In my example, I renamed it to “page1_table”. After renaming the table name, click Close & Apply to close Power Query Editor. This will evaluate and load 10,000 rows of data to the data model. You can repeat the steps above for page 2, page 3 and so on by replacing the page number in the URL until you connect all data for your form. The URL for page 2 will change to https://api.ona.io/api/v1/data/<form_id>?page=2&page_size=10000 When you connect multiple tables for different data pages in the PowerBi data model, you can use the union function to combine these tables into one table. A page will open, where you will include the Union function and the name of the union table. Pressing the Enter button will process the function and generate a union table that will be added to your data model. You can now use the Union table to generate reports. Once charts have been published and data submitted on Ona Data, you may need to refresh the data with new submissions submitted to a form in Ona to update charts on your dashboard. For more information on creating charts and dashboards in PowerBI, please see this help documentation. To manually refresh your data on PowerBI desktop, click Refresh, under the Home page, to get the latest data when you open the report on PowerBi desktop(as shown below). This will open a refresh window showing the refresh progress (as shown below in the screenshot). At the end, the window will show a notification on how many rows/records the table has refreshed. To schedule an automatic refresh, you need to log into PowerBi online and select the workspace where you published your report created from the forms connected. In the workspace, hover over the report’s dataset. The dataset menu will appear. Click on the three dots to open more options. Then, click on the settings option (as shown below). On the settings page and under Data source credentials, click on the Edit credentials link (as shown below). A configuration page will open, where you are required to set the authentication method and enter your username and password. Under the authentication method, select Basic, enter your Ona username and password, and click on Sign in. You will receive a notification that the credentials have been saved successfully. You can now schedule the refresh under the Schedule refresh section by turning the button to ON, selecting the refresh frequency, and clicking on Apply to update the changes. This will automatically refresh your data source based on the frequency you set. After authenticating the first time prior to loading or transforming/cleaning data, you will not need to authenticate again. After you have entered the URL, it will automatically connect using the credentials entered earlier. If you need to connect to another account, you will need to clear the data source permission settings allowing you to authenticate again. To clear permissions, click on File, select Options and Settings, and then Data source settings. A data source settings page will open showing all authenticated data source connections. Click Clear permissions to clear permissions, and close the window. 1. Timeout Error with Large Datasets Attempting to connect a form with a substantial number of records (100,000+) or a form with an extensive number of questions (exceeding 500 columns) may result in timeout errors during the connection process. Workaround: To overcome this limitation, the recommended approach is to use pagination. Pagination is a way of connecting data in batches or pages, making the connecting and refreshing data process faster. Read more on how to apply pagination here. 2. Media Files Attachment Limitations Currently, the system does not support the direct connection of media file attachments, such as zipped files containing images, audit files or audio files. Workaround: Consider utilizing the media file URLs that are connected with data. You can also export the files as zipped media files and then upload them separately to the data model in PowerBi. 3. Lack of Incremental Refresh Support At the moment, the system does not support incremental refresh. Incremental refresh is a refresh type that provides automated partition model tables that frequently load new and updated data to the models. Workaround: Currently, the system does not offer native support for incremental refresh. Consider implementing a scheduled refresh strategy based on your specific use case to stay updated with the latest data. This may involve periodic full refreshes or manual data updates as needed. It’s important to stay informed about system updates, as future releases may introduce new features or enhancements that address these limitations. Refer to the official documentation and release notes for the latest information on system capabilities and updates.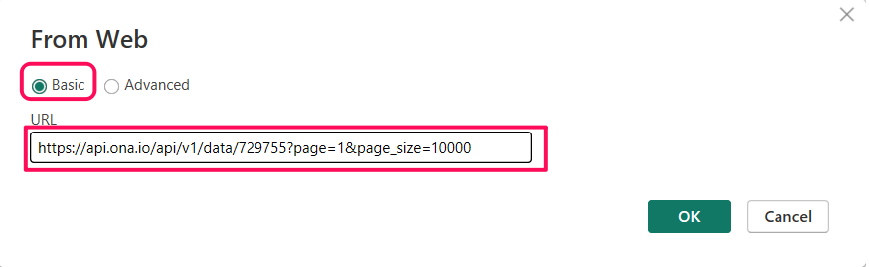
Union Data Tables in PowerBi
Refresh Data in PowerBI
There are two ways to refresh new submissions to your form:
Manual refresh on PowerBi desktop
Scheduled refresh on PowerBi Online
Clear permission
PowerBi Limitations