Using Import CSV to upload data is a great way to add new records in bulk to a form or replace existing records with clean records. Currently, this feature only supports uploading CSV files to a form.
Import CSV allows you to do any of the following;
- Add new records to a form – Upload additional records in bulk to a form.
- Edit existing records – Download data in CSV format and make the desired changes then import the edited dataset.
- Replace/delete existing records – Import CSV allows you to delete and/or replace existing data by importing a different dataset.
Warning: The Import CSV feature should be used with caution. Any lost data as a result of a CSV file upload cannot be recovered.
Add new records
Import CSV allows you to add new records to a form in two ways;
- Import data into blank forms (i.e. forms without submissions)
- Add more records to a form with submissions
When adding new records to a form, the CSV file should have a column header row where the column names match the name column on the XLSForm. It is recommended that you work with a CSV file downloaded from Ona. This is because the data export needs to be edited or cleaned manually once exported to ensure that the dataset is compatible with the form. Some of the factors to look out for when cleaning the dataset include;
- XLSForm field names should match CSV column headers
Check that the field names in the XLSForm match the column headers in the CSV word by word. If your data has groups, make sure to use a slash(/) as the delimiter for separating group names from field names. For example, if hhh_name is a field name in the household_members group, the column heading would be household_members/hhh_name.
- Select multiple-choice answers should not be split into separate columns
Use advanced data exports so that select multiple answers are in one cell and separated by a space. When a dataset with split multiple-choice answers is uploaded, the multiple answers are usually hidden.
To verify that the dataset to be uploaded is compatible with your form, you’ll need to generate a dummy data export that you can use to compare with your dataset.
Here’s a step-by-step process:
- Upload your form and send a sample form submission so you can download a data file. Make sure every question has an answer so you have an idea of what new data should look like.
- Use spreadsheet software to delete the sample submission and add new data. Each submission should go into a new row.
- Once you are done with the edits, save the file as a UTF-8 encoded CSV. UTF-8 encoded CSVs support special characters (umlaut, grave accent, acute accent, etc) found in non-English languages i.e. French or Spanish.
- If you are using Microsoft Excel please make sure you save the CSV file with UTF-8 encoding.
You can follow the instructions below to save your file as a UTF-8 encoded file.
a. Select Menu | Save As.
b. Enter any name for your file.
c. Under “Save as type,” select Unicode Text (Windows) or UTF-16 Unicode Text (Mac).
d. Click Save.
e. Open your saved file in Microsoft Notepad(Windows) or TextEdit (Mac). If you are using a MacBook, save the file as Plain Text. Go to the menu, click on Format then select the option Plain Text.
f. Replace all tab characters with commas (“,”).
- Select a tab character (select and copy the space between two column headers)
- Open the “Find and Replace” window (Press Ctrl+H on Windows or Command+H on Mac) and replace all tab characters with a comma.
g. Click Save As.
h. Name the file, and change the Encoding: to UTF-8.
i. Change the file extension from “*.txt” to “*.csv”.
j. Click Save.
k. Open the .csv file in Excel to view your data.
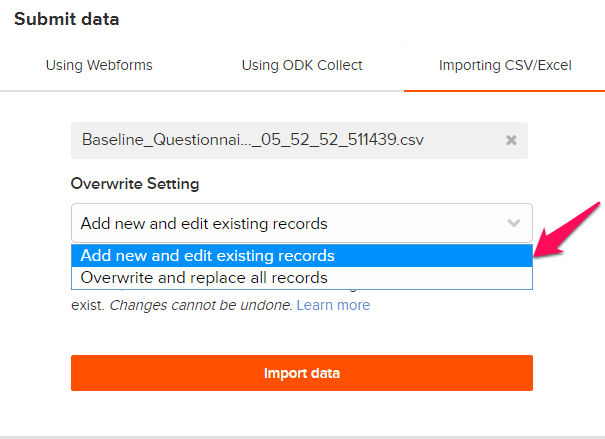
Once you have your data ready, upload the file to the Importing CSV tab under the Submit data section of your form’s Overview page. Click on the Select file to import button to upload your file.

An Overwrite Setting is displayed once a file has been selected for upload with the option Add new and edit existing records selected by default. Use this setting to add new records to your form.
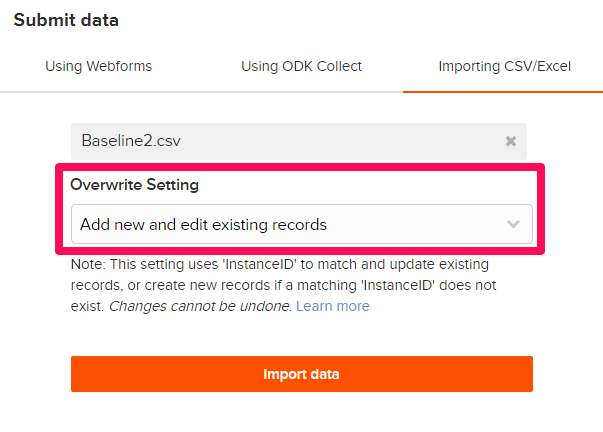
Note: If the data was exported from an Ona form which would have the column meta/instanceID, the column meta/instanceID will be used to match and update existing records, or create new records if a matching meta/instanceID does not exist. Changes made to your data cannot be undone.
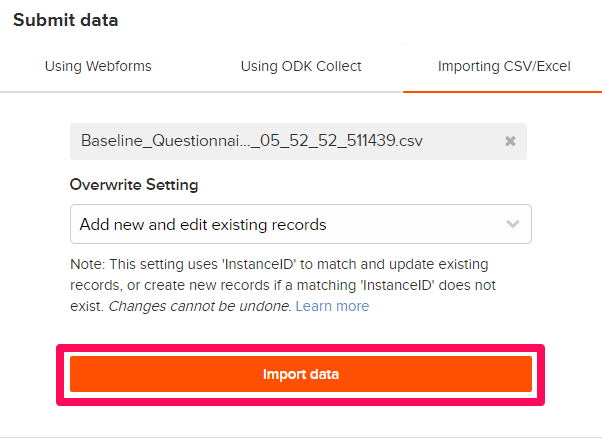
Click on the Import data button to upload data to your form.
During the data import, a progress notification is displayed showing the number of records imported at a given time. For large datasets with more than 100 records, data is imported in batches of 100 records. The progress notification is not displayed when importing small datasets of less than 100 records.
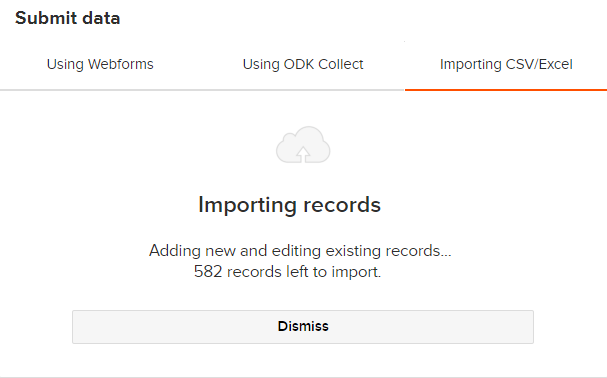
Clicking on the Dismiss button hides the progress notification. This action does not stop or cancel the data import. The process will continue in the background until all the data has been uploaded.
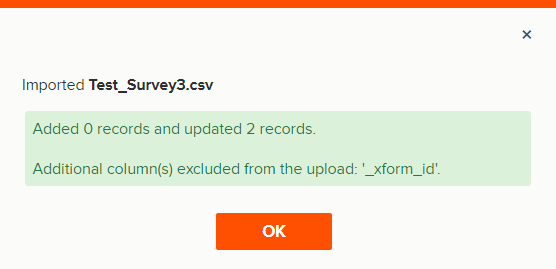
Once all the records have been uploaded, a success modal is displayed showing the number of records added to the form.
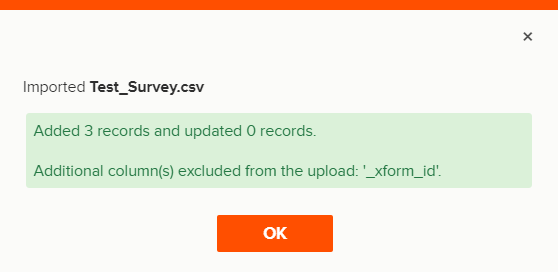
Click on the OK button then reload the Overview page to update the changes. You can view the uploaded data in the Table tab. See this guide for more information.
Edit existing records
Import CSV makes it possible for you to bulk edit your data as opposed to editing one record at a time in Enketo. To edit your data, download it in CSV format and in spreadsheet software, and make the desired changes to the dataset. Once you have edited the data, upload the updated dataset back to the form.
Under the Import CSV tab of the Submit data section of the form’s Overview page, select the edited file that you would like to upload. Select Add new and edit existing records in the Overwrite Setting drop-down menu then click on the Import Data button to upload your data.
All the edited records will be updated accordingly. Any record that was not edited will remain unchanged.
Note: This feature should be used with a lot of caution since any changes made to the data cannot be undone and it affects the monthly submission on that account.
Replace/delete existing records
You can replace or delete existing records by uploading a different dataset using the option Overwrite and replace all records under the Overwrite Setting.
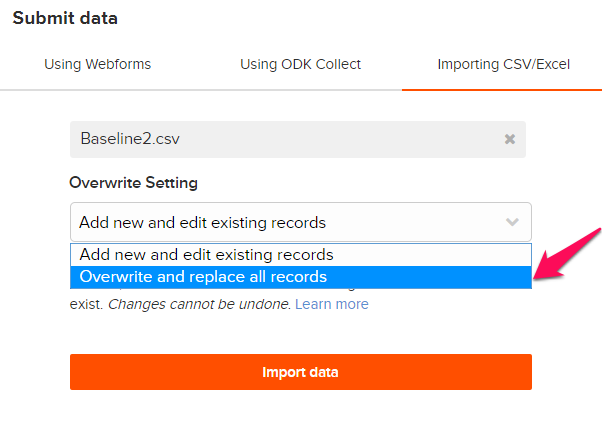
Warning: This setting results in all existing records being discarded and replaced with the data from the uploaded file. Changes cannot be undone.
How importing data works
Below is a list of a few rules about how importing data currently works:
- Files should be in CSV format (UTF-8 encoded) as explained here.
- Form logic is not applied to data uploaded through Import CSV.
- Right now, Import CSV has no “undo” option, so please test it out before making large changes.
Note: Only project admins can import data into a form using this feature.
Below is a video tutorial that outlines the process to be followed when importing submissions using the Import CSV feature:
Import CSV